Awesome thanks!I checked the Steeda K with the stock A-arms and they also fit perfectly once they sent me a good K.
You are using an out of date browser. It may not display this or other websites correctly.
You should upgrade or use an alternative browser.
You should upgrade or use an alternative browser.
Its been awhile but here are my most recent mods
- Thread starter SVT_Troy
- Start date
Making good progress! Top notch work as always!
I picked up my parts from the powder coaters yesterday. There was an issue with the coating on the calipers so they are being redone.
Rebuilding the CC plates ended up costing about $75 all in. Add about $15 for all new stainless hardware which is not needed but necessary for me.....
 IMG_7959
1 step forward a huge leap back..... My oil pan does not clear the Steeda K-member. I've been battling this issue for the past week plus. long story short I do not think its my oil pan..... These pics where taken back to back with no changes to anything but the oil pan and/or K-member installed. I am using good condition OEM engine mounts. Awaiting to see what Steeda says
Custom oil pan with Steeda K
 IMG_7941
OEM oil pan with Steeda K
 IMG_7942
OEM oil pan with OEM K-member.... See how much gap is there? Not sure why the Steeda has negative gap.
 IMG_7945
Rebuilding the CC plates ended up costing about $75 all in. Add about $15 for all new stainless hardware which is not needed but necessary for me.....
1 step forward a huge leap back..... My oil pan does not clear the Steeda K-member. I've been battling this issue for the past week plus. long story short I do not think its my oil pan..... These pics where taken back to back with no changes to anything but the oil pan and/or K-member installed. I am using good condition OEM engine mounts. Awaiting to see what Steeda says
Custom oil pan with Steeda K
OEM oil pan with Steeda K
OEM oil pan with OEM K-member.... See how much gap is there? Not sure why the Steeda has negative gap.
Is the rear of the motor supported by the transmission and its mount??? Im not familiar with the motor mounts but is there no way to push them back a bit on the frame or on the motor???
Is the rear of the motor supported by the transmission and its mount??? Im not familiar with the motor mounts but is there no way to push them back a bit on the frame or on the motor???
The rear of the motor is supported by the transmission. I loosened both engine and transmission mounts to move everything around to see if it changed. No luck whatsoever. The thing is, if I install the OEM K-member how everything sits I have clearance for days. Put the Steeda K in and no clearance. This tells me something is up with the Steeda piece.
Added 3" ARP studs. PN: 7723 which is 0.614 in. knurl. ARP recommends to drill holes .010" less than the knurl diameter. OEM front knurl is 0.594" my front hubs measured .584" +/- .002". Since my hub holes were smaller i cleaned up the holes with a 19/32 drill bit. .593" then pressed the studs in
 IMG_7972
I picked one of these up....may use in a future winter time mod depending on how temps are this summer....
 IMG_7978
 IMG_7980
I picked one of these up....may use in a future winter time mod depending on how temps are this summer....
After all the issues with the Steeda K i decided to part ways and go with a Maximum Motorsports piece. I mean I am already running everything MM in the front anyway.
I will say that with having both K's in hand I am glad i ended up with MM. The welds look better, it is a few lbs heavier but it looks and feels stronger than the Steeda K. I also really like how they went through the time to write detailed instructions on squaring the K-member which I find really important. If its not square you'll find out when doing the alignment!
Oh and did I mention that it clears my oil pan without ay issues!
 IMG_8005
 IMG_8007
 IMG_8034
I will say that with having both K's in hand I am glad i ended up with MM. The welds look better, it is a few lbs heavier but it looks and feels stronger than the Steeda K. I also really like how they went through the time to write detailed instructions on squaring the K-member which I find really important. If its not square you'll find out when doing the alignment!
Oh and did I mention that it clears my oil pan without ay issues!
Last edited:
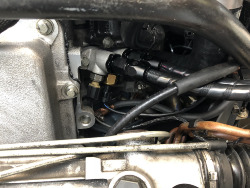
The MM K-member requires a oil filter relocation. Some have installed a short filter to clear...... Do not do that, do not run one of those cheap short Fram filters.... That is all I have to say about it....
Some may not agree but after quit a bit of research and asking around I decided to delete the factory oil cooler/warmer.
I am not running the car on the open track. I mainly do street pulls and drag racing so I do not plan on running a aftermarket H/E for the oil system.
I did install a oil temp sensor in the oil pan so i can monitor the oil temps. I'll be happy with temps staying around 220° but time will tell.
 IMG_8022
I'm glad i kept my Ford racing oil cooler delete piece!
I had to clean up the casting alittle
 IMG_8008
 IMG_8009
Installed with a new gasket and 10AN O-ring boss to 10AN flare.
I did not T both factory oil temp sensor and aftermarket oil pressure sensor like the OEM cooler has it. I ran what was important to me (Oil pressure sensor) off the correct oil to the engine port and the factory temp sensor/idiot light to the oil to the filter port.
 IMG_8038
Just a cheap aluminum oil filter adapter. This should allow me to run straight fittings and no 90° fittings reducing flow. It will be installed where MM's instructions show their setup mounted.
 IMG_8013
Some may not agree but after quit a bit of research and asking around I decided to delete the factory oil cooler/warmer.
I am not running the car on the open track. I mainly do street pulls and drag racing so I do not plan on running a aftermarket H/E for the oil system.
I did install a oil temp sensor in the oil pan so i can monitor the oil temps. I'll be happy with temps staying around 220° but time will tell.
I'm glad i kept my Ford racing oil cooler delete piece!
I had to clean up the casting alittle
Installed with a new gasket and 10AN O-ring boss to 10AN flare.
I did not T both factory oil temp sensor and aftermarket oil pressure sensor like the OEM cooler has it. I ran what was important to me (Oil pressure sensor) off the correct oil to the engine port and the factory temp sensor/idiot light to the oil to the filter port.
Just a cheap aluminum oil filter adapter. This should allow me to run straight fittings and no 90° fittings reducing flow. It will be installed where MM's instructions show their setup mounted.
Last edited:
As always, nice work!!!
Assembling my lines for the oil filter relocation setup. Dont forget to add alittle lube to the threads when assembling. (Don't mind my mess of a work bench.... I have another project car ive been working on for the past few years!)
 IMG_8080
I always recommend pressure testing your lines prior to installing them. You should understand with the pic below. install fittings and submerge in water, add air. Here is my hose assembly process:
 IMG_8082
The final install
I didnt buy the MM oil filter housing which allows you to bolt the housing to the bumper support and use straight fittings so I made a quick 90° aluminum bracket to orient my housing the same. 10AN lines with 45° fittings out the filter housing and straight fittings into the engine. I only use teflon lined hoses. They are less flexible than rubber but do not break down like rubber. Slightly overkill for oil but I would only use teflon lined for fuel.
**When doing this make sure you get the hoses correct. Engine out should go to filter housing In and engine in should go to filter housing out.**
 IMG_8083
Alittle long to clear the swaybar:
 IMG_8084
 IMG_8085 by Troy, on Flickr
Here's a pic of the coolant hose I made bringing me from the engine block to the factory T-stat housing.
 P7310052_zpsecb0df98
I always recommend pressure testing your lines prior to installing them. You should understand with the pic below. install fittings and submerge in water, add air. Here is my hose assembly process:
- Assemble lines
- Clean lines out
- Pressure test
- blow out with air
- Let dry
- Install
The final install
I didnt buy the MM oil filter housing which allows you to bolt the housing to the bumper support and use straight fittings so I made a quick 90° aluminum bracket to orient my housing the same. 10AN lines with 45° fittings out the filter housing and straight fittings into the engine. I only use teflon lined hoses. They are less flexible than rubber but do not break down like rubber. Slightly overkill for oil but I would only use teflon lined for fuel.
**When doing this make sure you get the hoses correct. Engine out should go to filter housing In and engine in should go to filter housing out.**
Alittle long to clear the swaybar:
Here's a pic of the coolant hose I made bringing me from the engine block to the factory T-stat housing.
Attachments
Last edited:
At this point Iv'e swapped out every piece of stock rubber in the car.....except the front/rear swaybar bushings..... ** see below, I ended up going with the MM swaybar relocation which uses different bushings**
I think it was time.
29mm for the front and 26mm for the rear
 IMG_8058
I'm a big fan of this waterproof grease... it never washes away!
 IMG_8073
Both front and rear oem bushings were deteriorating. The black specs you see in the pic is not dirk, its the bushing material.
 IMG_8059
I think it was time.
29mm for the front and 26mm for the rear
I'm a big fan of this waterproof grease... it never washes away!
Both front and rear oem bushings were deteriorating. The black specs you see in the pic is not dirk, its the bushing material.
Last edited:
So I noticed that the company I ordered my Alumastars with mounted/balanced tires mounted the tires incorrectly. They are directional so one needs to be flipped. Iv'e contacted them but waiting until tomorrow to see how they make this right....
 IMG_8072
Small update on parts with some ranting...
While replacing the rear swaybar bushings I stripped out my FTBR adjustable swaybar endlinks. I started to just cut the bolt off and buy a replacement at the hardware store but after really taking a look at them I realized the rod end bearings were too stiff. It looks like the rod ends are lined with plastic instead of typical teflon or like material. The plastic was pushed out the side of the bearings and they were all stiff. Everything but the barrel nuts are corroded.
I'm going to say these rod ends are cheap Chinese junk at best. Lucky for most street cars adjusted with zero preload they should work just fine. Until they corrode which will happen.
At this point I knew I could have contacted Bruce and he might have worked with me but I didn't want another cheap rod end so I found a replacement myself. I have everything Bruce makes for the IRS and absolutely love his products....except the endlinks...they are crap IMHO
I do believe that I had them adjusted incorrectly (adjusted with a slight preload) which lead to their early demise but if I were a road racer and wanted some preload then what?
Anyway I found an exact spec stainless steel higher quality replacement from QA1. I paid about $15 per rod end! ouch.... Don't forget you need two left hand thread and two right hand thread rod ends. I want to replace all the hardware with non corroding SS replacements which most can be sourced at your local hardware store. I did overlook the requirement for the non standard left hand thread rod end nuts. I'll be on the hunt for that tomorrow.
**I ended up having to order left hand threaded jamnuts! Buy them ahead. NL10JAMSS is for left hand jam nuts and NJAM10SS is for right hand both in stainless steel. I got them from "belmetric.com" **
Note the corrosion on everything except the barrel nut which is aluminum.
 IMG_8096
New replacement rod ends. Part #'s are on the bags for reference
 IMG_8097
I switched the bolts out for stainless and I wanted smooth shanks versus a fully threaded bolt. I didn't search that hard but I couldn't find the correct length bolt with the shank threaded as much as I needed so I had to tap the bolt.
 IMG_8140
And finally the complete rebuilt rear IRS swaybar endlinks.... I know most wouldn't go through this hassle for something you can't see almost doubling the original price but I am happy with the end result. Mostly my OCD.... but I love stainless and the original rod ends were junk.
** I added anti-seize to the rod end shanks threading into the barrel nuts**
 IMG_8141
While replacing the rear swaybar bushings I stripped out my FTBR adjustable swaybar endlinks. I started to just cut the bolt off and buy a replacement at the hardware store but after really taking a look at them I realized the rod end bearings were too stiff. It looks like the rod ends are lined with plastic instead of typical teflon or like material. The plastic was pushed out the side of the bearings and they were all stiff. Everything but the barrel nuts are corroded.
I'm going to say these rod ends are cheap Chinese junk at best. Lucky for most street cars adjusted with zero preload they should work just fine. Until they corrode which will happen.
At this point I knew I could have contacted Bruce and he might have worked with me but I didn't want another cheap rod end so I found a replacement myself. I have everything Bruce makes for the IRS and absolutely love his products....except the endlinks...they are crap IMHO
I do believe that I had them adjusted incorrectly (adjusted with a slight preload) which lead to their early demise but if I were a road racer and wanted some preload then what?
Anyway I found an exact spec stainless steel higher quality replacement from QA1. I paid about $15 per rod end! ouch.... Don't forget you need two left hand thread and two right hand thread rod ends. I want to replace all the hardware with non corroding SS replacements which most can be sourced at your local hardware store. I did overlook the requirement for the non standard left hand thread rod end nuts. I'll be on the hunt for that tomorrow.
**I ended up having to order left hand threaded jamnuts! Buy them ahead. NL10JAMSS is for left hand jam nuts and NJAM10SS is for right hand both in stainless steel. I got them from "belmetric.com" **
Note the corrosion on everything except the barrel nut which is aluminum.
New replacement rod ends. Part #'s are on the bags for reference
I switched the bolts out for stainless and I wanted smooth shanks versus a fully threaded bolt. I didn't search that hard but I couldn't find the correct length bolt with the shank threaded as much as I needed so I had to tap the bolt.
And finally the complete rebuilt rear IRS swaybar endlinks.... I know most wouldn't go through this hassle for something you can't see almost doubling the original price but I am happy with the end result. Mostly my OCD.... but I love stainless and the original rod ends were junk.
** I added anti-seize to the rod end shanks threading into the barrel nuts**
Last edited:
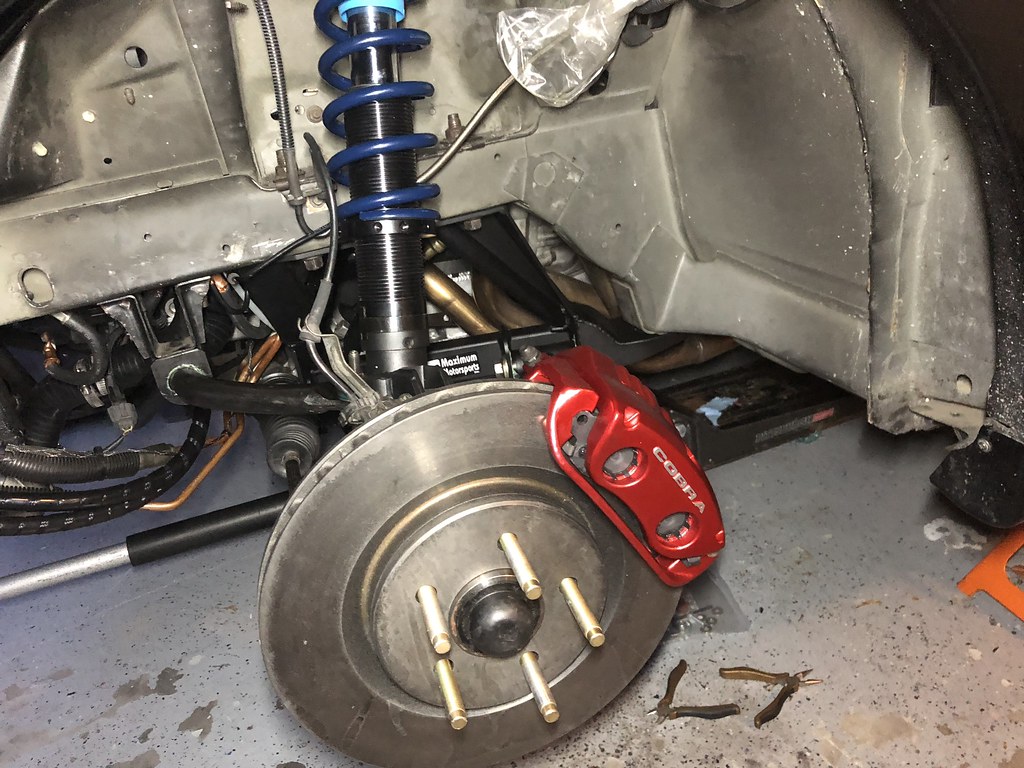
I finally got my calipers back form the powder coaters. Its kind of a candy red and I like it. I just have to get the rears matching! I installed new seals and added speed bleeders to the front calipers. I installed Porterfield R4S pads as I hear they are an excellent performing pad as far as braking power and low dust.
 IMG_8099
IMG_8099This weekend I set my desired ride height with the new coilovers. After doing so I did the string method to set my toe good enough to drive it to the shop where I will have my alignment and bumpsteer set.
While doing this I noticed that the oem swaybar endlinks are too long and pointing to the rear. The end of the swaybar is supposed to be parallel with the ground and straight up and down unlike mine.
 IMG_8136
MM sells short swaybar endlinks which I have. They also sell a swaybar relocation bracket which pushes the swaybar forward to account for the MM LCA's that push the wheel forward. I have this piece as well. When using the relocation bracket you need to remove the oem swaybar mount and use a prothane style universal mount. And here lies my problem.
The OEM front swaybar is 29mm. Prothane list part# 19-1136-BL as being the required size for 03-04 cobra's. That part number is a standard size 1-1/8" which converts to 28.57mm. This part does not fit correctly, it doesnt fully close around the swaybar so when tightened down it binds the swaybar. Part # 19-1145-BL is a true 29mm and is what MM sells on their site. Prothane now sells new version which have a zerk fitting installed so you can re-grease them. I'm going to try this in the 29mm size. I will take pics when it comes in.
This small amount of gap matters, the swaybar should move freely in the bushing when properly tightened. Small stuff but it matters.
 IMG_8137
While doing this I noticed that the oem swaybar endlinks are too long and pointing to the rear. The end of the swaybar is supposed to be parallel with the ground and straight up and down unlike mine.
MM sells short swaybar endlinks which I have. They also sell a swaybar relocation bracket which pushes the swaybar forward to account for the MM LCA's that push the wheel forward. I have this piece as well. When using the relocation bracket you need to remove the oem swaybar mount and use a prothane style universal mount. And here lies my problem.
The OEM front swaybar is 29mm. Prothane list part# 19-1136-BL as being the required size for 03-04 cobra's. That part number is a standard size 1-1/8" which converts to 28.57mm. This part does not fit correctly, it doesnt fully close around the swaybar so when tightened down it binds the swaybar. Part # 19-1145-BL is a true 29mm and is what MM sells on their site. Prothane now sells new version which have a zerk fitting installed so you can re-grease them. I'm going to try this in the 29mm size. I will take pics when it comes in.
This small amount of gap matters, the swaybar should move freely in the bushing when properly tightened. Small stuff but it matters.
Last edited:
After all the issues with the Steeda K i decided to part ways and go everything MM. I mean I am already running everything MM in the front anyway.
I will say that with having both K's in hand I am glad i ended up with MM. The welds look better, it is a few lbs heavier but it looks and feels stronger than the Steeda K. I also really like how they went through the time to write detailed instructions on squaring the K-member which I find really important. If its not square you'll find out when doing the alignment!
Oh and did I mention that it clears my oil pan without ay
I was going to ask this question a while back, but you seem like a bright guy so I figured you had your reasons. You’ll be happy with the MM piece. I run the MM on my streetcar and have nothing but good things to say about it.
Just judging by the pictures, but the sway bar relocation kit might do you well.
Sent from my iPhone using Tapatalk
Really it was just to give Steeda a chance. Other than that I did not want to run an oil filter relocation. Like I said before after all I’m glad I ended up with the MM.
Are you running an strut tower brace with your setup? I have one in the box and wondering if I should install it or not.
Sent from my iPhone using the svtperformance.com mobile app
I run one on my MM equipped street car (the factory one). Its a street car and any benefit in the NVH department is a good thing. Also, I’m not attempting to gain every ounce of performance out of it, and if I’m leaving something on the table, well who cares, it is a street car.
My race car is an SLA Griggs setup. Since there is no load at the top of the strut tower, I do not run one.
In the end, if I were you, I’d run one.
Good tech reading: Do strut tower braces do ANYTHING? - Page 4 - Corner-Carvers Forums
Sent from my iPhone using Tapatalk
My race car is an SLA Griggs setup. Since there is no load at the top of the strut tower, I do not run one.
In the end, if I were you, I’d run one.
Good tech reading: Do strut tower braces do ANYTHING? - Page 4 - Corner-Carvers Forums
Sent from my iPhone using Tapatalk
I run one on my MM equipped street car (the factory one). Its a street car and any benefit in the NVH department is a good thing. Also, I’m not attempting to gain every ounce of performance out of it, and if I’m leaving something on the table, well who cares, it is a street car.
My race car is an SLA Griggs setup. Since there is no load at the top of the strut tower, I do not run one.
In the end, if I were you, I’d run one.
Good tech reading: Do strut tower braces do ANYTHING? - Page 4 - Corner-Carvers Forums
Sent from my iPhone using Tapatalk
Thanks a lot for the link. I'm a member on CC but those guys are always usually on the far extreme when it comes to modding. Everything is track oriented and those guys are serious about it! It is a site for road racing/corner-carving so I understand.
I am believer that braces work, i'm just curious if it will provide any improvement in feel/stability/eliminate creeks normally associated with going coil-overs on my street car that I drag race. At this point I am not corner carving at all and everything extra I install adds weight.
Troy
Users who are viewing this thread
Total: 2 (members: 0, guests: 2)

