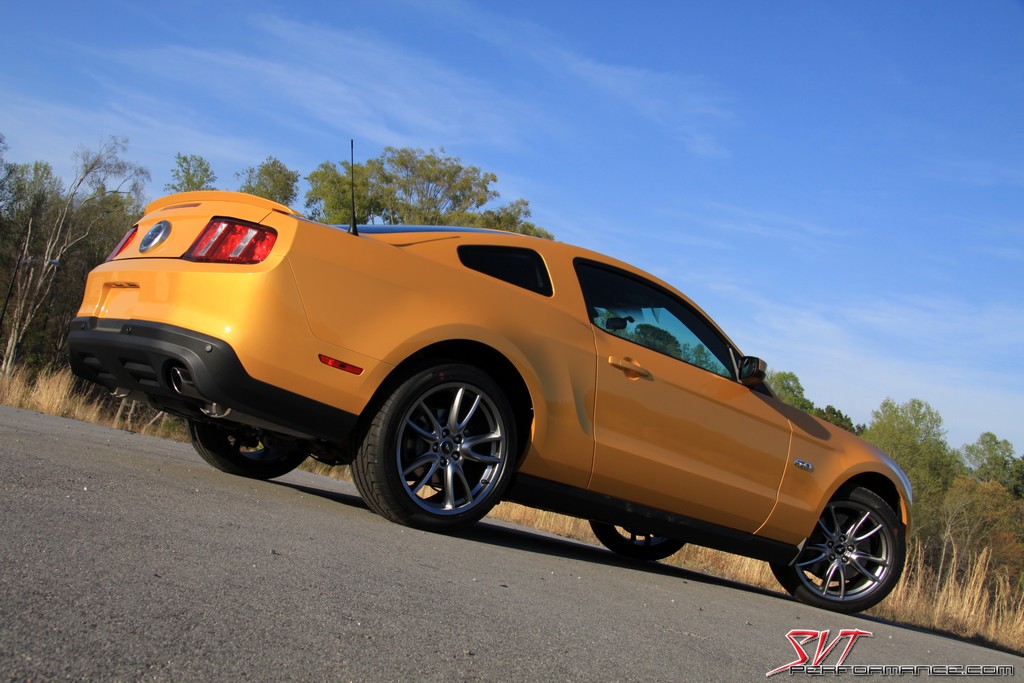
Power, the pursuit of it seems to drive so many of the mods we do to our vehicles. The quest for more power is so prevalent on SVTP that any inquiry as to how to obtain more is often met with the response of a time honored formula for its obtainment; pulley, tune, intake. But what if you don’t have a supercharger? Changing an alternator pulley probably isn’t going to help you much, and the SVTP 2012 Mustang GT doesn’t have a power steering pump so we couldn’t change that pulley. Well, that left us with little recourse, we had to go out and get ourselves some boost.
Not surprisingly, that’s exactly what we did. Magnum Opus translates to mean Great Work, and IMO there’s not much a “greater” mod than bolting on a supercharger. I’ve always been partial to positive displacement superchargers. I love the instant power and monstrous torque they provide. To me, it’s hard to beat the feeling of thrust they deliver on a street driven car. However, things have changed a bit in the blower world since I picked up my 2004 SVT Lightning over seven year ago. A slick new rotor design has positioned itself between the tradition “Roots” rotors and the screaming “Twin-Screw” units. Eaton has dubbed them the Twin Vortices Series, or “TVS” for short, of supercharger rotors.
The TVS rotors have several feature and benefits which set them apart from their other positive displacement cousins. Previous generations of the Eaton Roots-style superchargers came equipped with three-lob rotors with 60 degrees of twist. However, Eaton’s patented TVS line features twin four-lobe rotors which are twisted 160-degrees. Eaton claims this new design reduces noise, vibration, and harshness compared to previous designs while also providing increased thermal efficiency.
When our search for a blower to install on the SVTP GT began I new I wanted to try out a TVS based system. The benefits of the new rotor design were just too good to pass up. Once that decision was made, the choice of which one to go with was easy. Magnuson Superchargers, as far as I know, is the only supercharger manufacturer that produces a TVS based kit for the 2011+ GT Mustangs that requires no modification (ie, drilling, cutting, hacking, etc.) of the front engine cover. That might not seem like a big deal to a group accustomed to modifying anything they can get there hands on, but for the average Mustang owner it’s a significant advantage. It means you don’t have to have extra tools, such as saws, cut-off wheels, right-angle drills, etc. If you’re doing the install in your driveway with a limited amount of tools the ease of installation designed into the Magnuson kit will be greatly appreciated.
Speaking of design, the Magnuson TVS kit for the 2011+ GT boasts many features that SVTP members have some to expect from a top-of-the-line supercharger system. These include: a Bosch pump based integrated air-to-water intercooler system, Premium quality Gates hoses, a high-flow K&N air filter, and a SCT X-Cal III to handle the necessary tuning duties. The supercharger itself is a 2.3L unit. These are the same Eaton TVS rotors that will be called into duty on the upcoming 2013 SVT Shelby GT500.
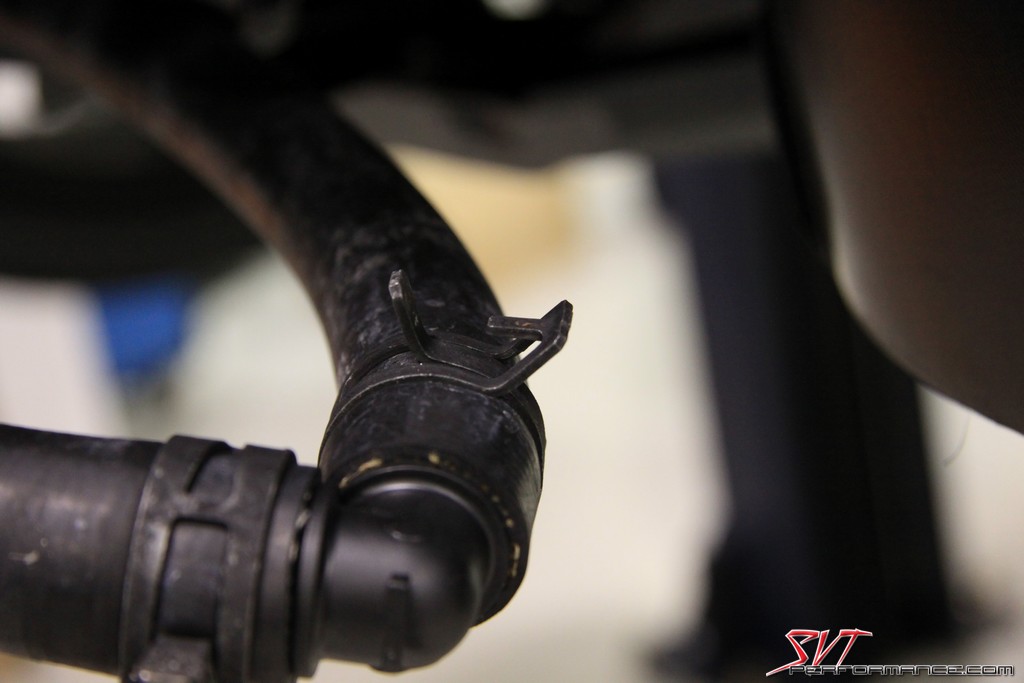
To say the Magnuson kit is complete is an understatement. They went beyond just giving you the parts you need to accomplish the install and provide you with the materials that keep you from having to make 37 runs to the parts store. Things like injector lube, wire loom, and every bolt and clamp you need to complete the job. The only thing I didn’t care for in the kit was the OEM style spring tension hose clamps. They work very well and are inexpensive, but they can be difficult to install and manipulate. However, having the proper tool for the job makes everything go much smoother.
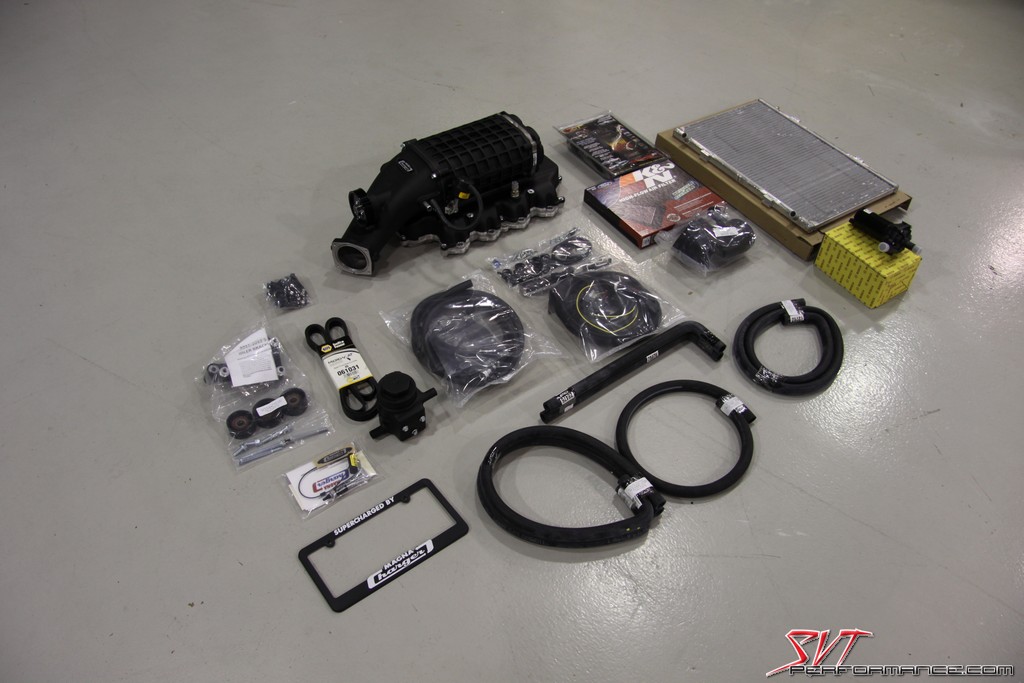
Everything you get in the boxes. Among the familiar parts provided is an SCT X-Cal III, a K&N drop-in replacement filter, a Gates 6 rib belt, and a Bosch intercooler fliud pump.
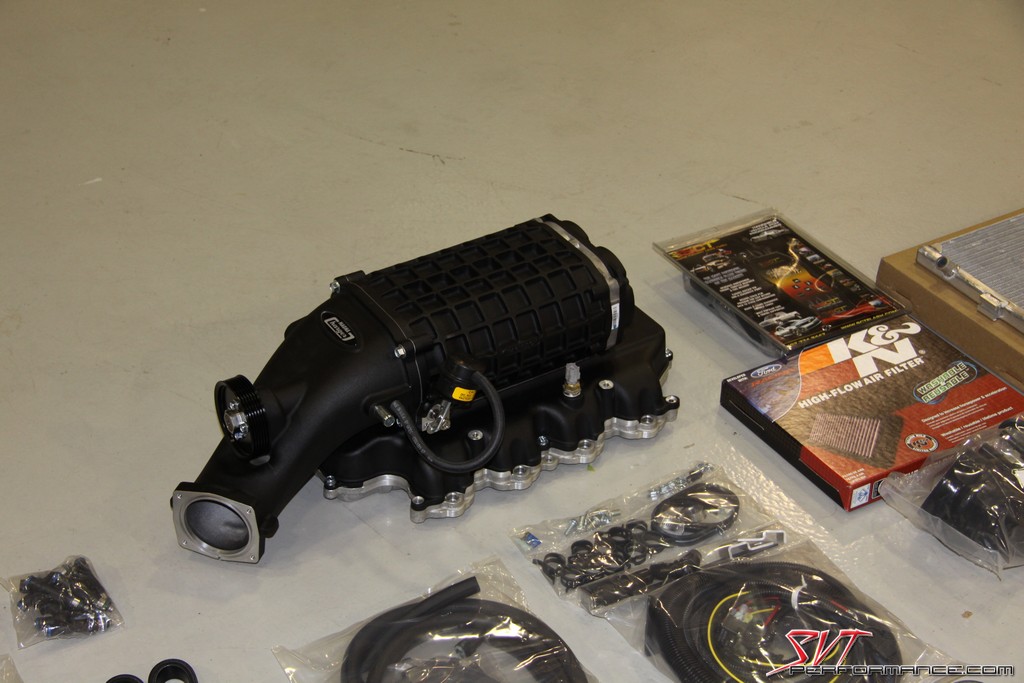
The Magnuson blower looks great even sitting on the floor.
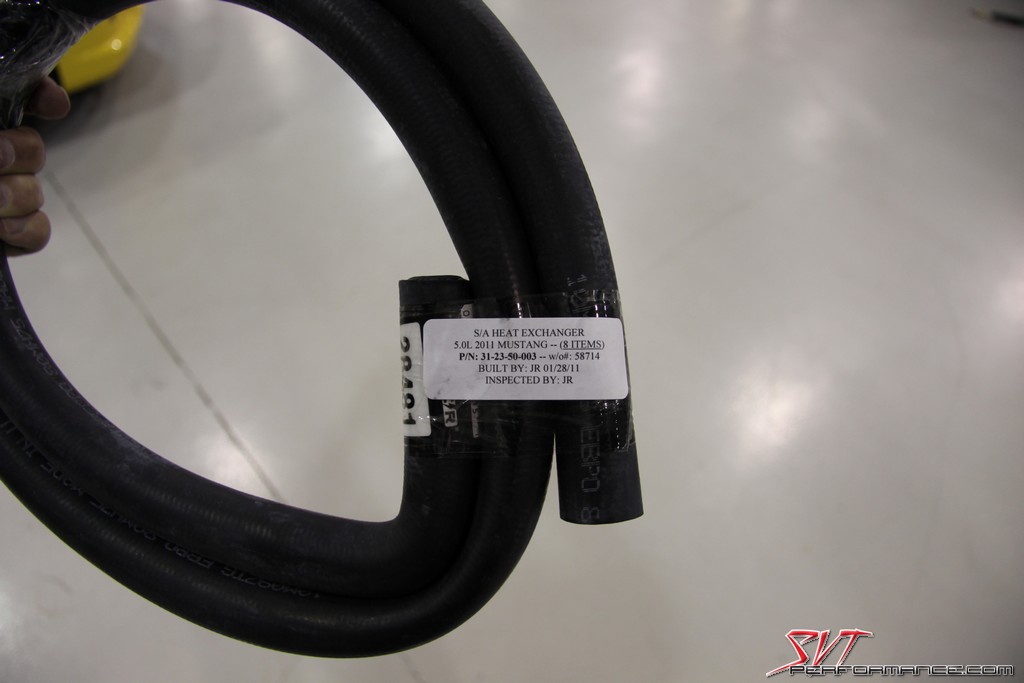
JR (the inspector) thoughtfully labeled the hoses and other parts in the kit to help with identification.
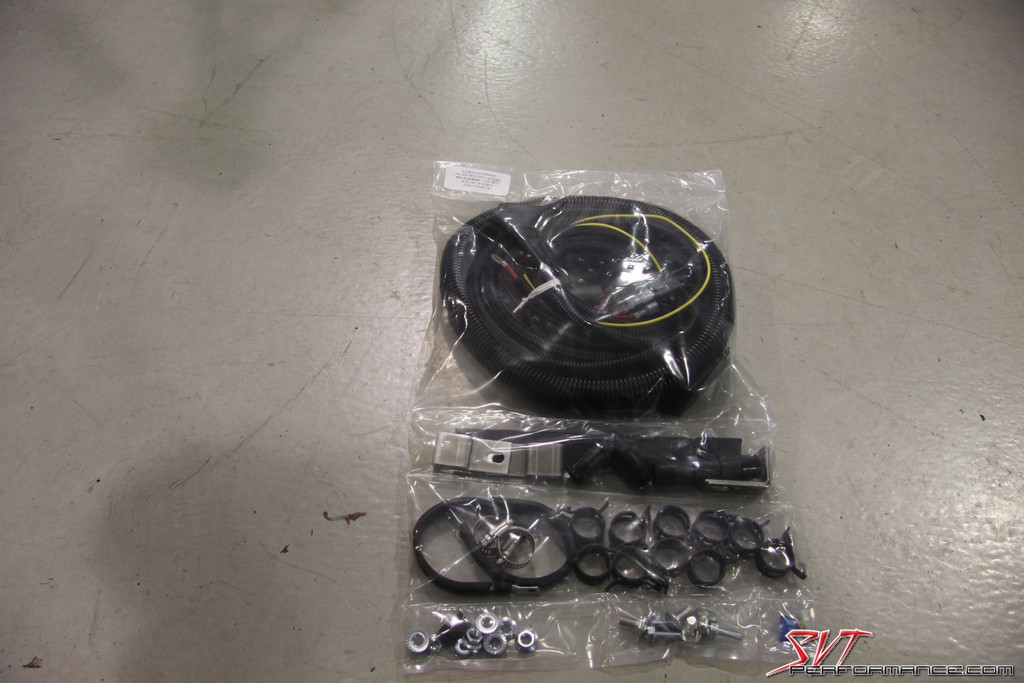
The small parts in the kit are cleverly sectioned into sealed compartments in plastic bags. The intercooler harness in the top of the bag is the first part of the kit we're going to install.

The Magnuson blower looks great even sitting on the floor.

JR (the inspector) thoughtfully labeled the hoses and other parts in the kit to help with identification.

The small parts in the kit are cleverly sectioned into sealed compartments in plastic bags. The intercooler harness in the top of the bag is the first part of the kit we're going to install.

So let’s get into the meat of the installation. Once again, we are working in the impressive facilities of Arrington Performance. To put it simply, if you can read, look at pictures, and possess a modicum of mechanical inclination you can install this supercharger system. The instructions are extremely clear and replete with detailed photographs. I’m not sure how many of you will find this relevant, but to me installing the Magnuson kit was easier than changing spark plugs on my ’04 SVT Lightning. That is really due to two things. First, Ford really made the Mustang fairly simple to work on, and second, the Magnuson did an outstanding job engineering their system.
As I mentioned earlier, Magnuson designed their kit in such a way as to avoid having to make any modifications to the engine’s front cover or the factory wiring harness. To me this is a huge advantage to the other Eaton TVS based superchager systems on the market. First, it makes the install much simpler. But more importantly to me, I didn’t want to have to start grinding off aluminum bosses on the front cover of a brand new car. It causes a mess and is a needless hassle. Would it be difficult to modify the front cover, no. If you have the correct tools drilling a few holes or removing some metal is not terribly difficult (just don’t screw it up or you’ll be buying a new front cover. However, if you want an install that is exceedingly simple and produces impressive results the Magnacharger is the way to go.
They provide you with a thirty nine page pdf file replete photographs for nearly every step of the installation. I have installed more than a couple supercharger kits in my day, and I can honestly say that the instruction provided with the Magnuson blower are the most complete and well rounded ones I have used. That being said, I did have a few small issues with them, mostly concerning the clarity of certain directions, and I brought those quibbles to the attention of Magnuson. Upon being presented with them they agreed to make the changes I humbly suggested. So there’s a very good chance that by the time you would start installing a Magnuson blower on your 5.0 you will be working from the revised directions. The only other real issue we ran into was at the time we installed the blower on the SVTP GT Magnuson didn't have it's tuning ready for the 2012 car. Not to be dissuaded from installing it NOW!!! we gave Chris Jones at Blow-By Racing a call and he set us up with a couple custom SCT tunes to try out.
Follow with me through the pictures below as I briefly walk you through the disassembling of the stock intake system and the installation of the Magnuson TVS supercharger system.
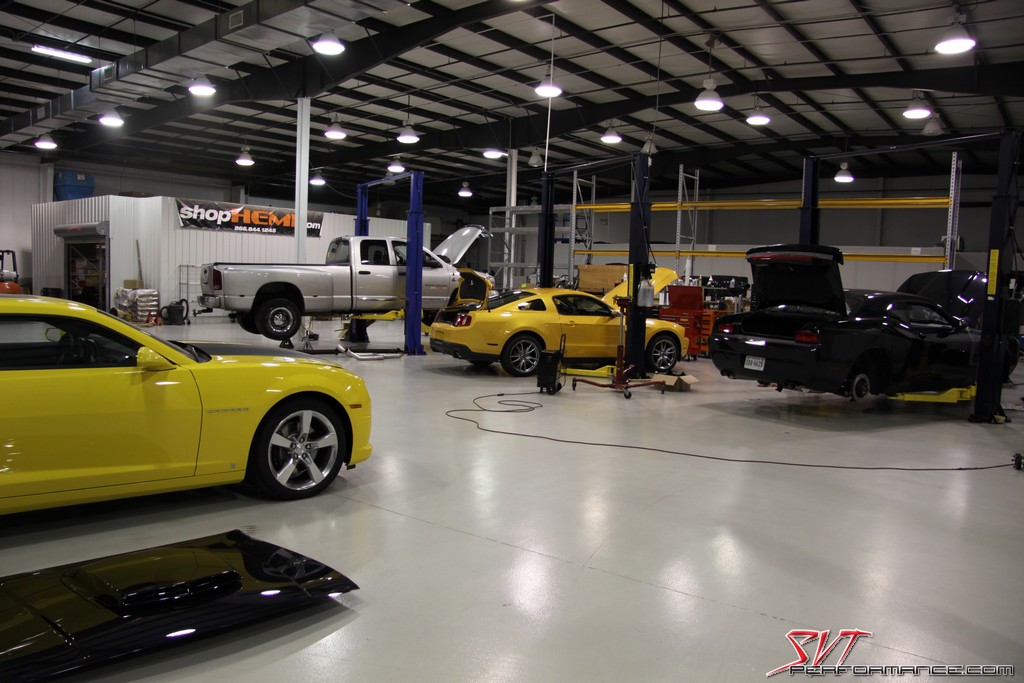
A Mustang can seem a bit lonely among the sea of Mopars in Arrington's massive shop.
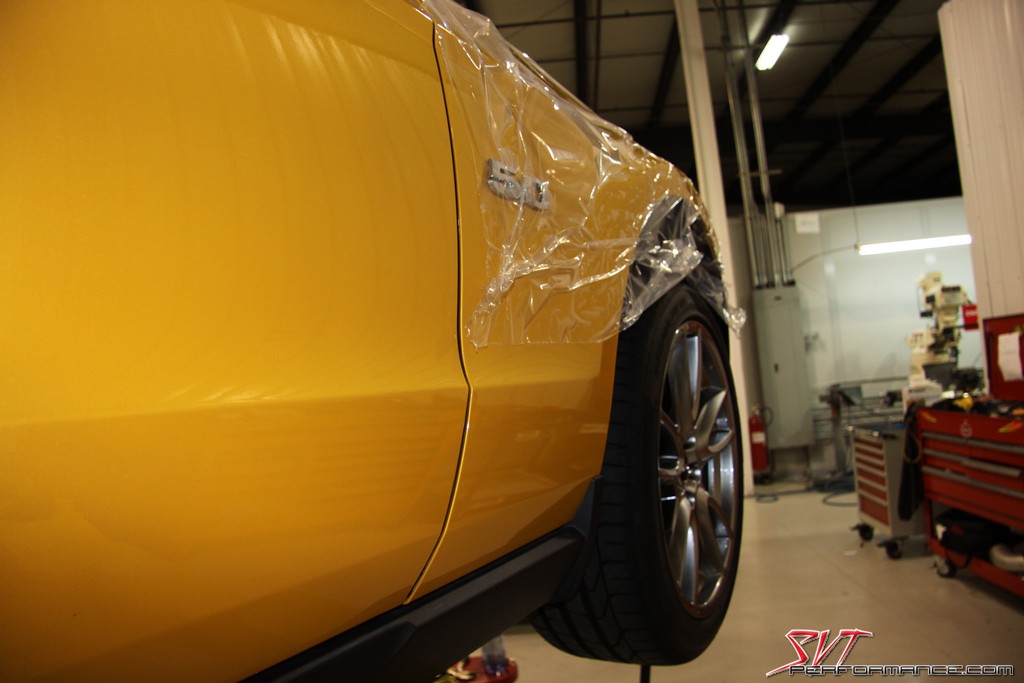
As with all cars getting underhood work at Arrington, the SVTP GT had its paint protected by some cling-on plastic wrapping.
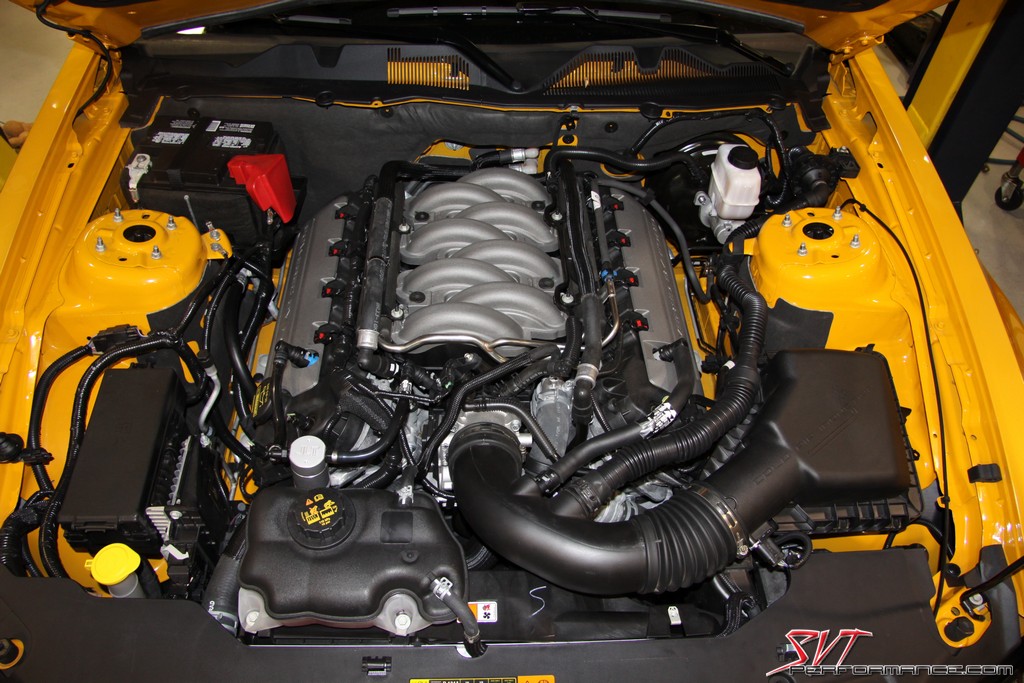
With the engine cover and strut tower brace out of the way we're ready to get to work.
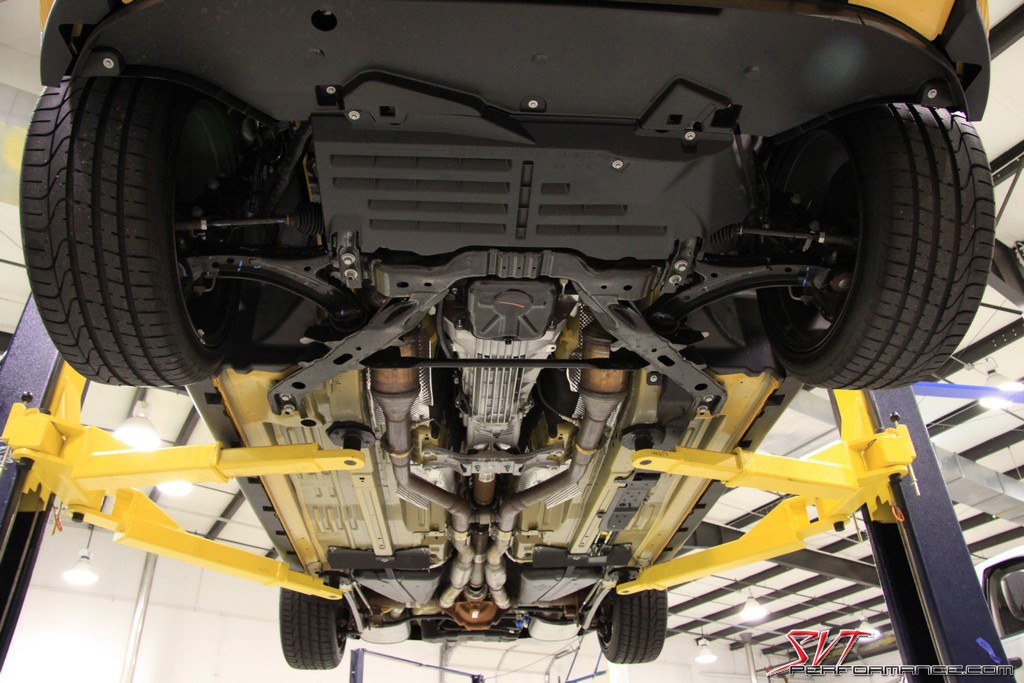
This is where it all begins. A lift isn't necessary for the install but it makes life much easier, especially when you have to take a lot of pics.

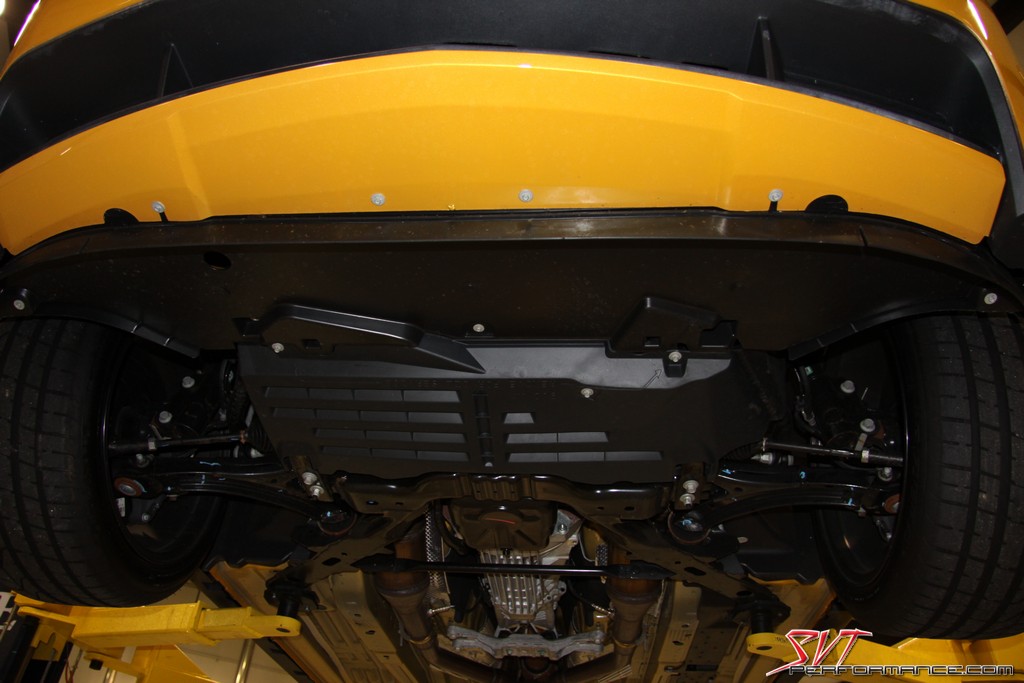
You'll need to remove the plastic lower body work.
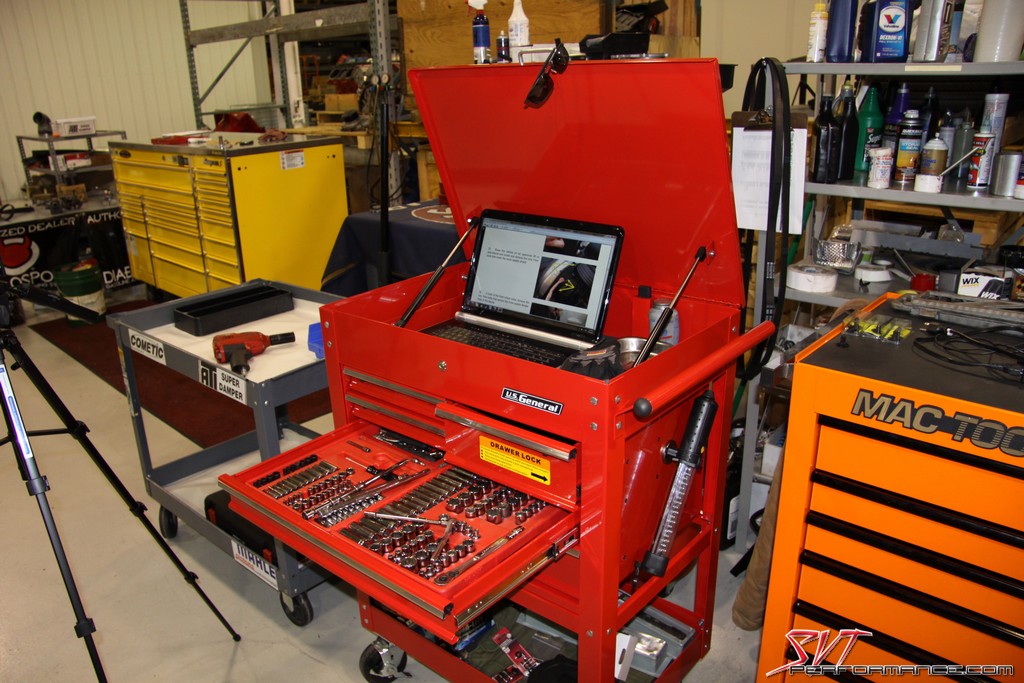
Can anyone guess which toolbox in this pic belongs to the guy who doesn't do rely on his mechanical abilities to put food on the table?
All these panel bolts have to be removed.
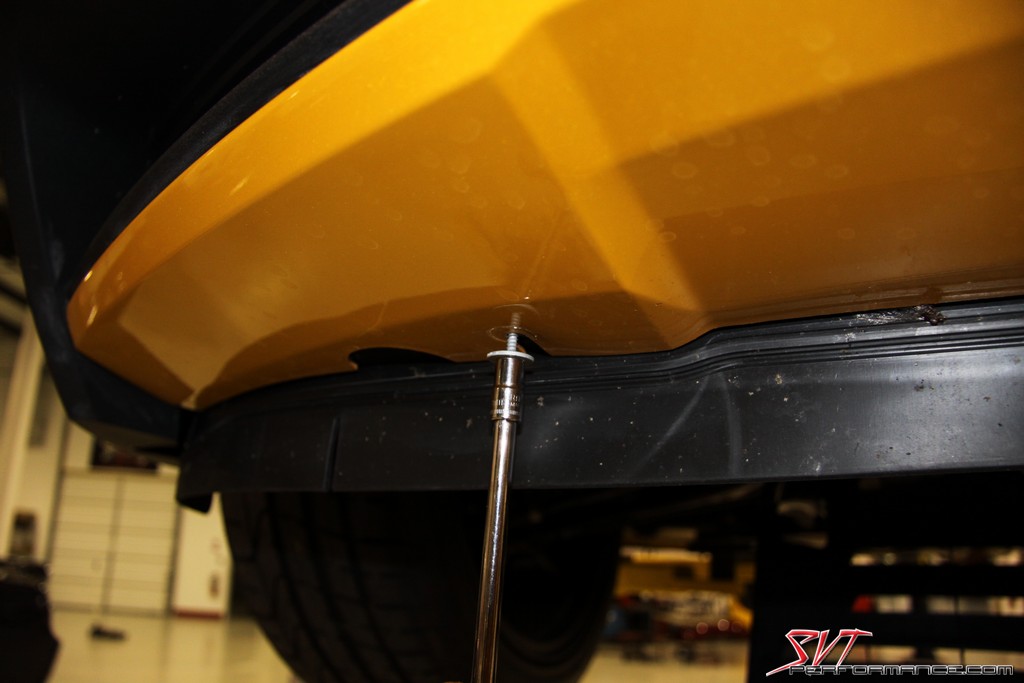
A 1/4 inch drive ratchet will make quick work of them.
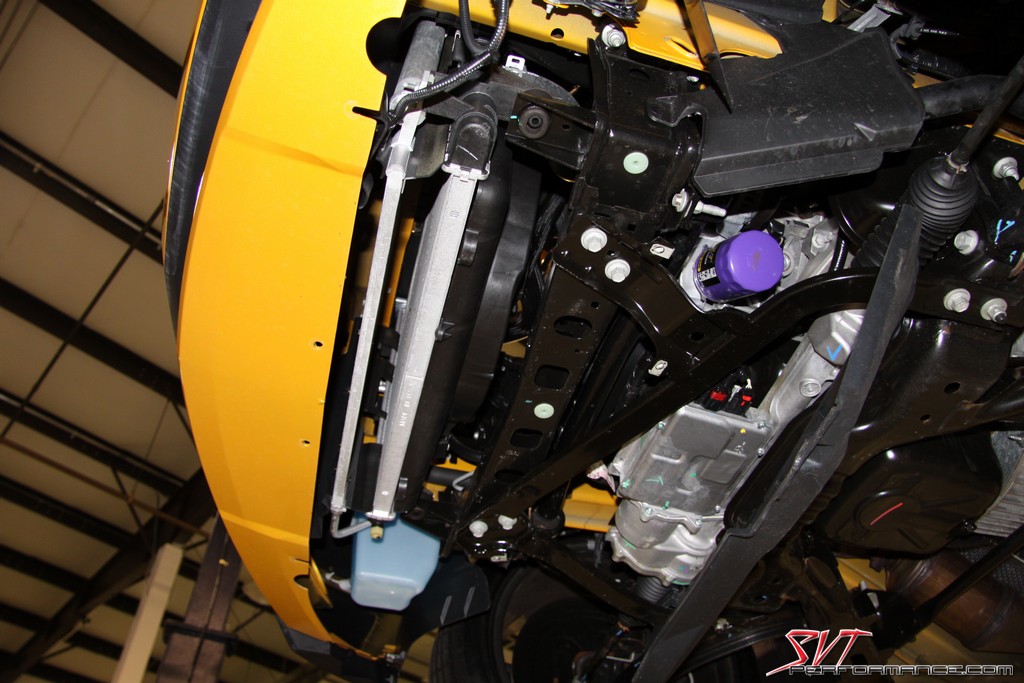
Once the panels are removed you're ready to remove the front fascia. You can see the SVTP GT's Royal Purple oil filter.
Again, the 1/4 inch ratchet dispatches the work quickly.
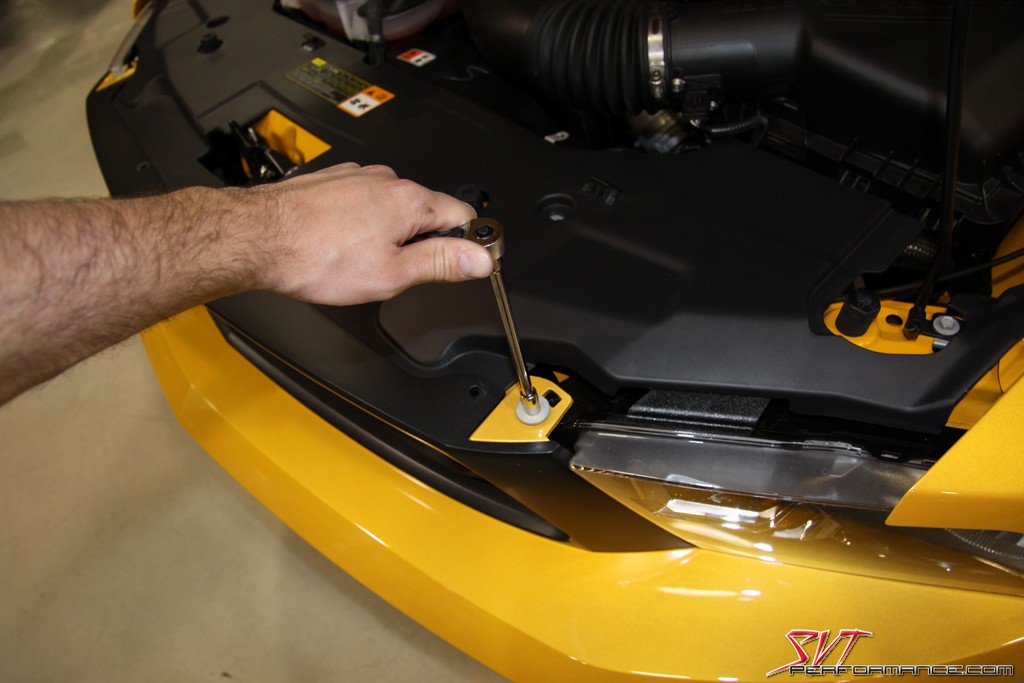
With the header panel and all the bumper cover bolts removed you can unplug the lights and start removing the fascia.
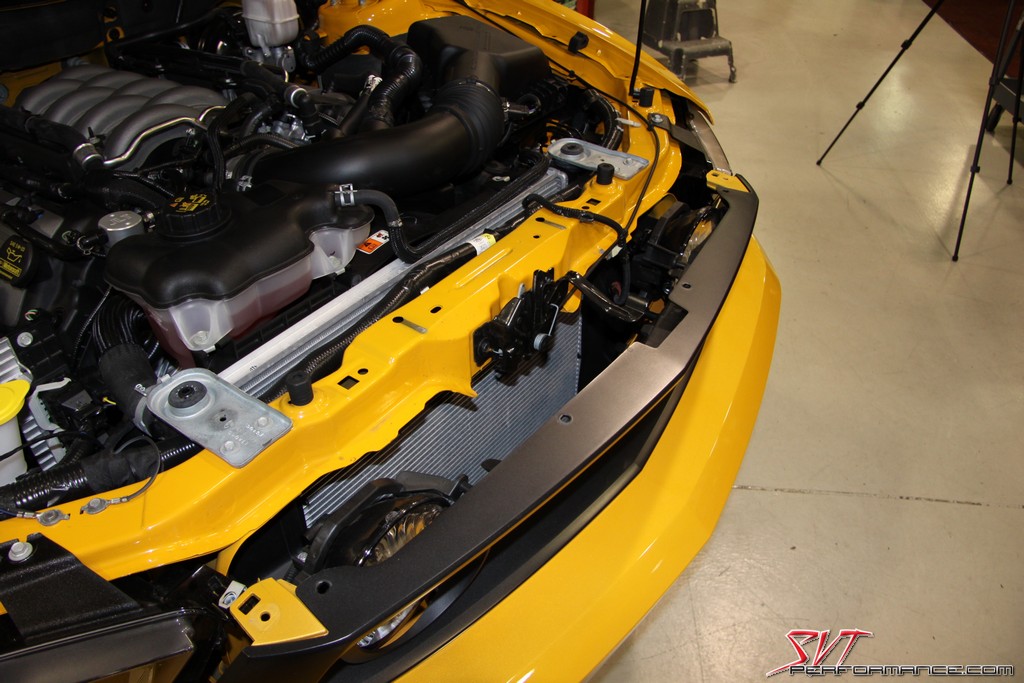
As unnerving as it is, you have to pull out on the front bumper to release it from its clips.
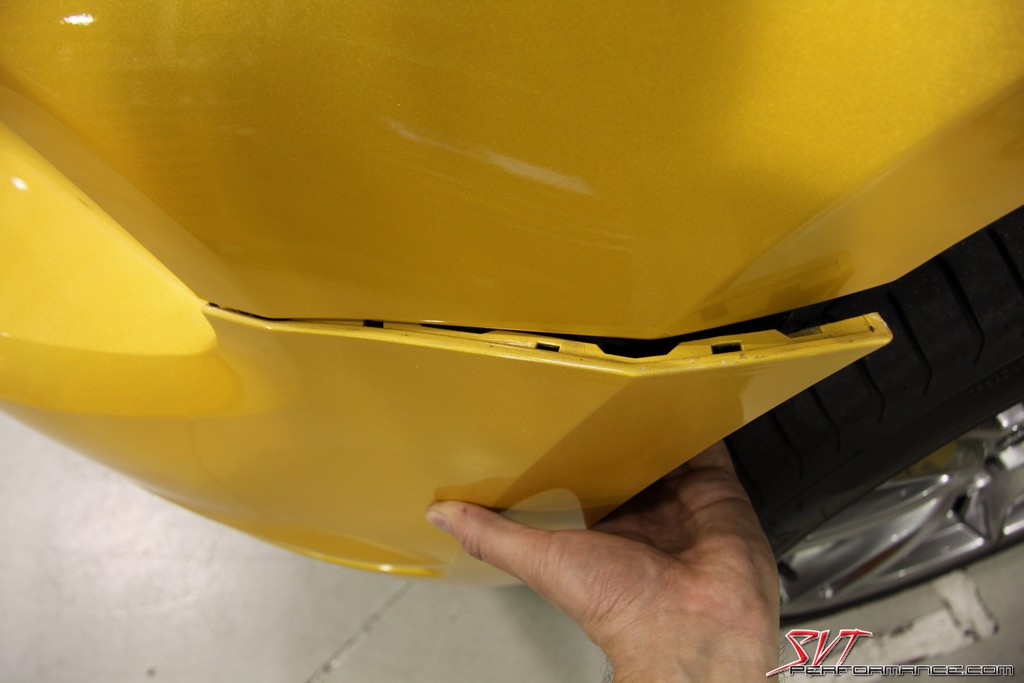
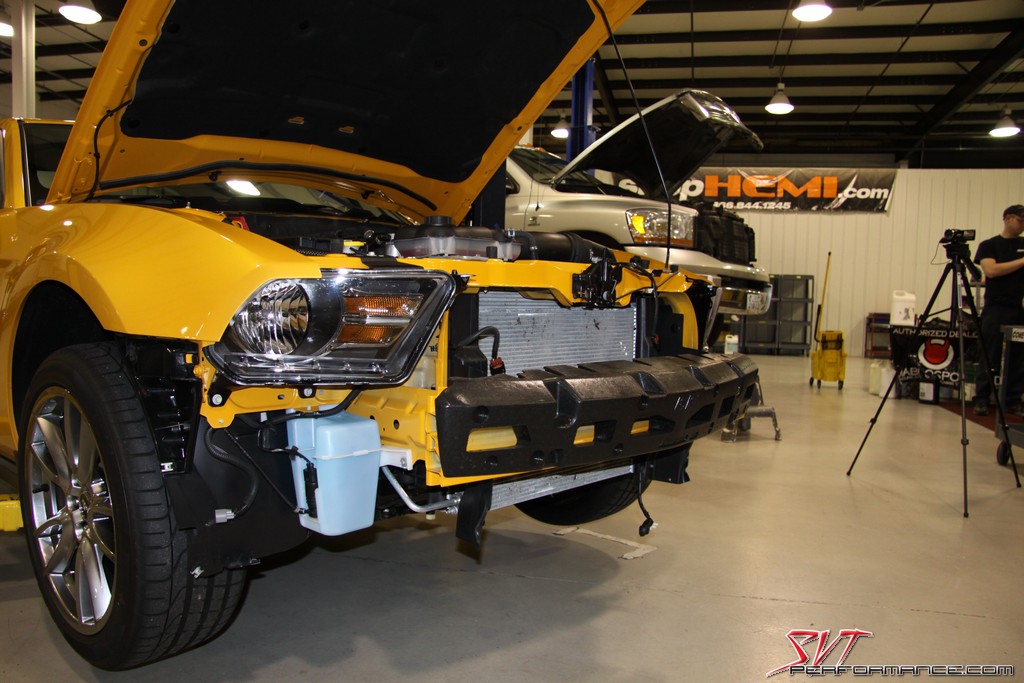
With the bolts removed, the lights unplugged, and the clips released the fascia can be lifted off and stored somewhere out of the way.
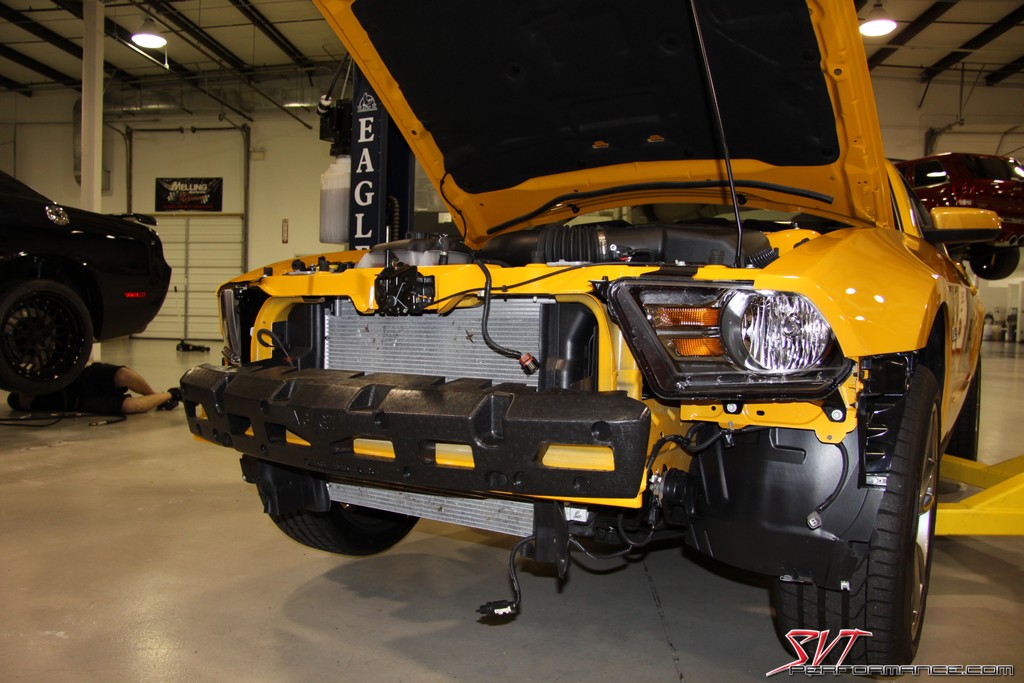
I'm betting it wouldn't take much of a hit on the passenger side to rupture that blinker fluid reservoir.
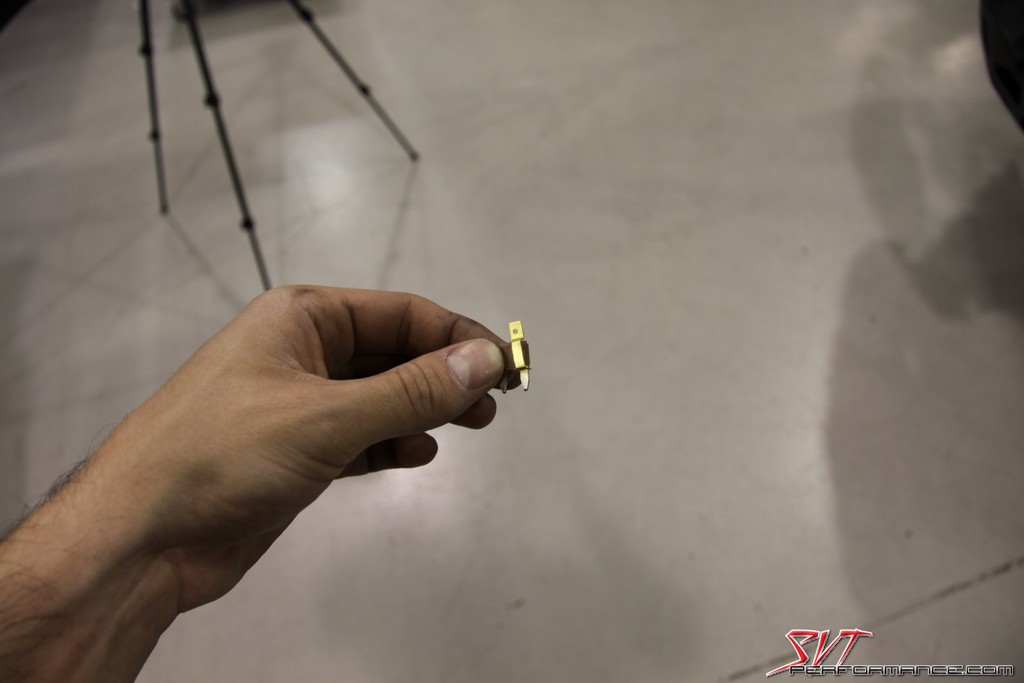
We start the installation process by installing this jumper strap on a fuse. After such heavy lifting you might need to take a break at this point.
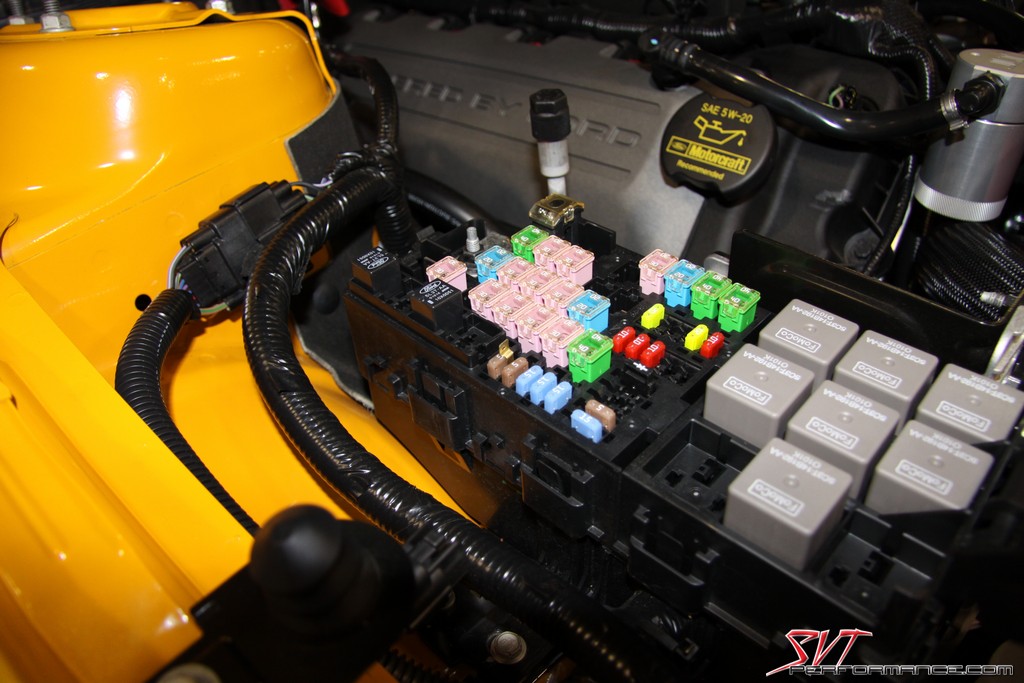
The fuse is then placed back into it spot in the under hood fuse block.
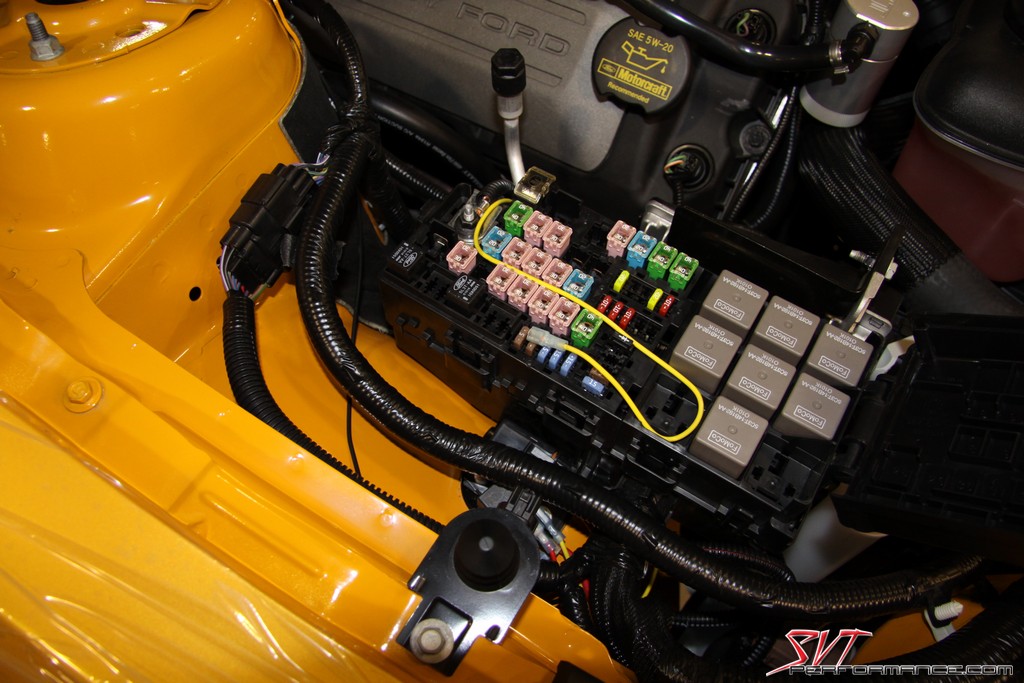
The power wire in the pump harness can then be installed on the jumper and routed through the block.
For those interested, this is the scoop that feeds outside air to the airbox.
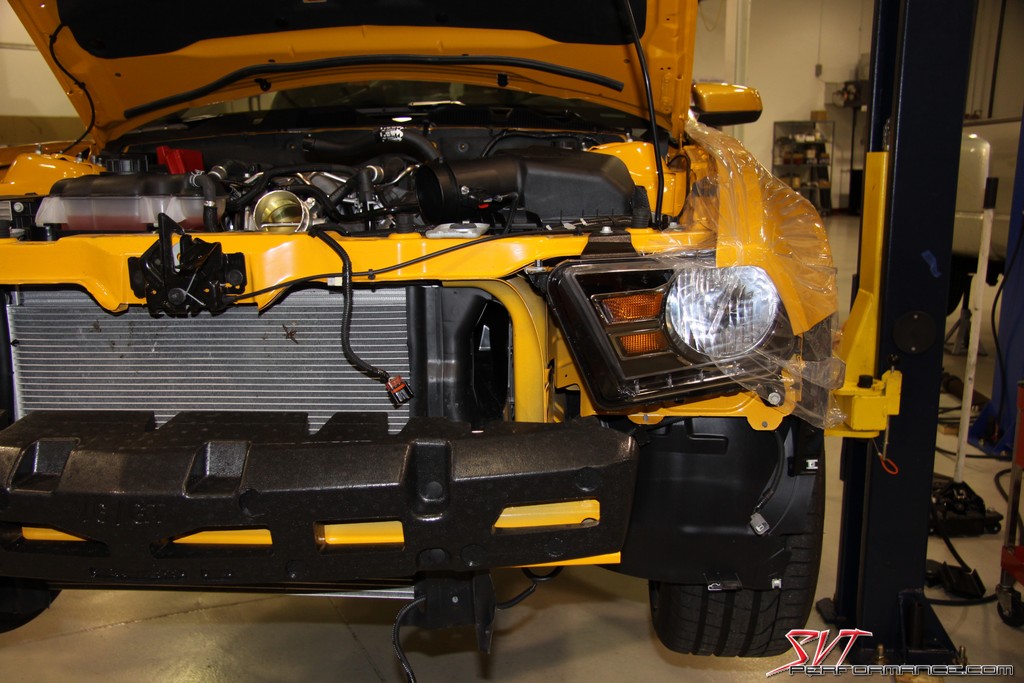
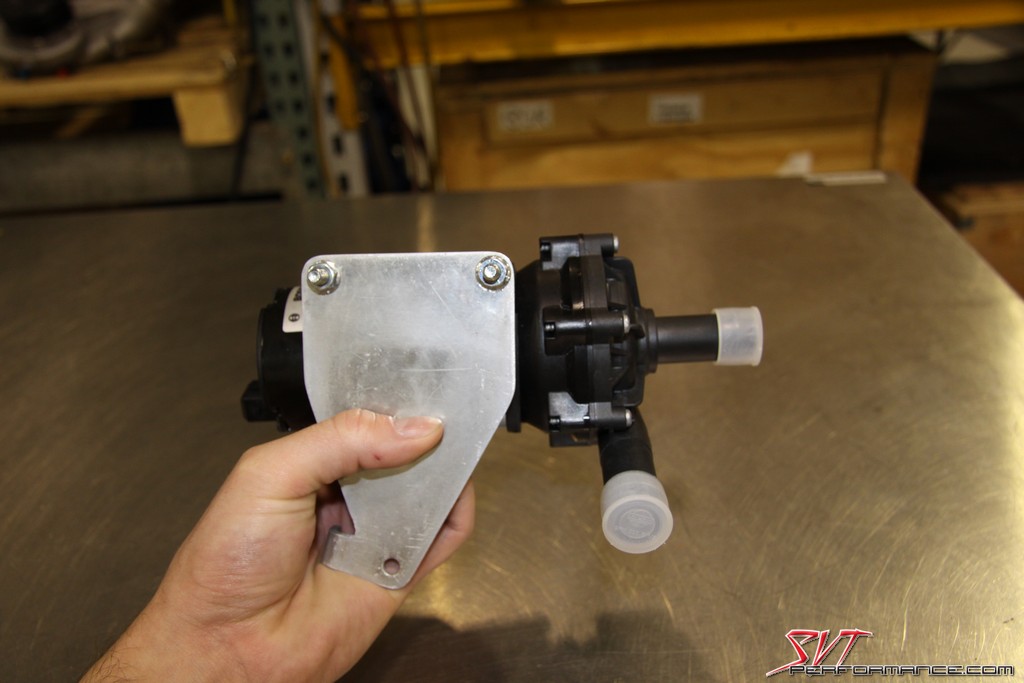
We then installed the mounting bracket onto the intercooler pump. It can then be mounted on the K-member and plugged into its wiring harness.
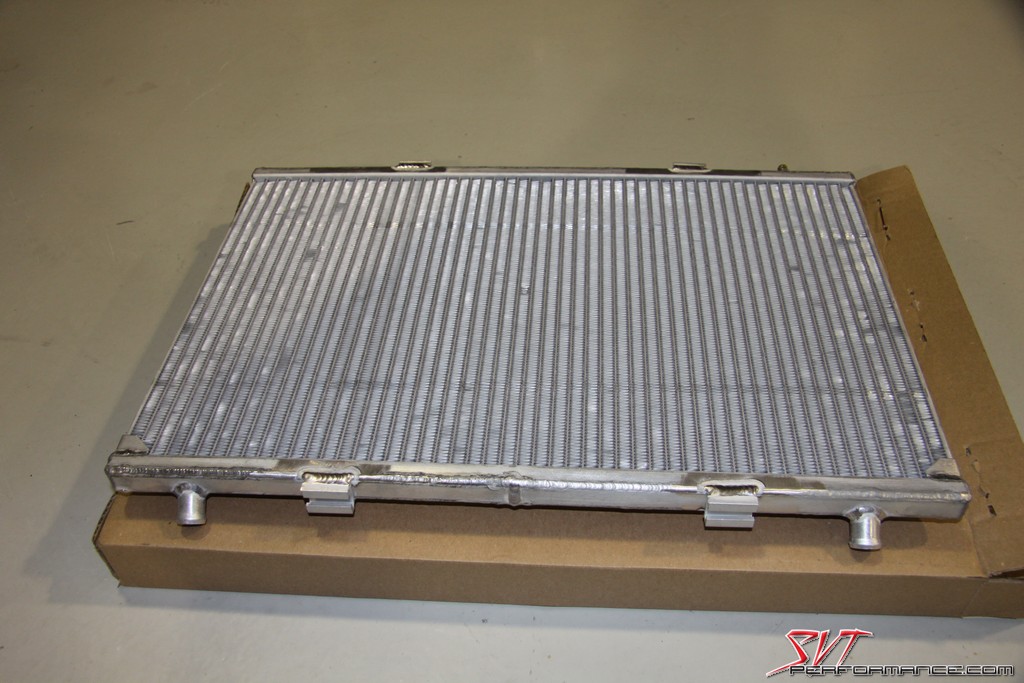
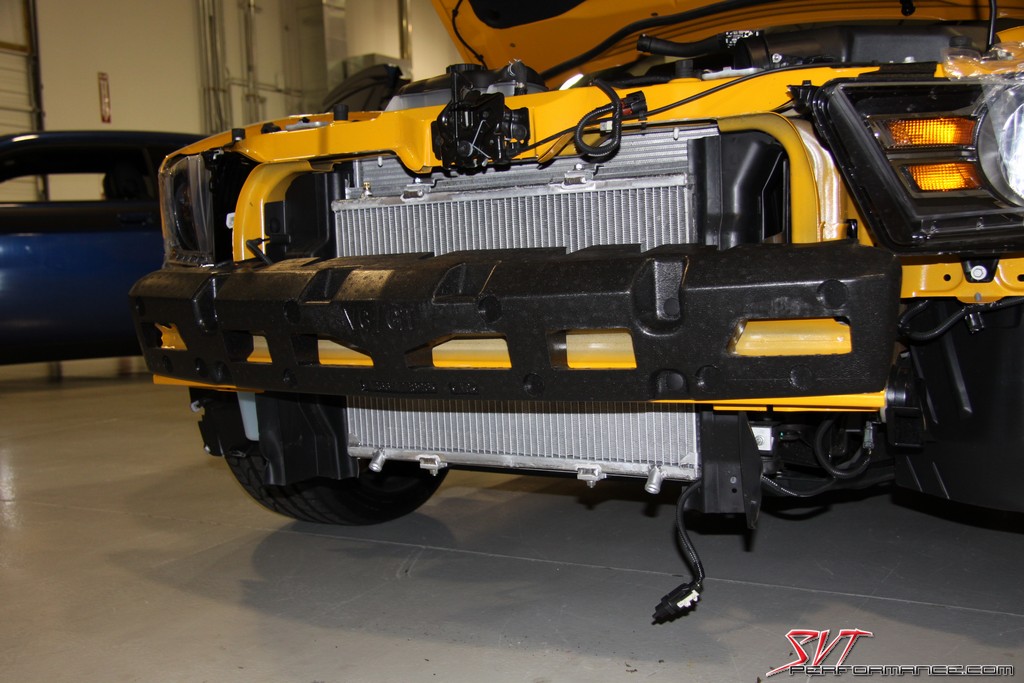
The heat exchanger included in the kit is thin, but it is very tall and wide compared to the heat exchangers we're used to seeing on Cobras and Lightnings.
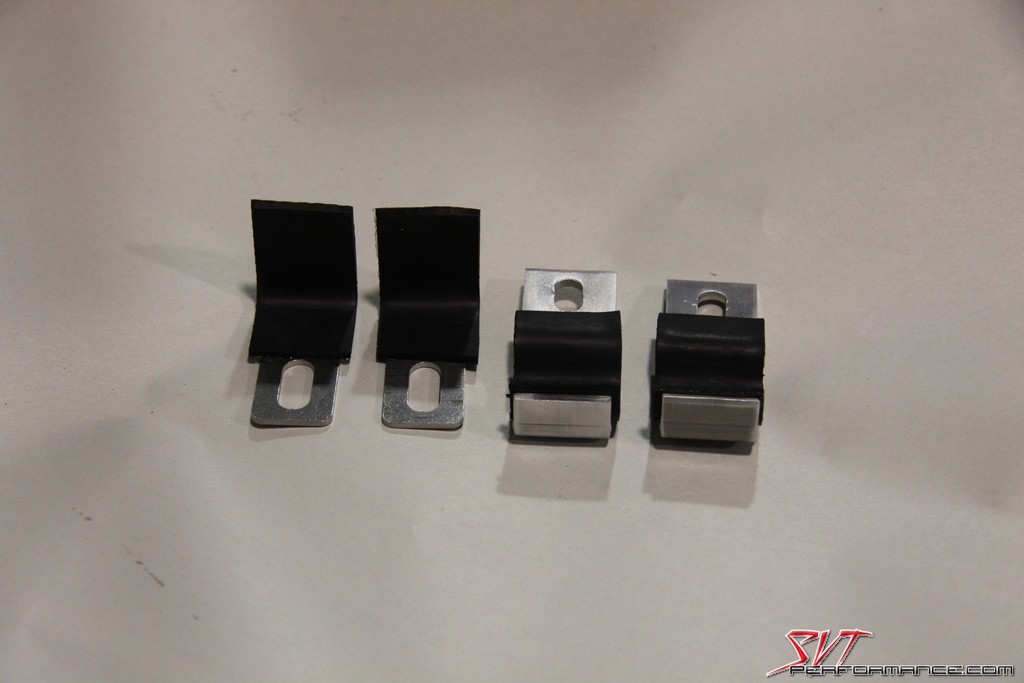
These are the brackets that mount the heat exchanger to the A/C evaporator core.
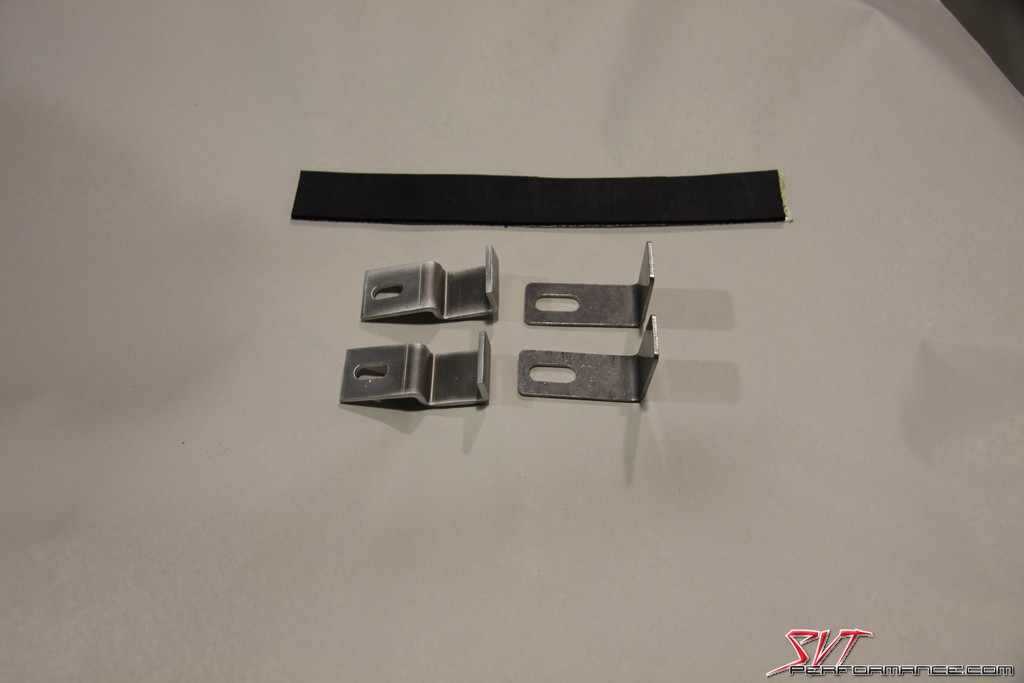
These rubber pads help protect the core from vibrational damage.
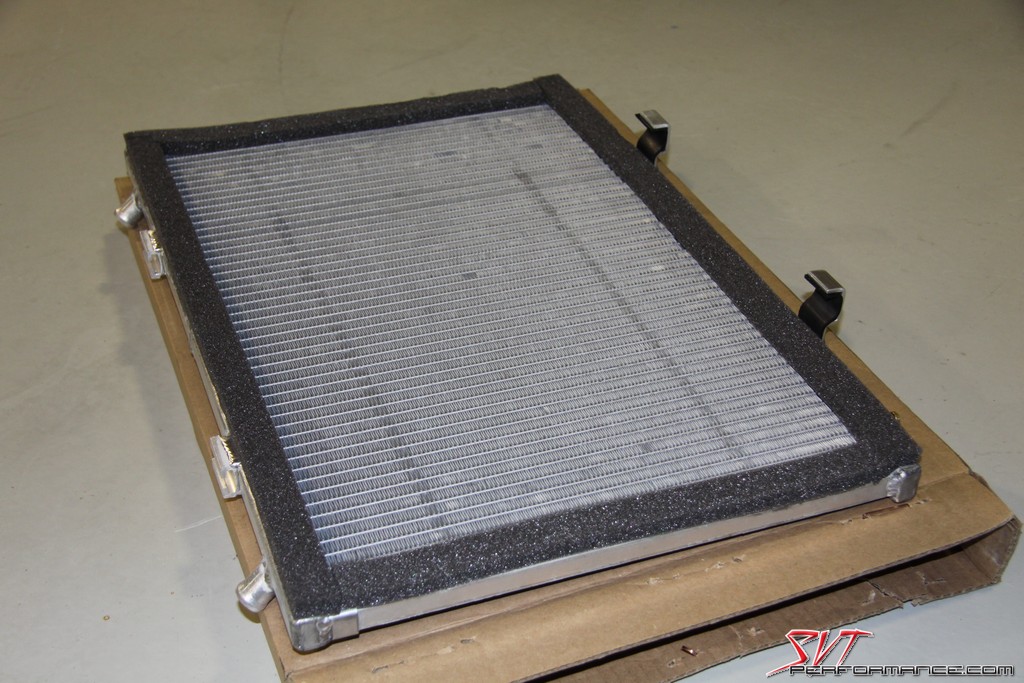
This foam is also added to the hear exchanger to protect the A/C core.
The heat exchanger just drops into place.
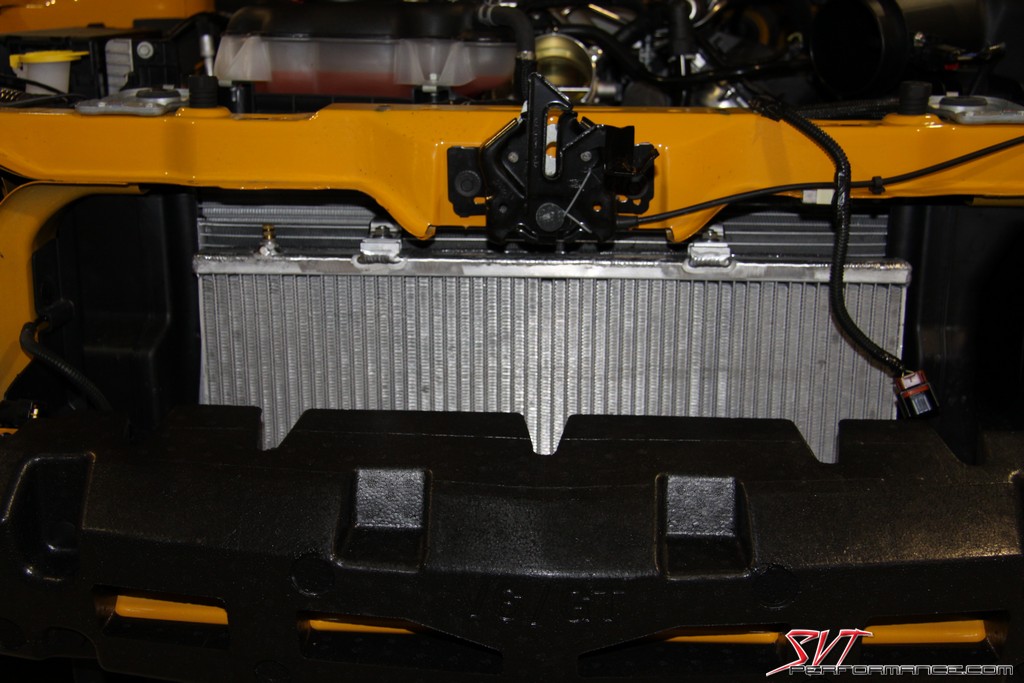
This is the bleeder screw that helps evacuate any air out of the intercooler system.
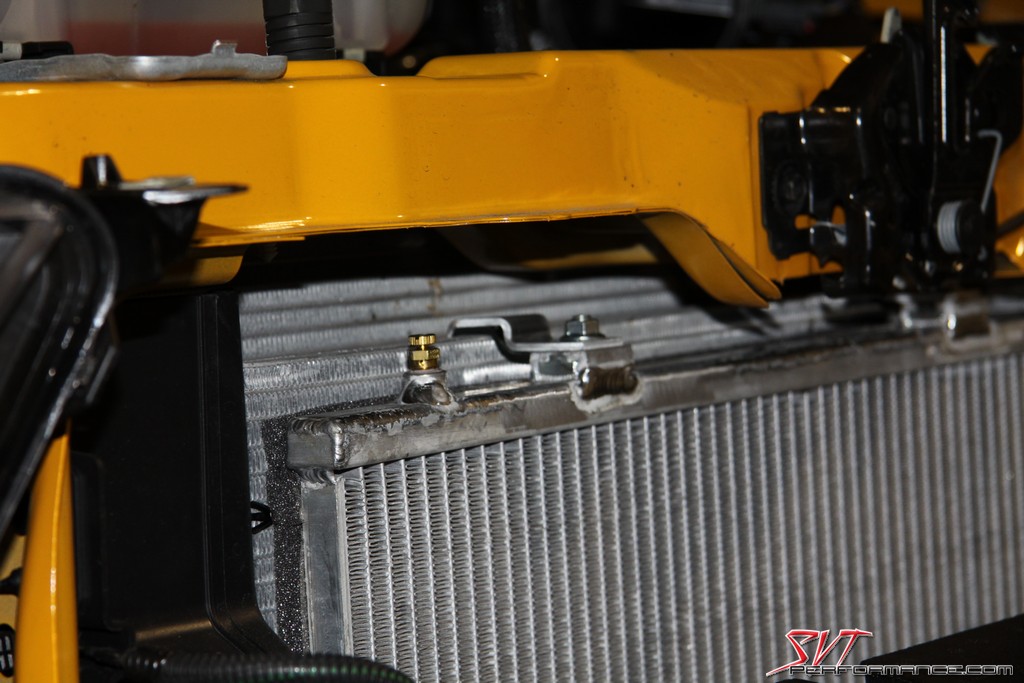
Here you can see how the heat exchanger mounts to the A/C core at the top...
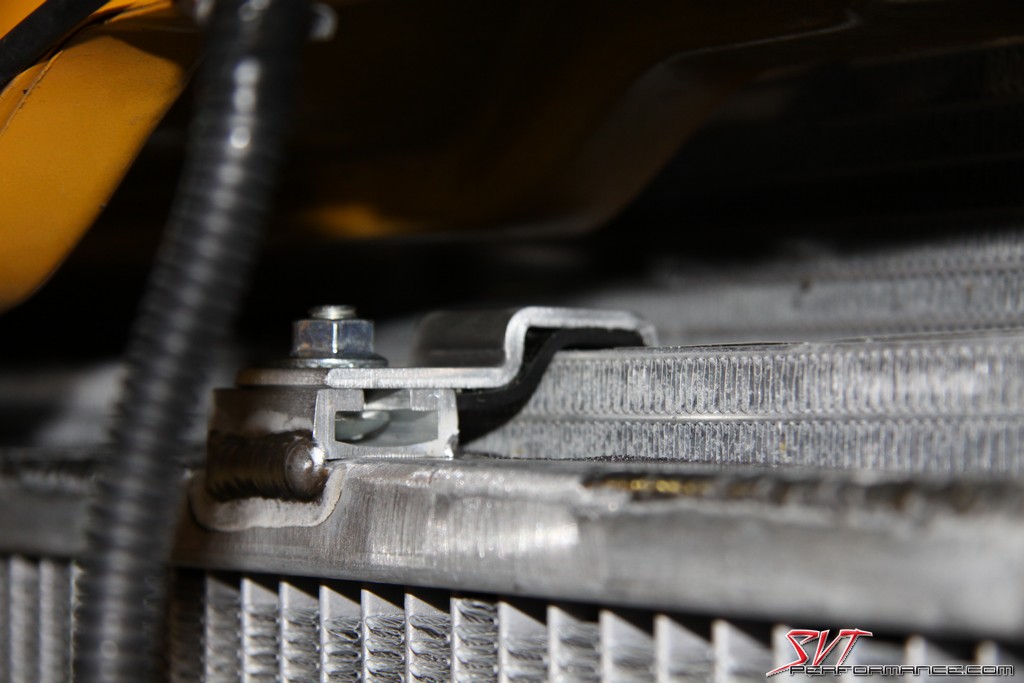
...and at the bottom.
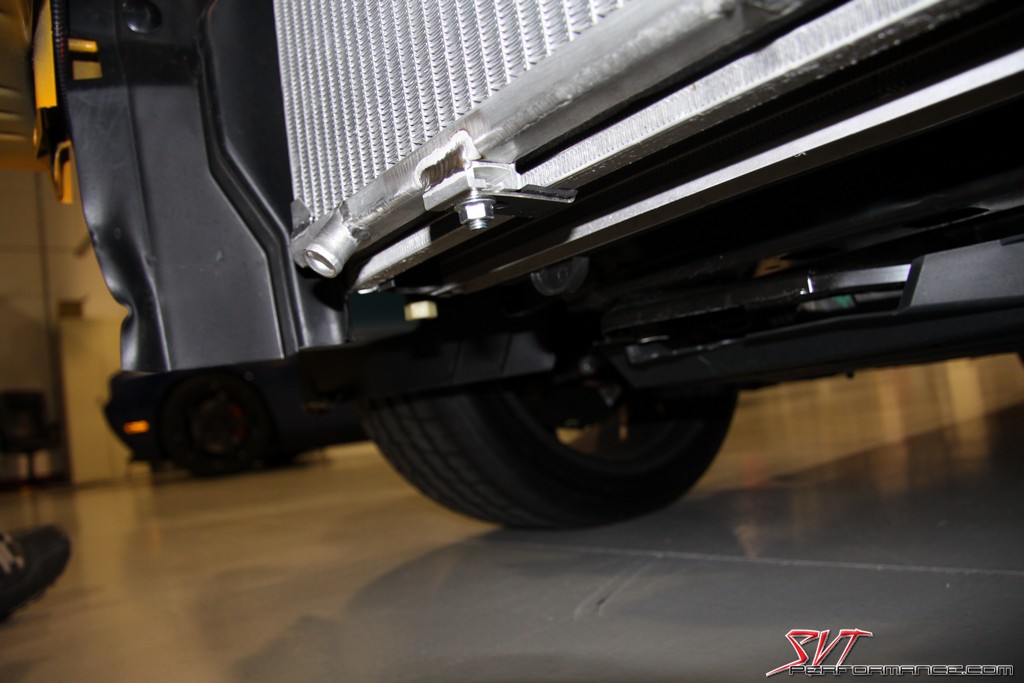
Due to its large surface area and exposure to massive amounts of airflow the heat exchanger should do a great job at dissipating heat from the intercooler fluid.
A hole has to be made with a hole saw in the fender liners on both sides of the car for the coolant hoses to pass through. They're a little rough looking when freshly cut.
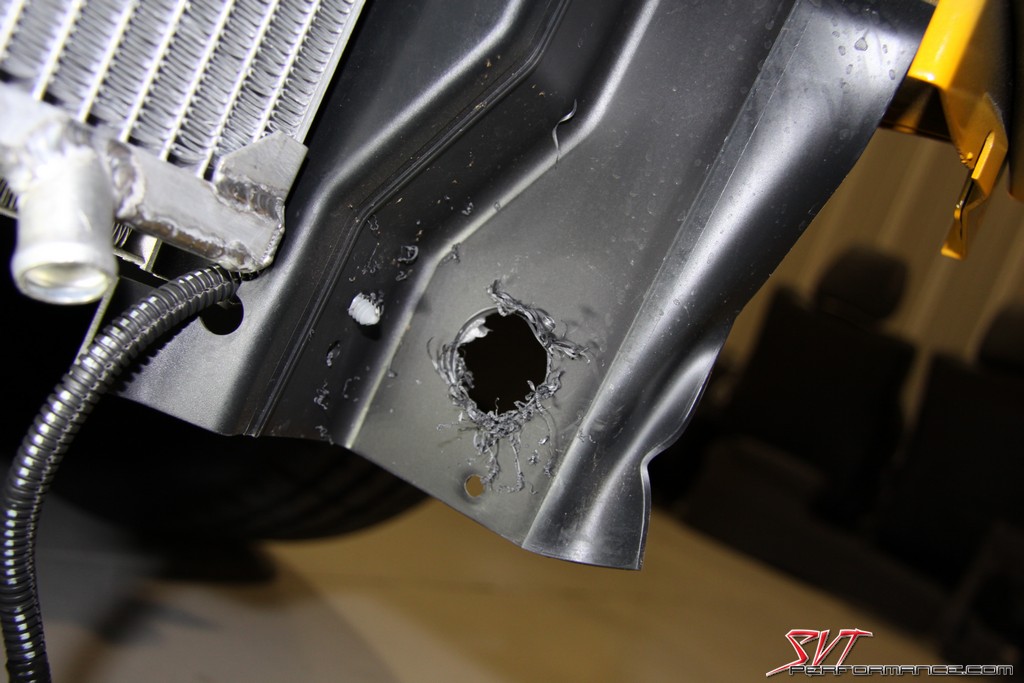
A little work with the deburring tool and the newly drilled hole looks like it was put in by the factory.
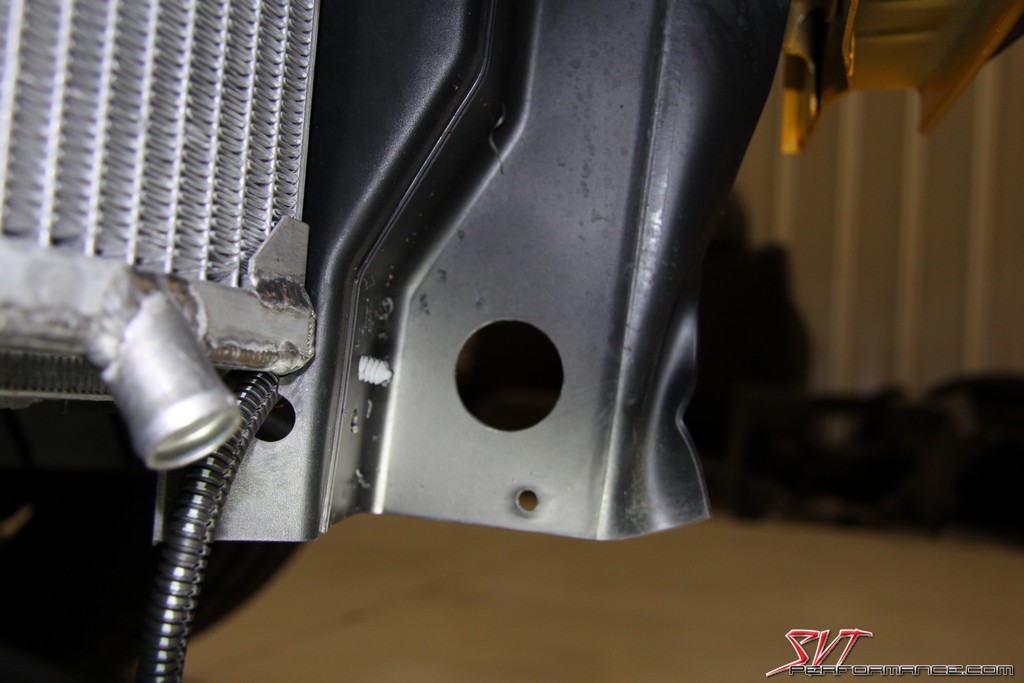
Unplug the fuel injectors and using the supplied tool the fuel line can then be disconnected from the fuel rail. It's a good idea to have some towels ready to soak up the fuel that will inevitably leak out.
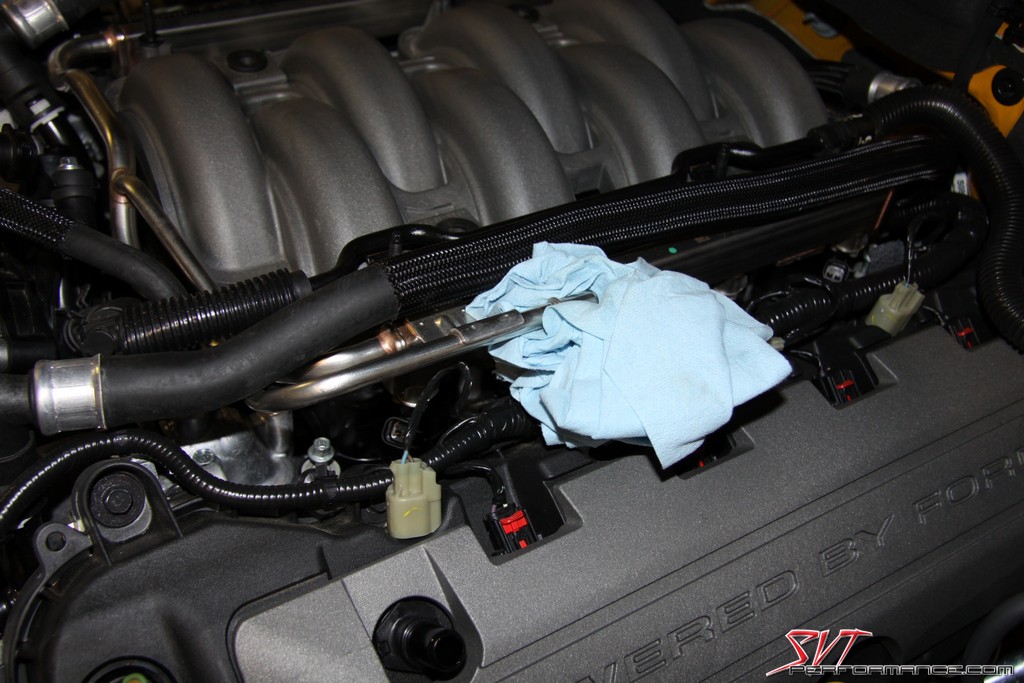
To prevent excessive fuel spillage it's a good idea to tie the fuel supply line back in a vertical position. All the intake manifold bolts can then be removed.
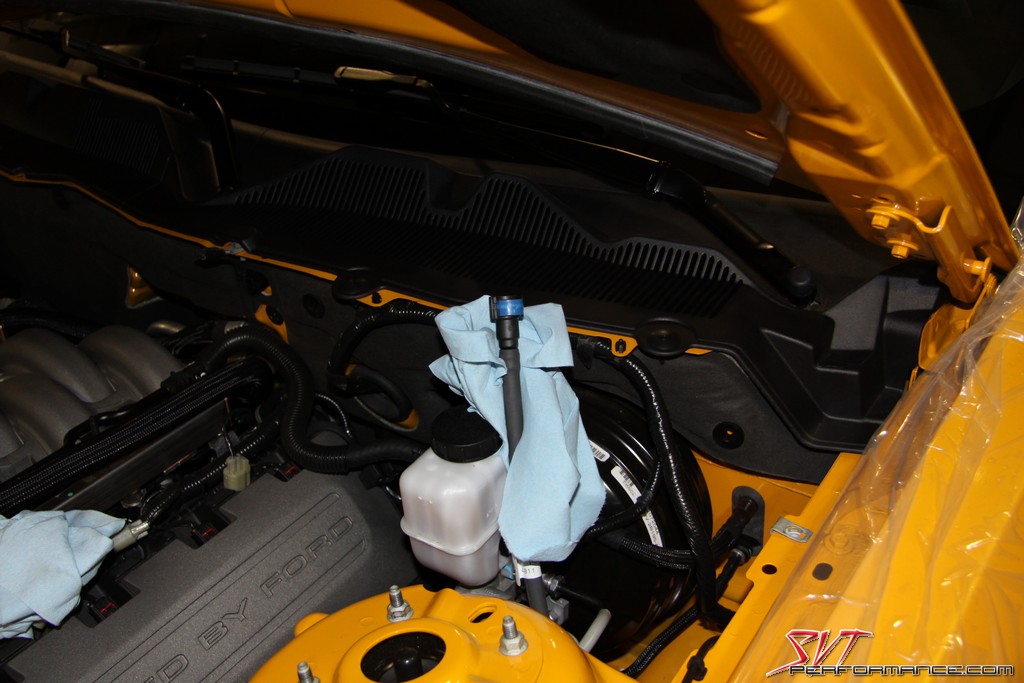
The intake manifold can then be removed.
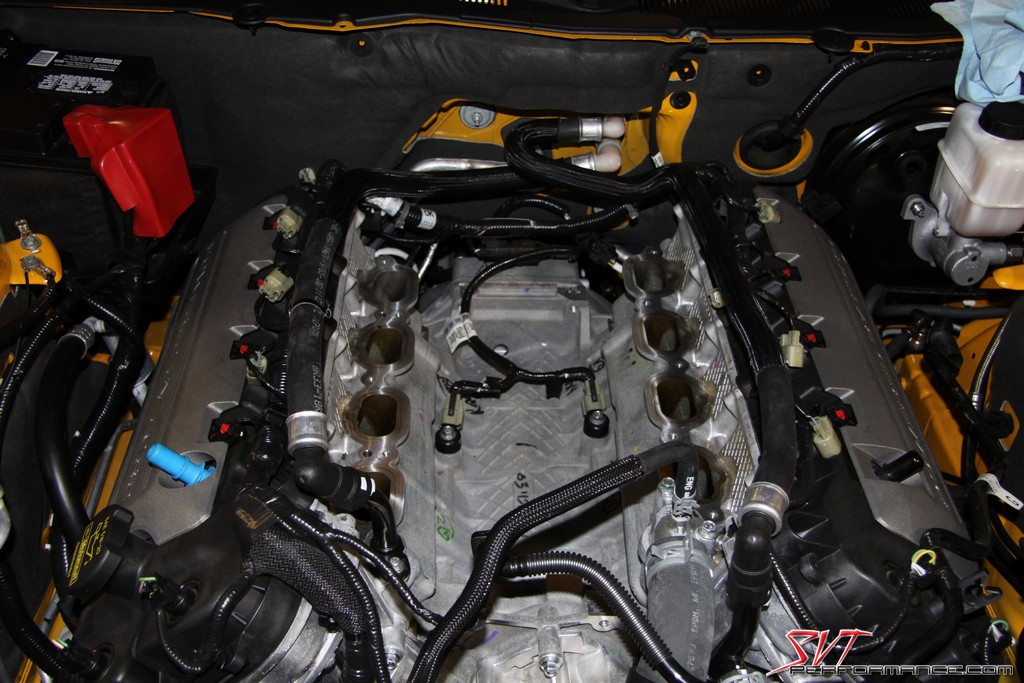
It's a good idea to clean any dirt and debris from around the intake ports.
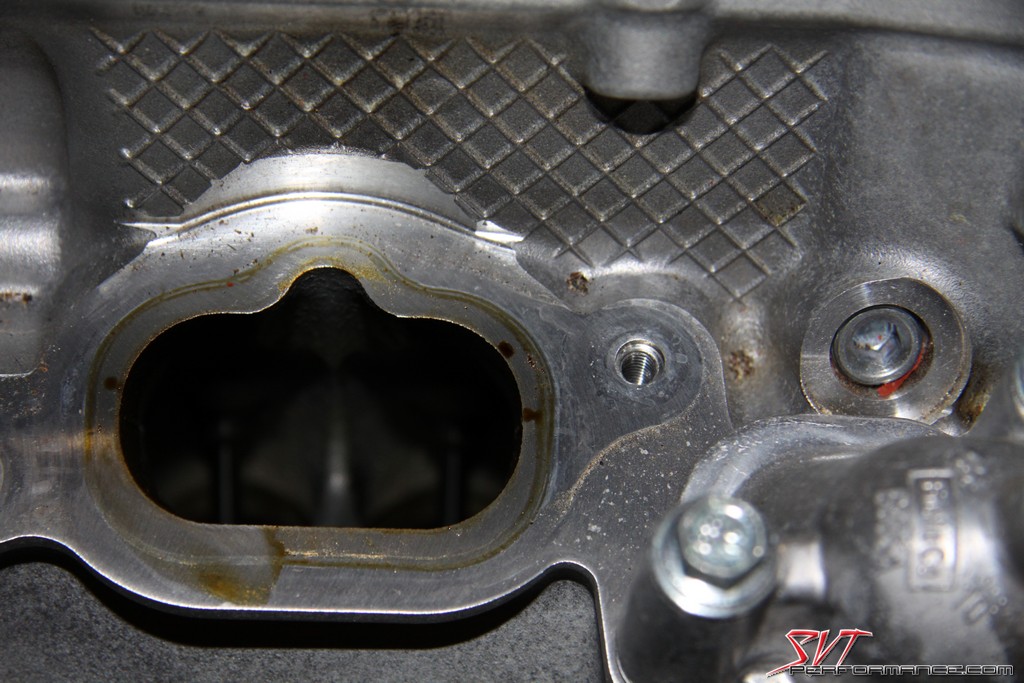
I see a valve stem poking in. You can see the knock sensors in this pic as well.
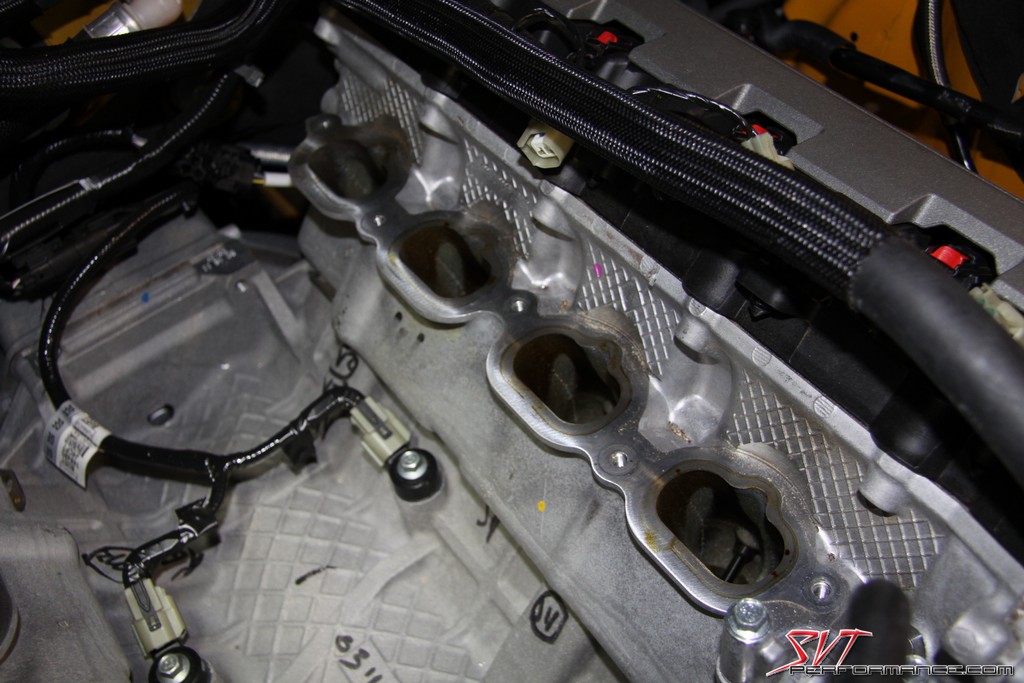
It's a good idea to cover the intake runners with some painter's tape. It's not fun wasting an afternoon fishing for a dropped piece of hardware.
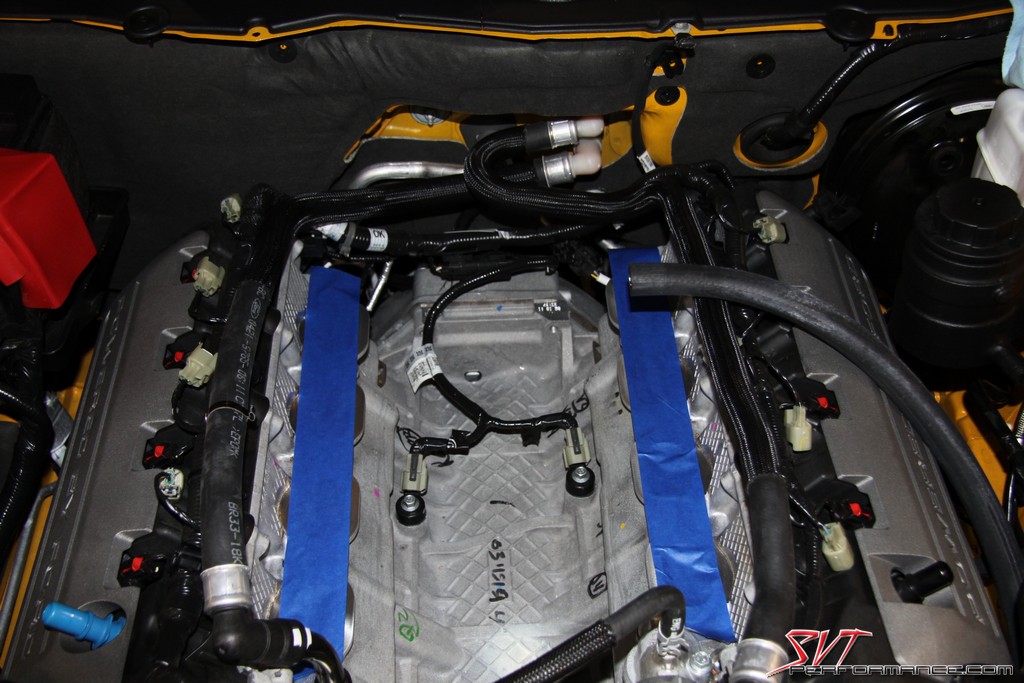
It may look like a lot difficult work, but this install is actually pretty easy for those with a little mechanical inclination.
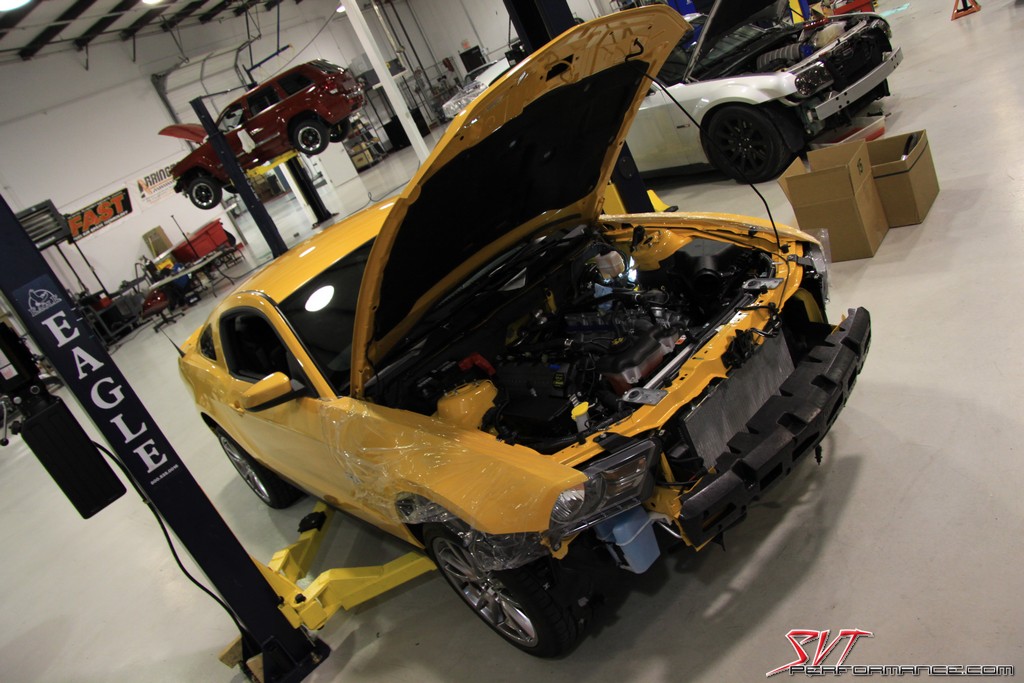
This is the intercooler fluid reservoir and its accompanying bracket and hardware.
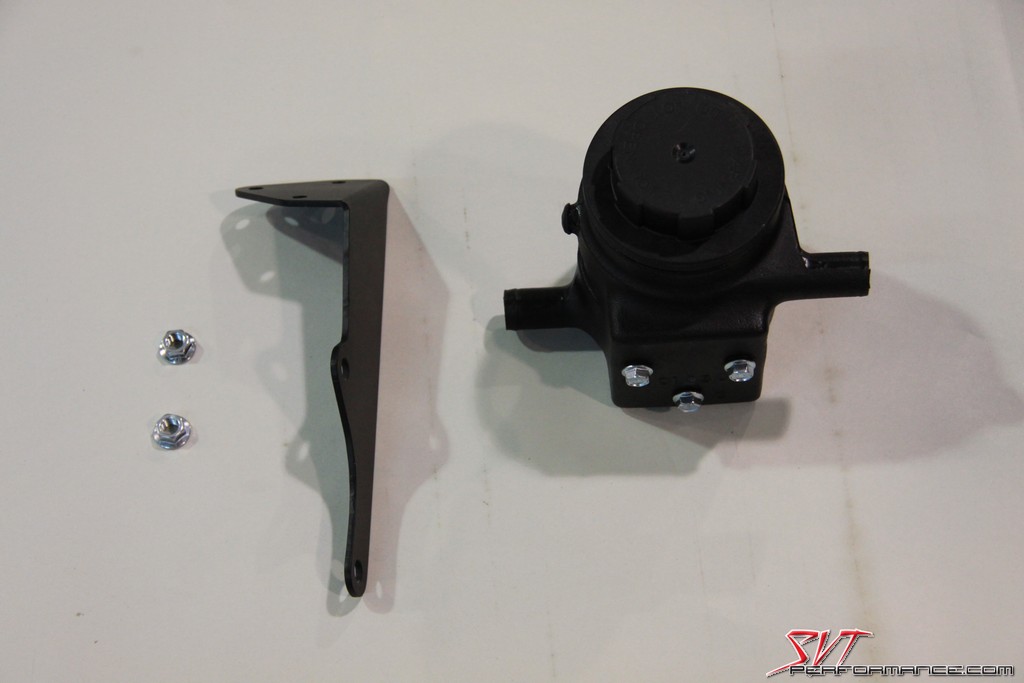
It installs on to the strut tower.
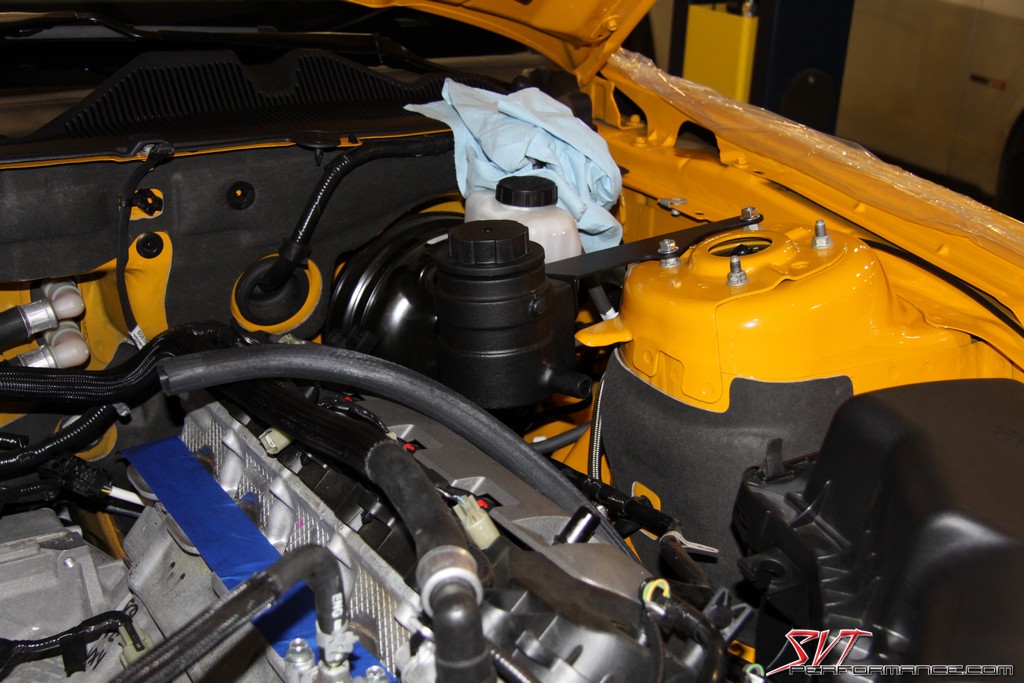
Now it's time to install the intercooler hoses.
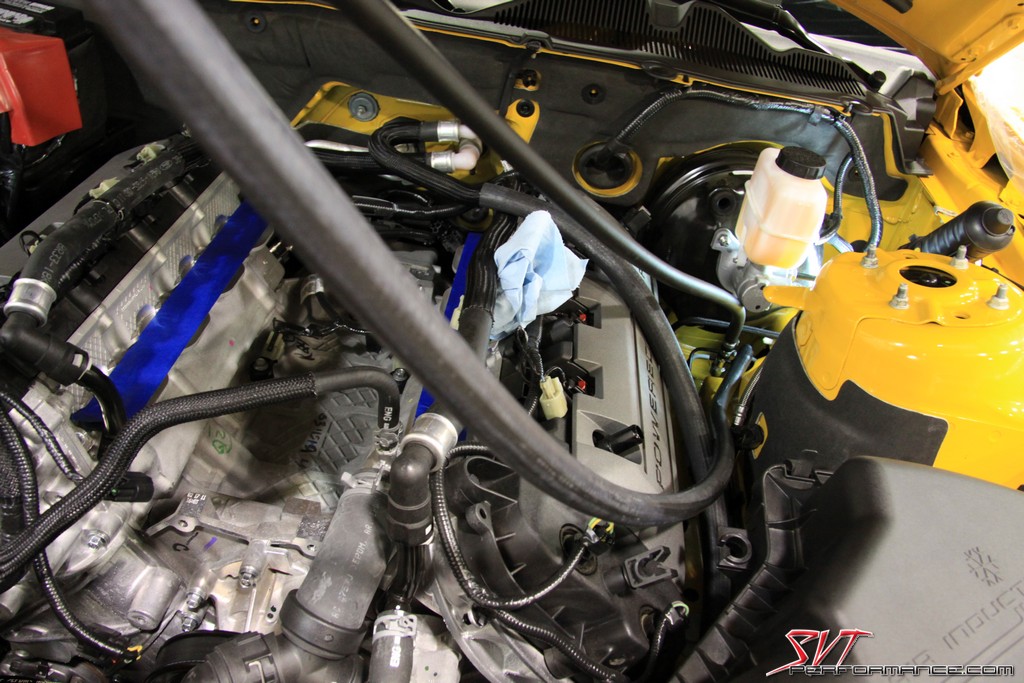
The intercooler hoses are loosely in place.
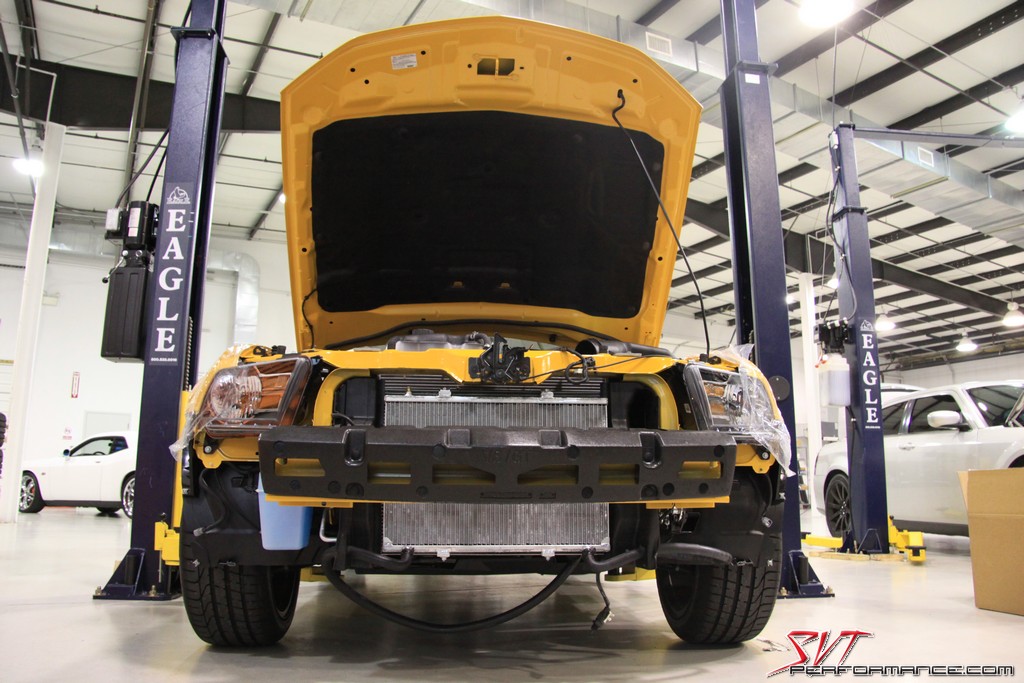
Here you can see the bane of my existence, the spring style hose clamp. Working with these things can be a pain if you don't have the proper hose clamp pliers.
Time to start stripping the stock intake manifold of the parts that will be reused with the Magnuson.
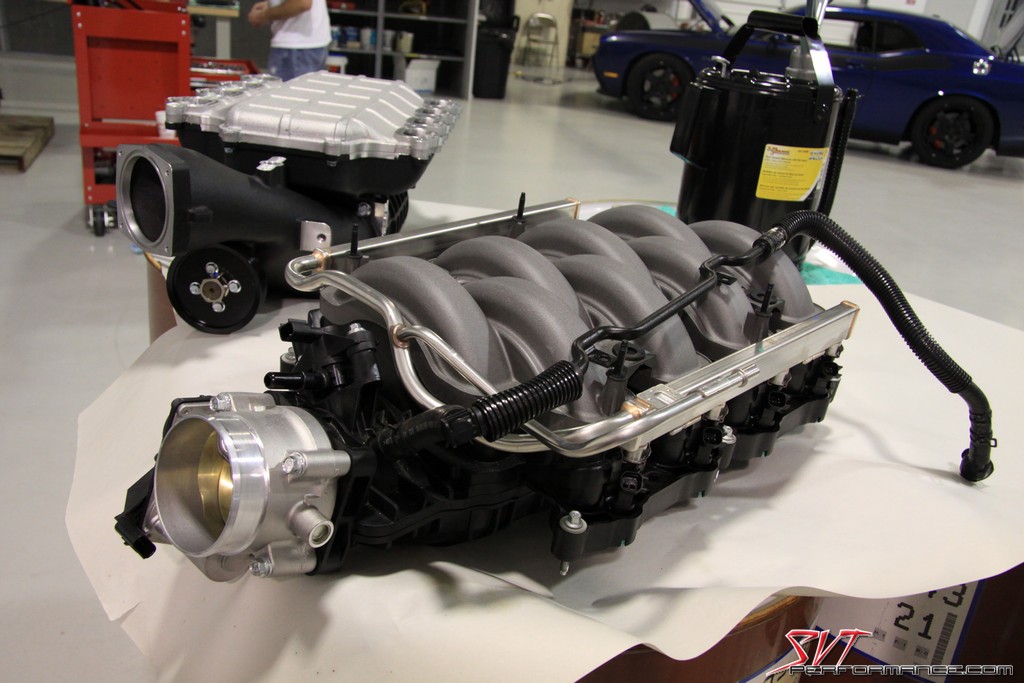
First we scavenged the throttle body.
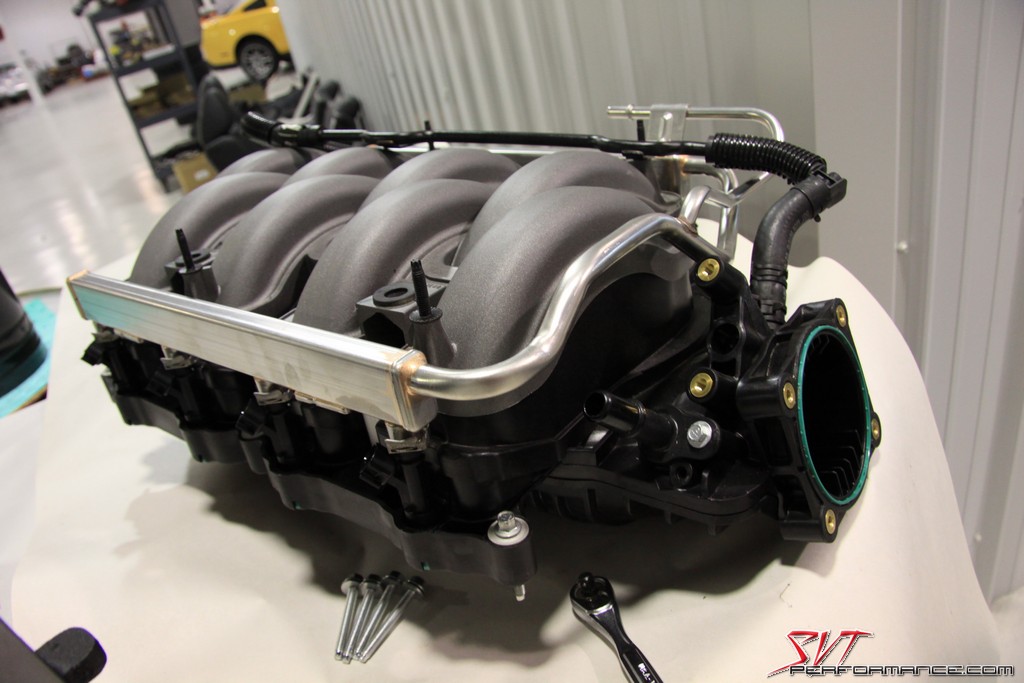
If this opening could could it would probably say "MMmmmm, CAMARO!!! OM NOM NOM!!!"
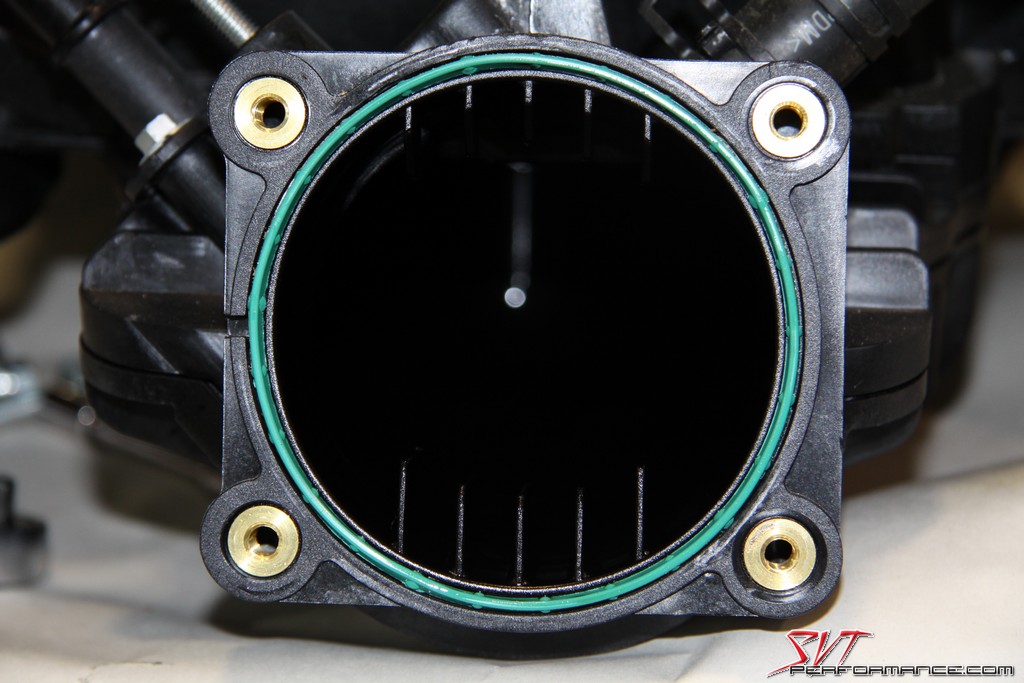
If you haven't gotten a good look at one yet, this it the Coyote throttle body.
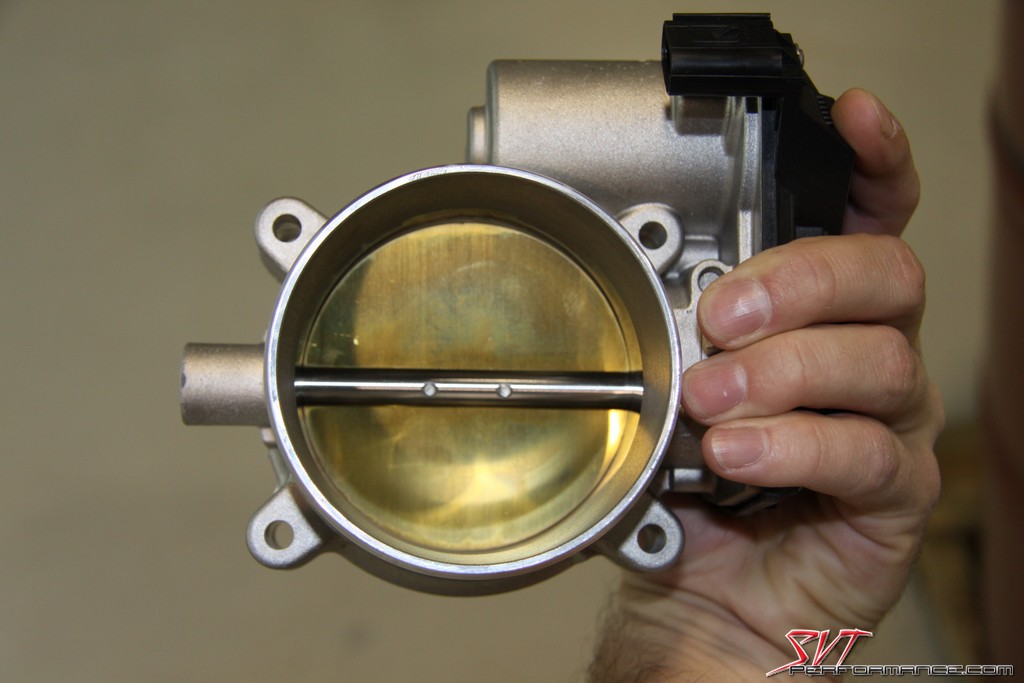
Though you can reuse the stock throttle body gasket we elected to use a new one. We bought ours from SVTP Vendor Tousley Ford.
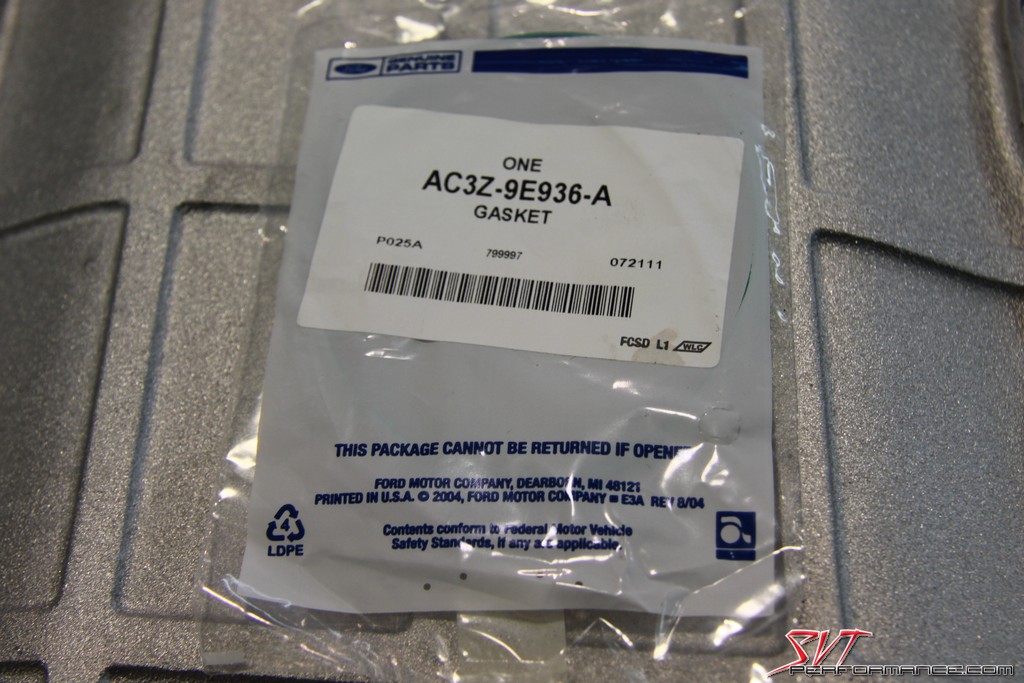
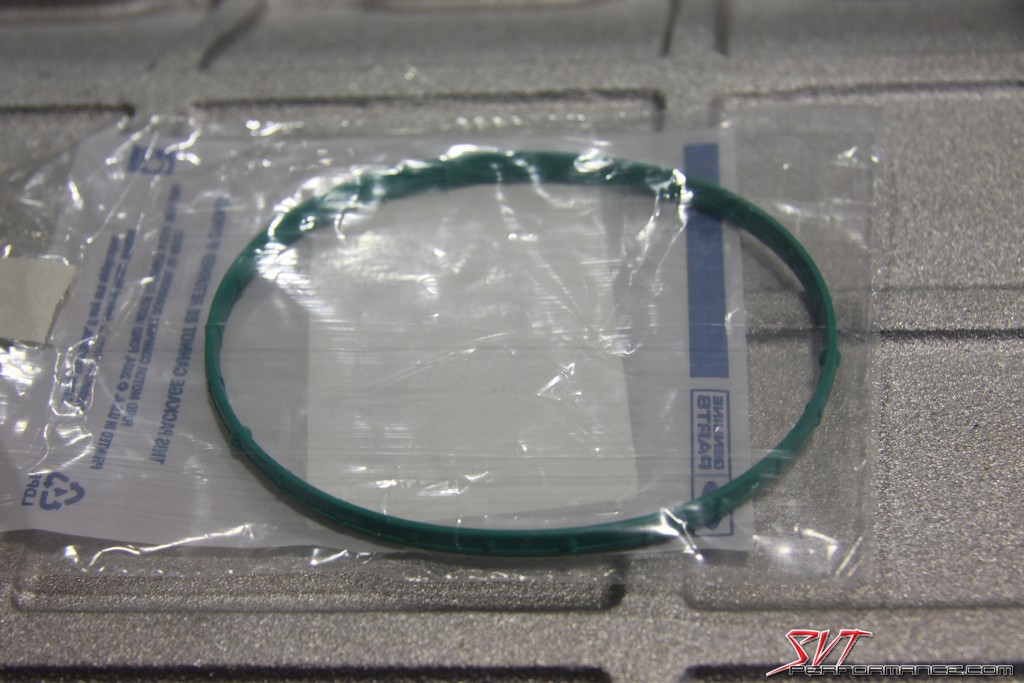
The stock gasket is a great quality piece. Much better than the paper gaskets of years past.
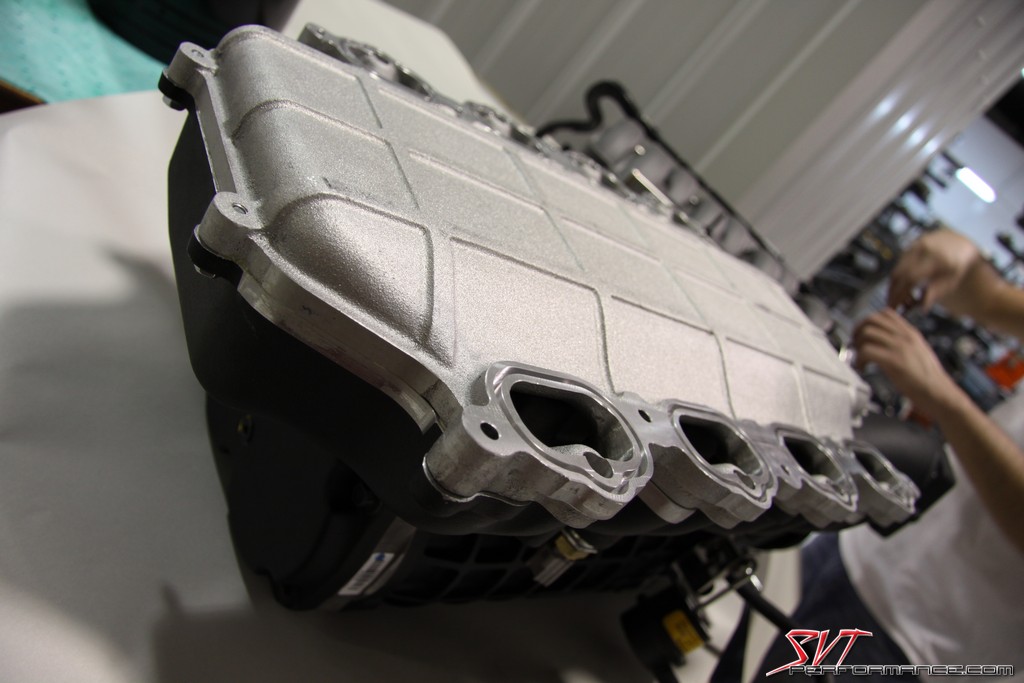
Like the stock manifold, the Magnuson blower has grooves machined in it to accept (IMO) Ford's best designed intake gaskets.
Again, even though you can reuse the stock manifold gaskets we elected to give Tousley Ford a call and get some new ones.
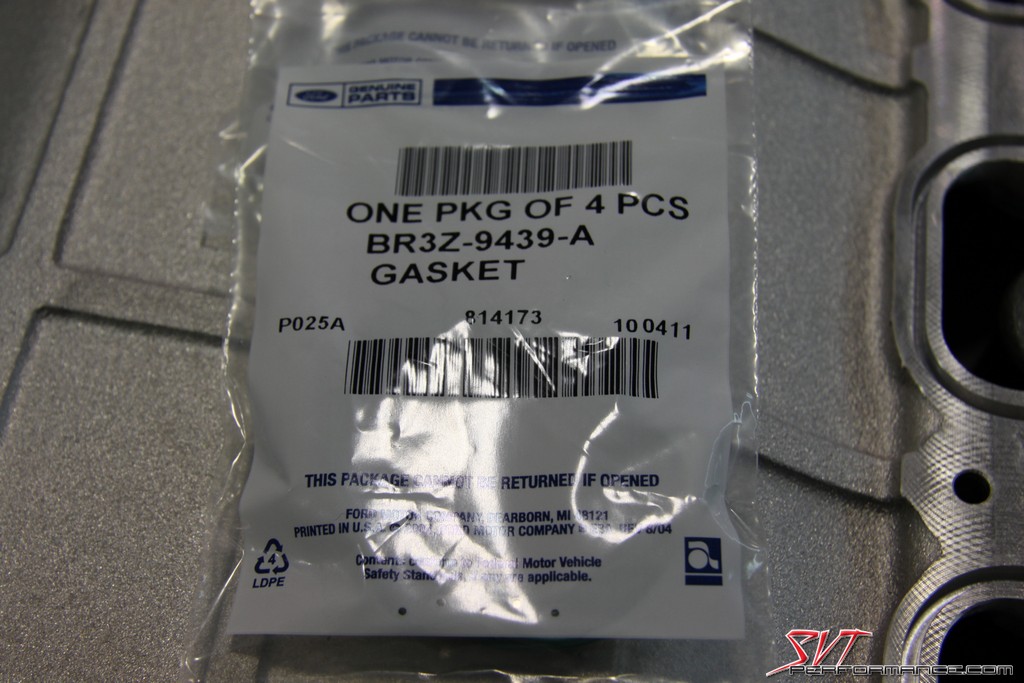
The manifold gaskets are a similar design to the throttle body gasket and come 4 to a pack.
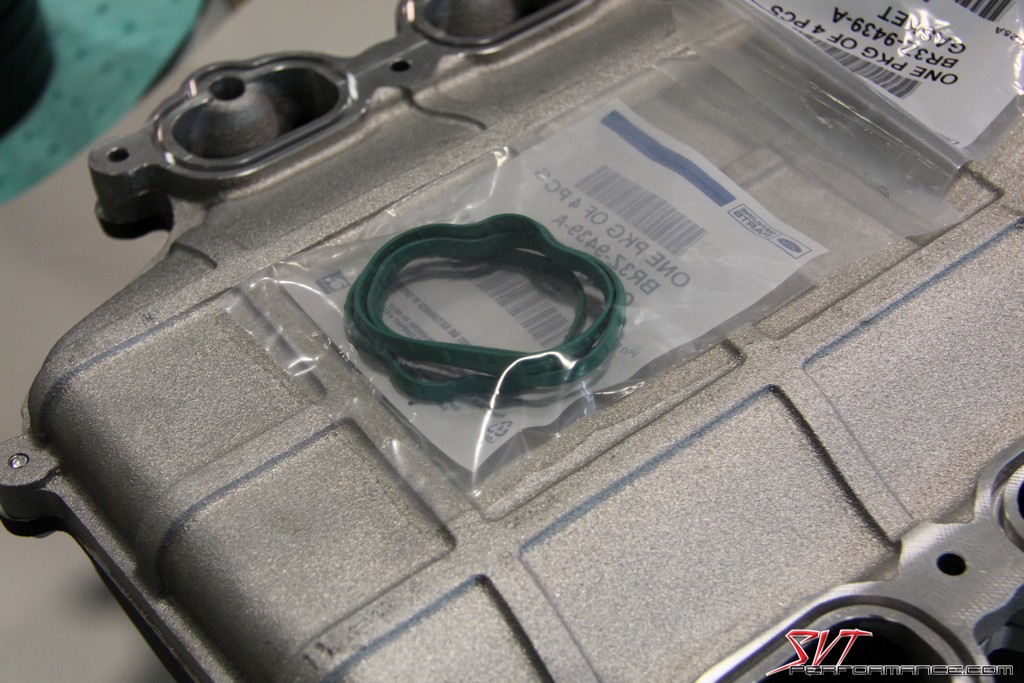
The individual gaskets can then be installed into their respective machined grooves. These separate gaskets are much easier to deal with than the old 2V modular units I'm used to dealing with.

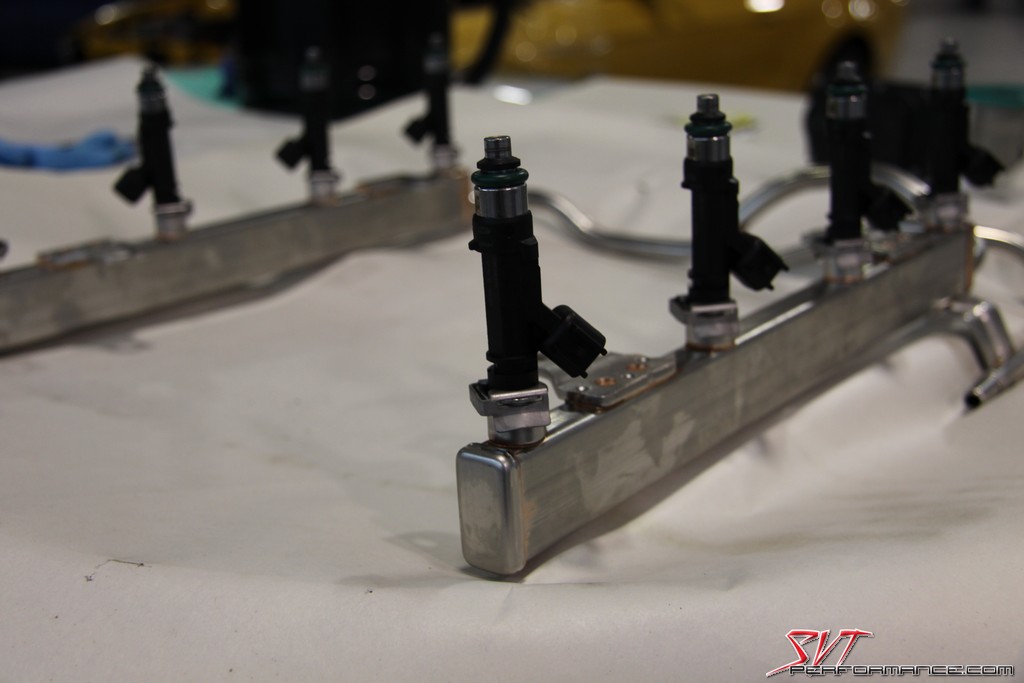
The Magnuson kit includes these new fuel injectors. They are actually the same ones used on the 2011-2012 SVT Shelby GT500.
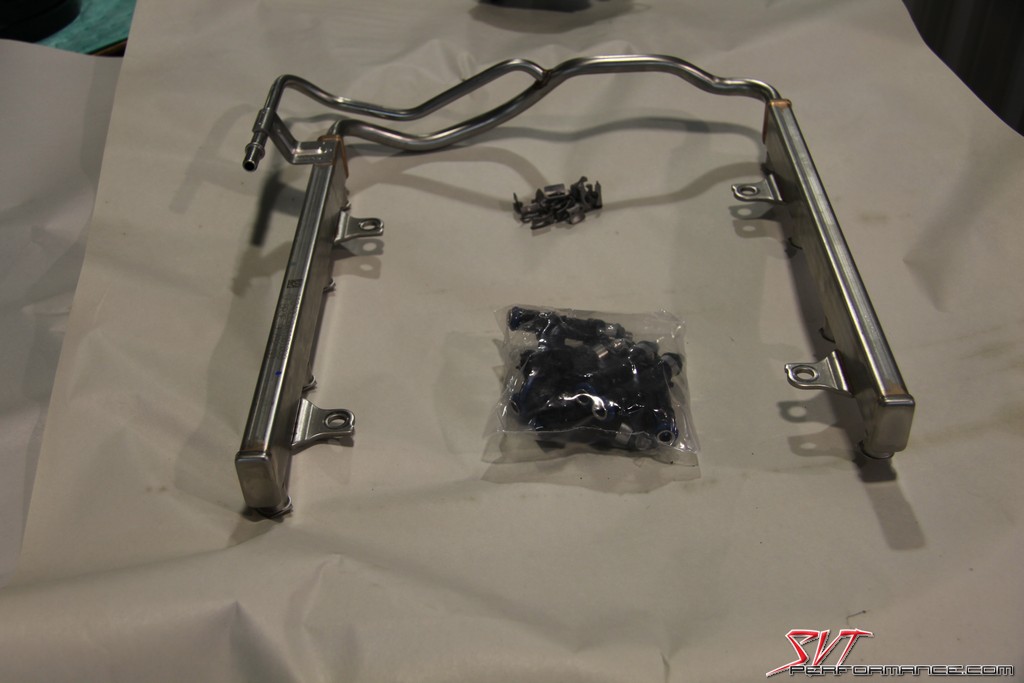
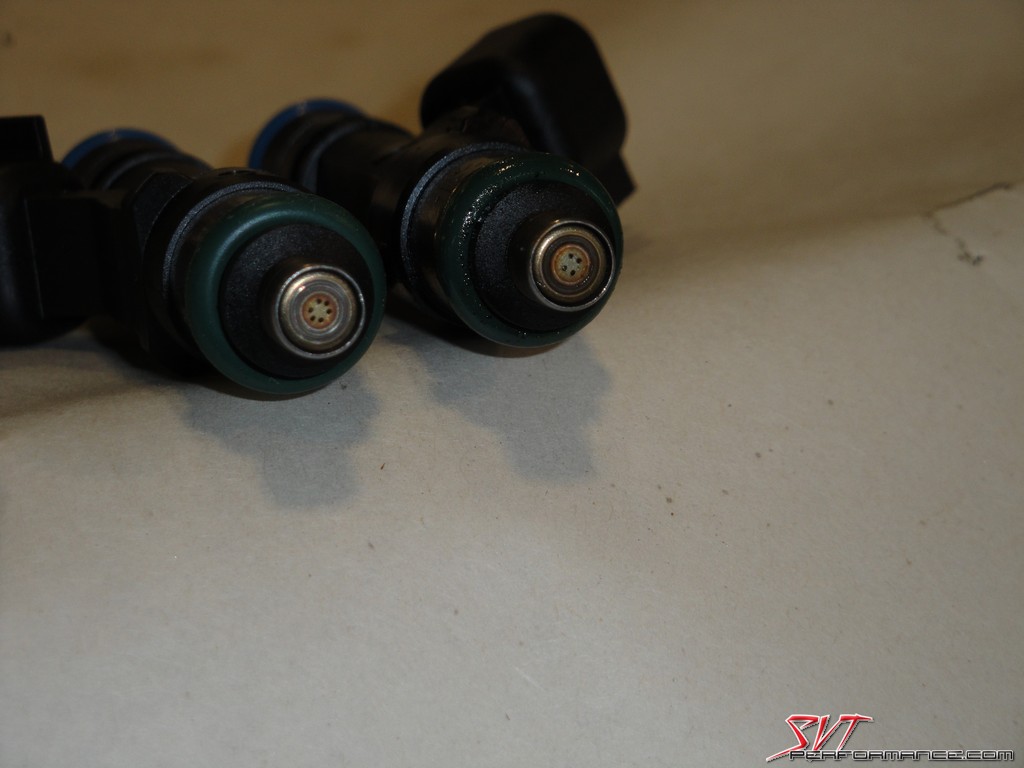
The stock injectors are a four-hole design, whereas the new ones utilize six-holes. That should help flow more fuel and improve atomization.
Magnuson even includes this little tube of grease to lube the fuel injector o-rings.
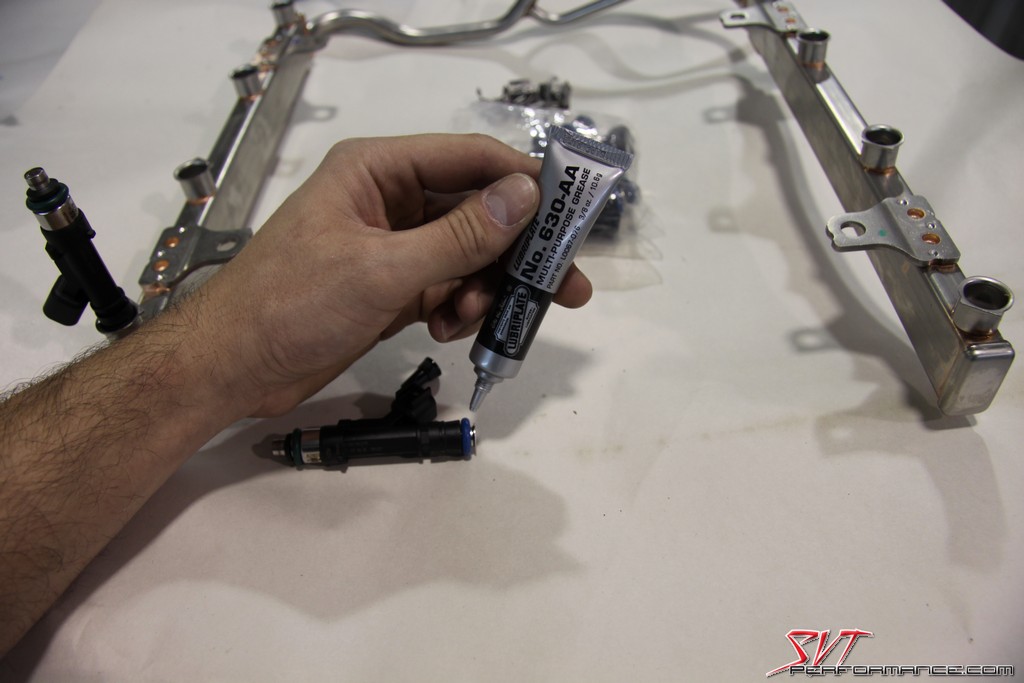
The new injectors are clipped into place on the rails.
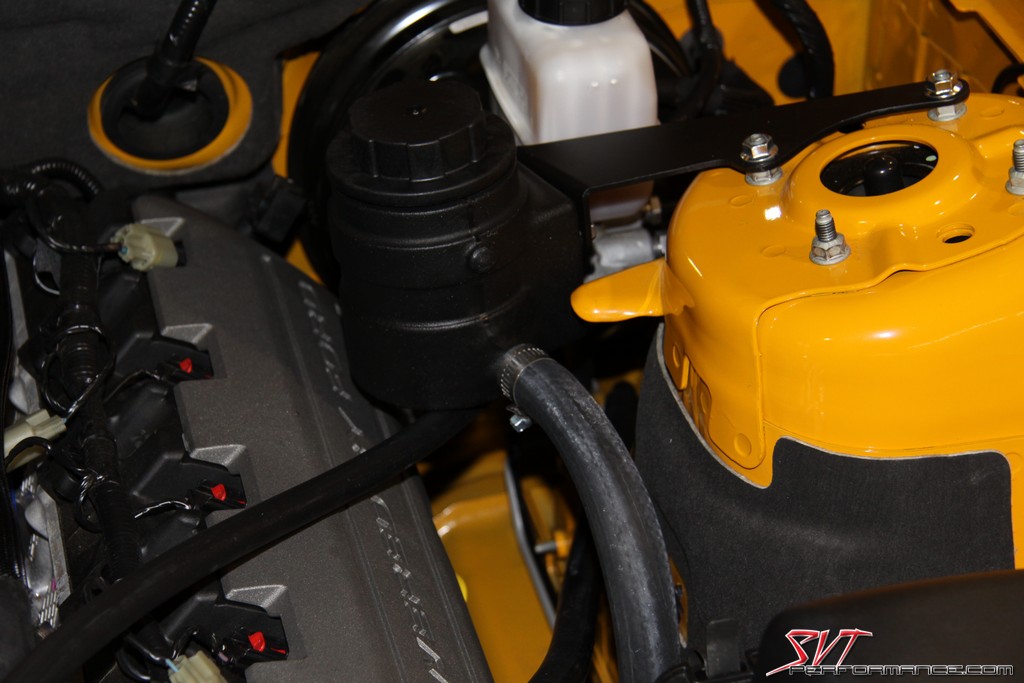
The evaporative emissions purge valve gets relocated to the Magnuson blower case.

We then started with the plumbing work.
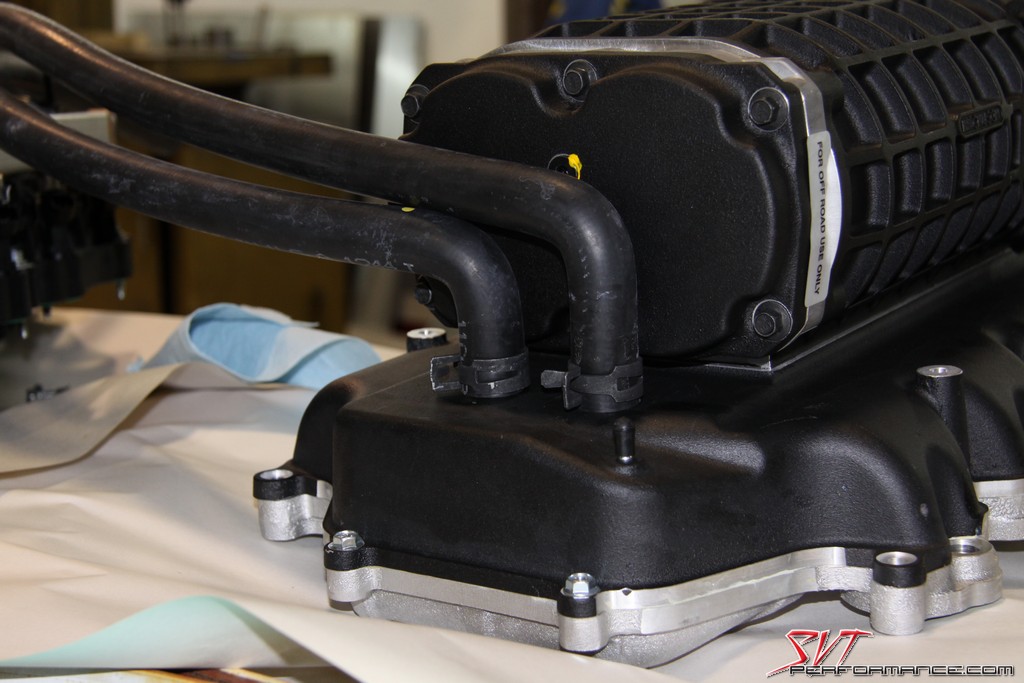
The coolant lines get installed on the back of the supercharger.
With all the wiring and coolant hoses safely out if the way it's now time to drop the blower on the engine.
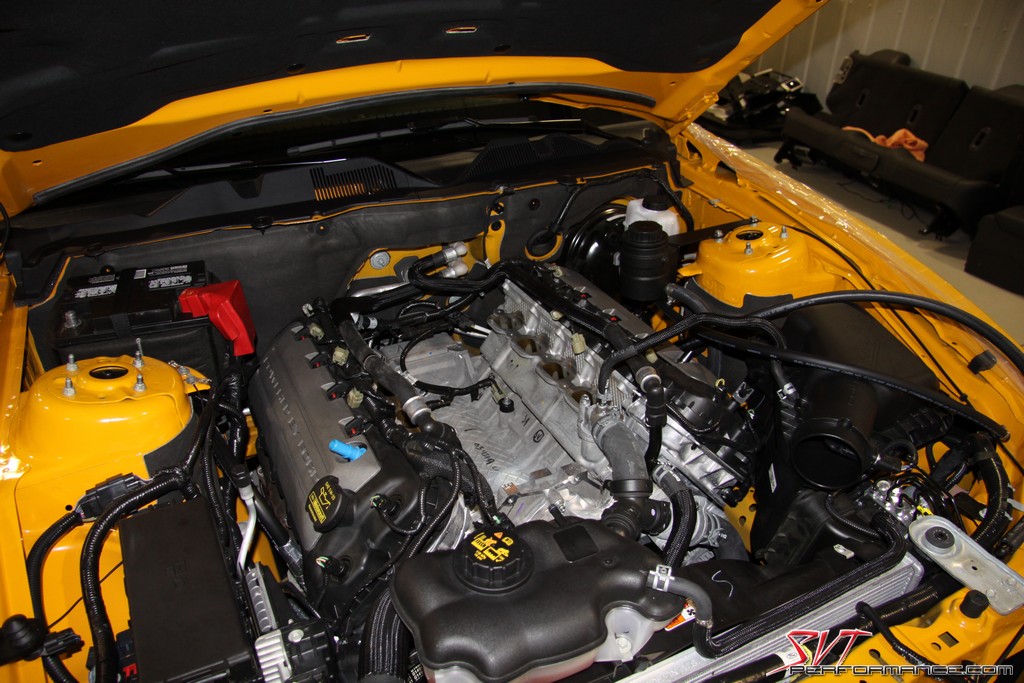
This is the part where you get two mechanics to carefully lower your precious supercharger in place while you stand back and take photos.
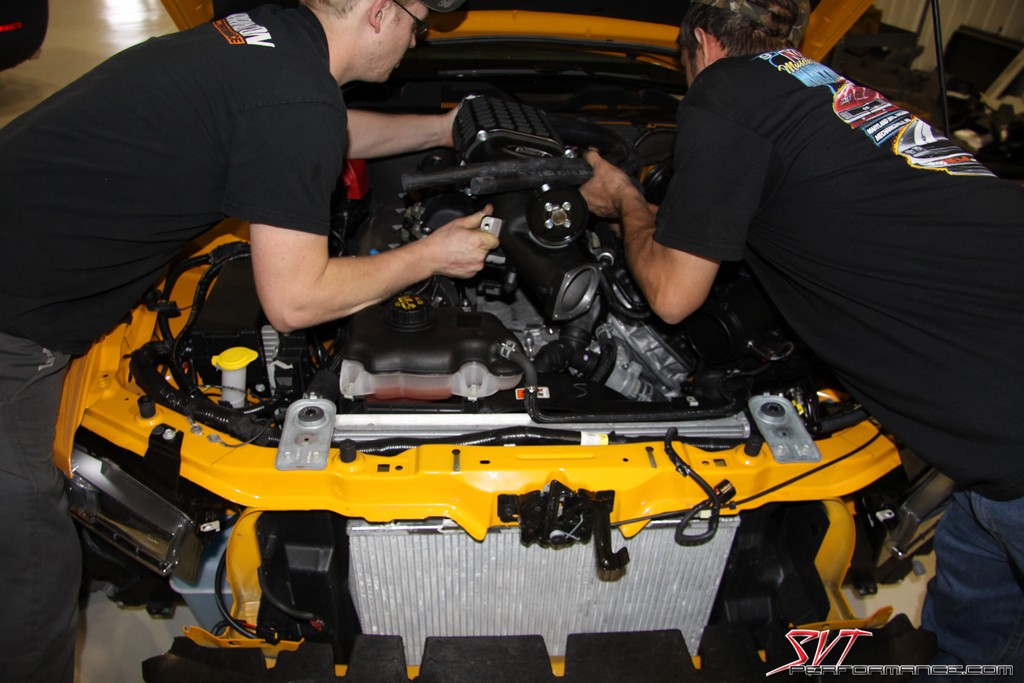
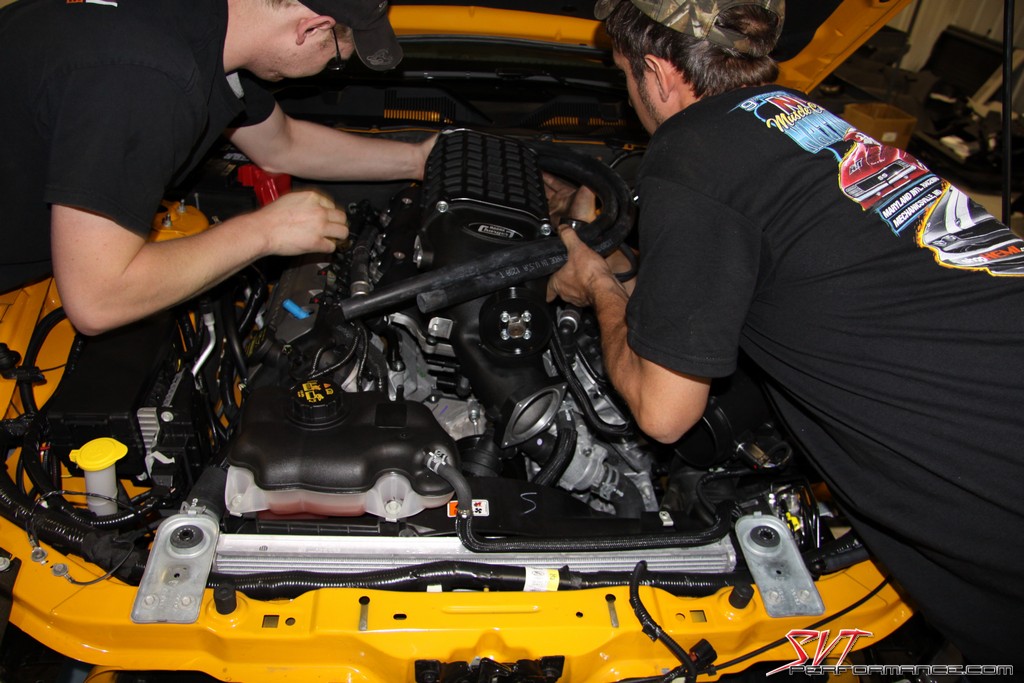
Because there are so many possible obstructions to hold back and move out of the way it really helps to have two sets of hands during this step.
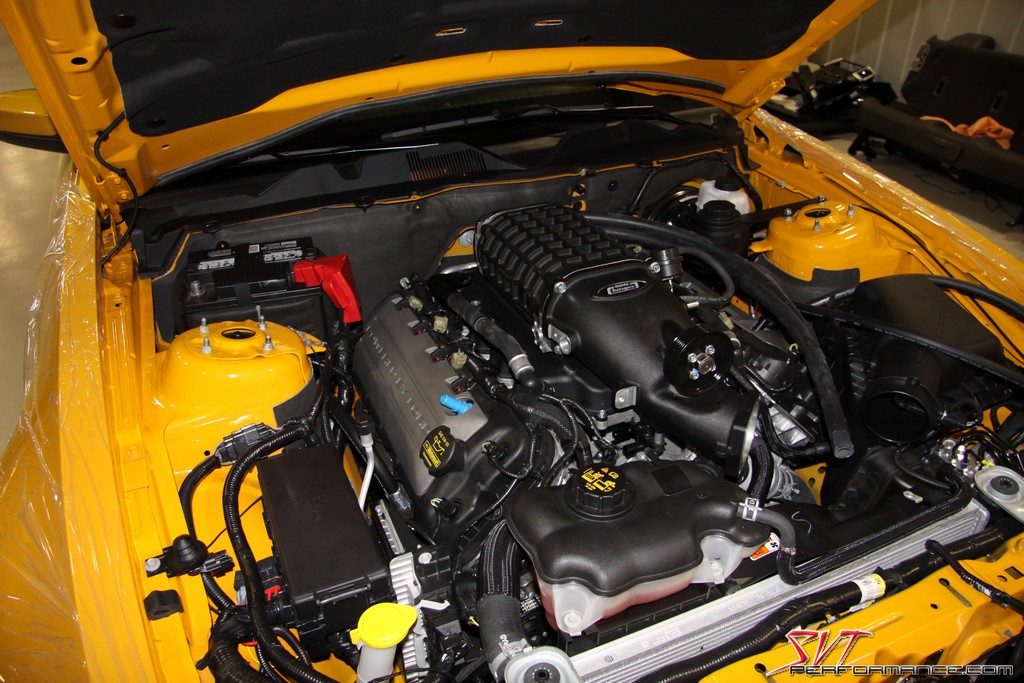
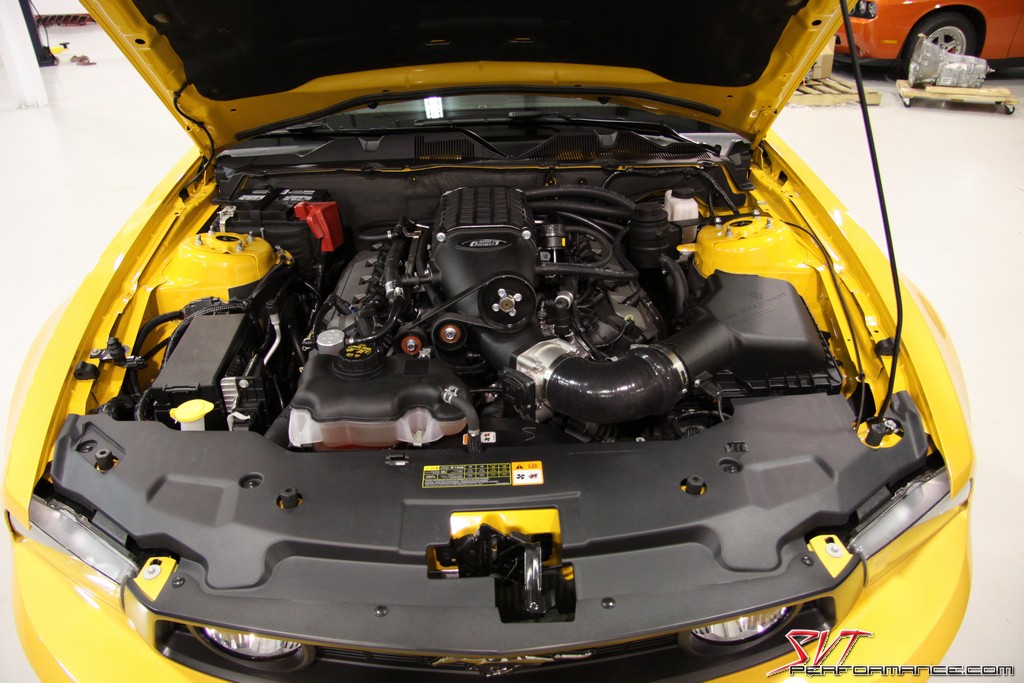
However, once it's setting in place you can really step back and appreciate how awesome this blower looks on the 5.0.
At this point it's time to bolt the supercharger assembly to the cylinder heads with the supplied hardware.
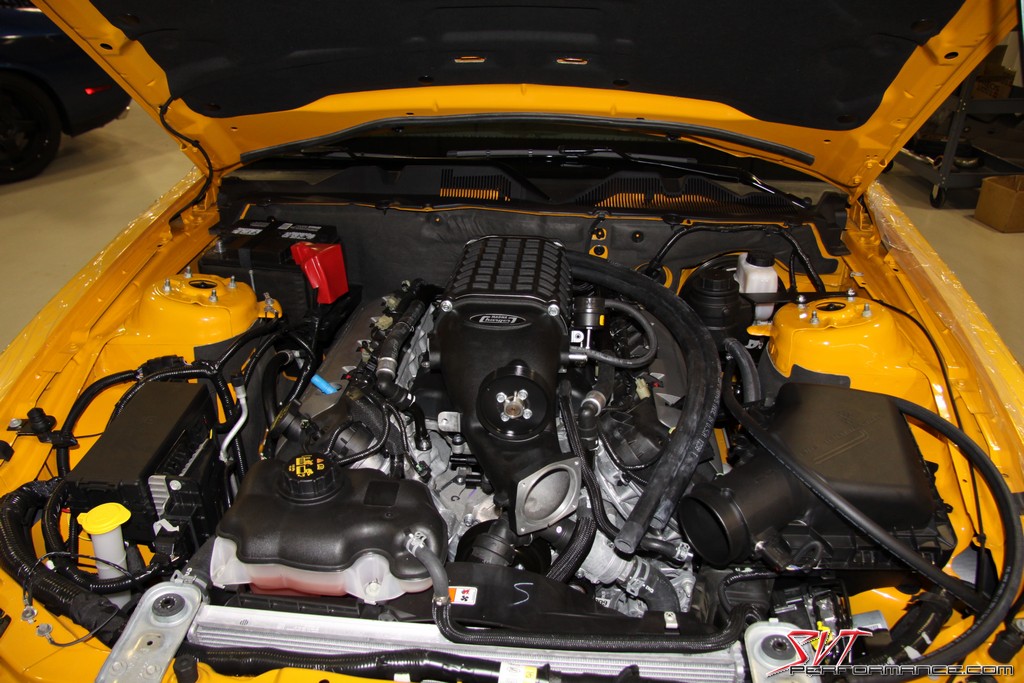
A couple of the blower bolts are a different length than the others, you'll have to pay special attention and make sure they are installed in the proper location.
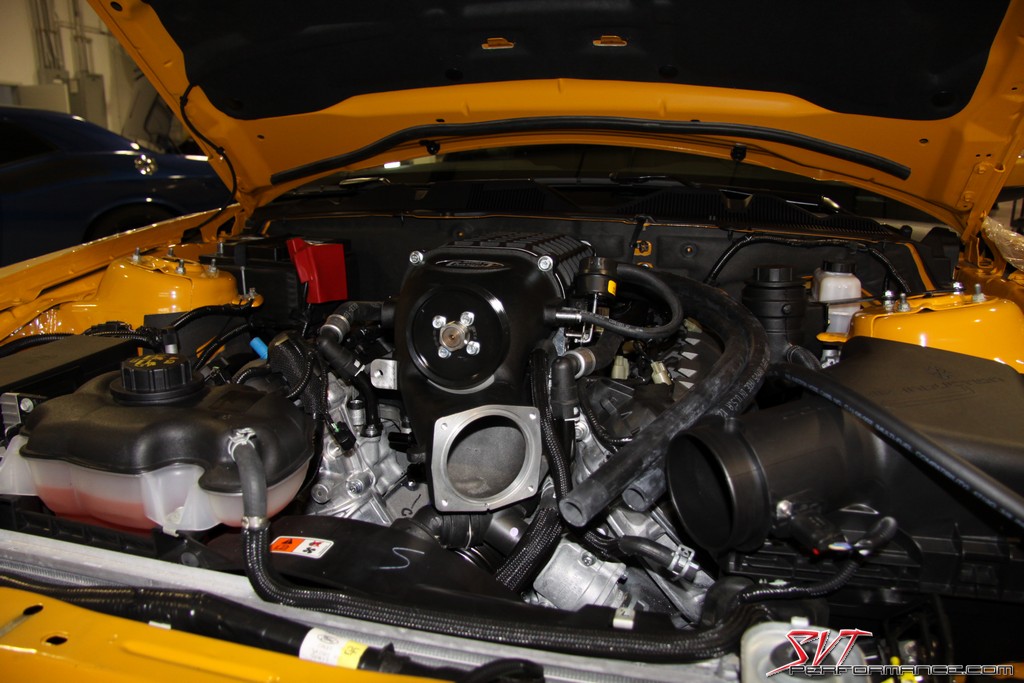
From here on out the rest of the installation will go fairly quickly.
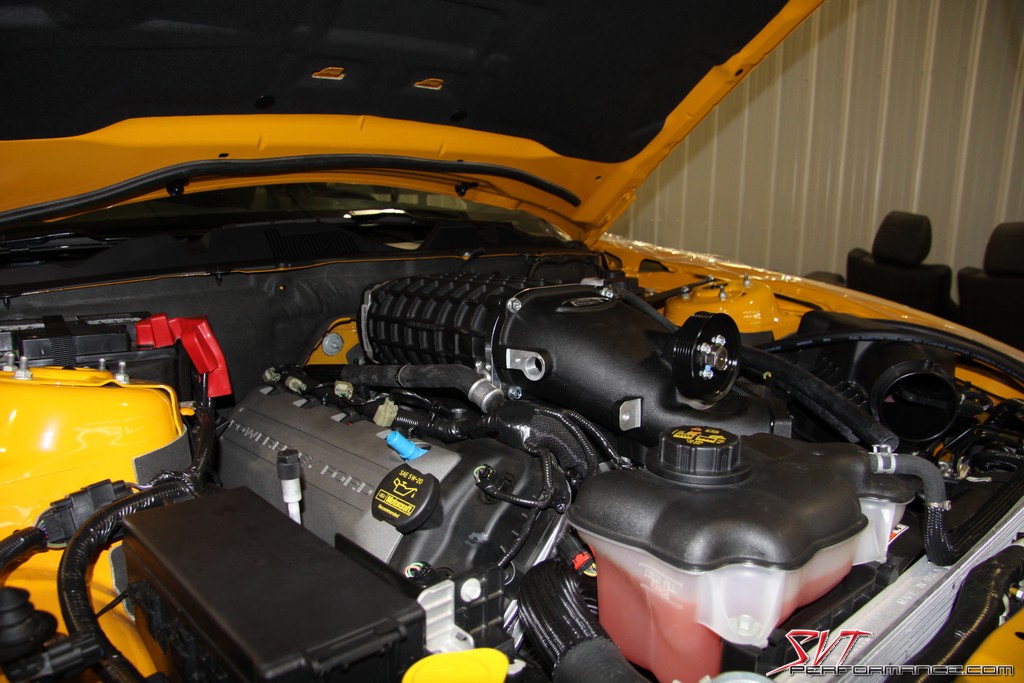
The fuel rail assembly is reinstalled backwards from its stock position.
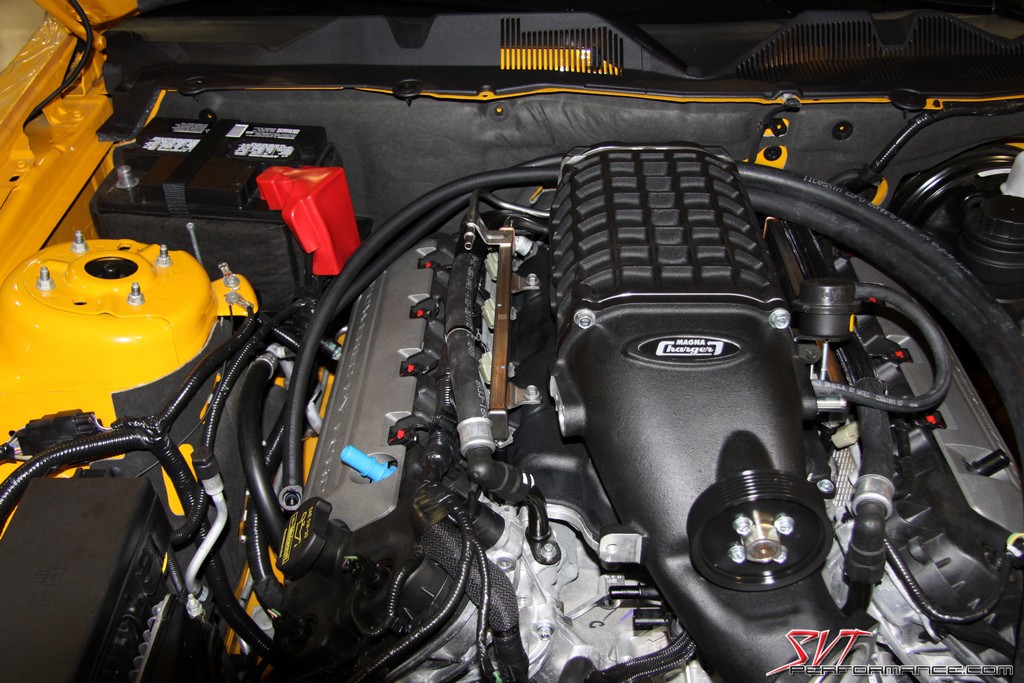
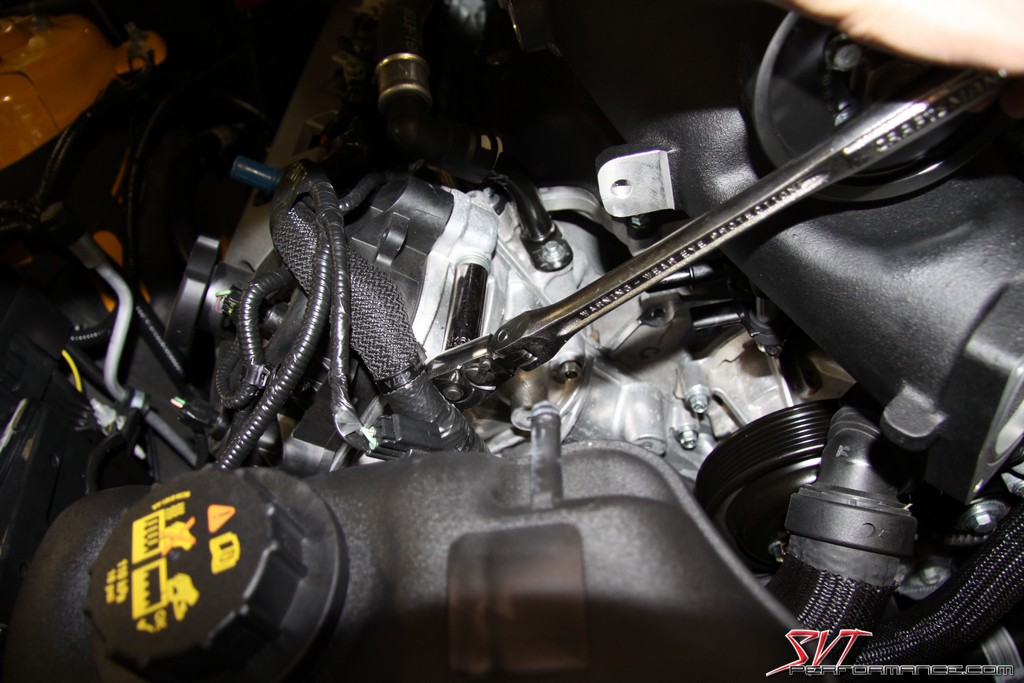
This front cover bolt must be removed in order to install the idler bracket, which thankfully requires no cutting or grinding of the front cover as part of the installation.
The bolt which holds this idler pulley in place also attached the idler bracket to the blower case. A third bolt connects the bracket to a preexisting tapped hole in the engine block.
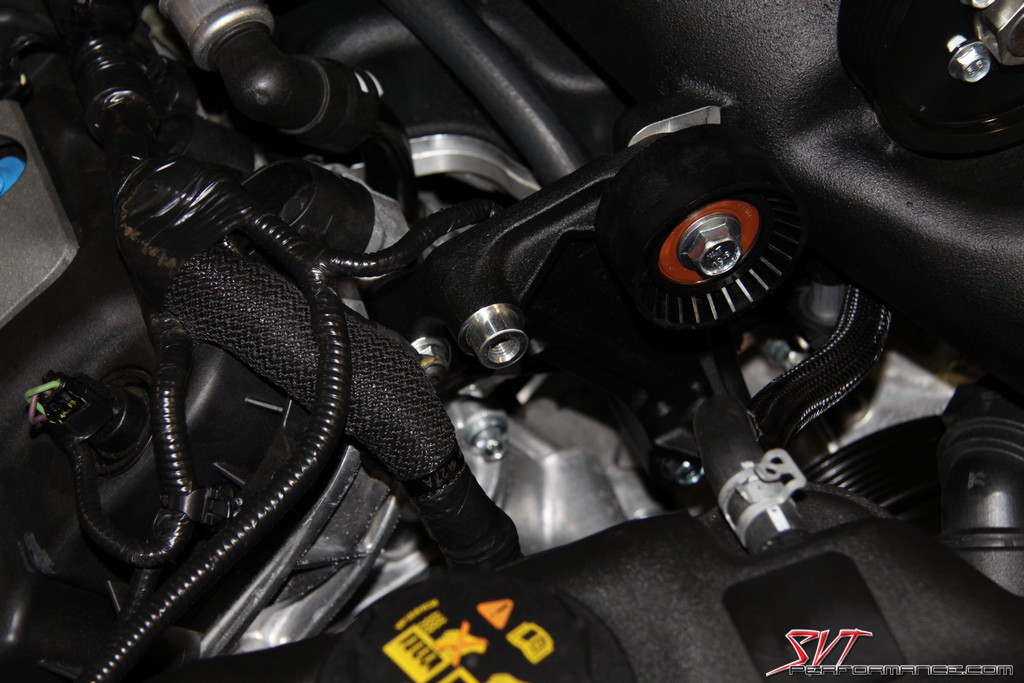
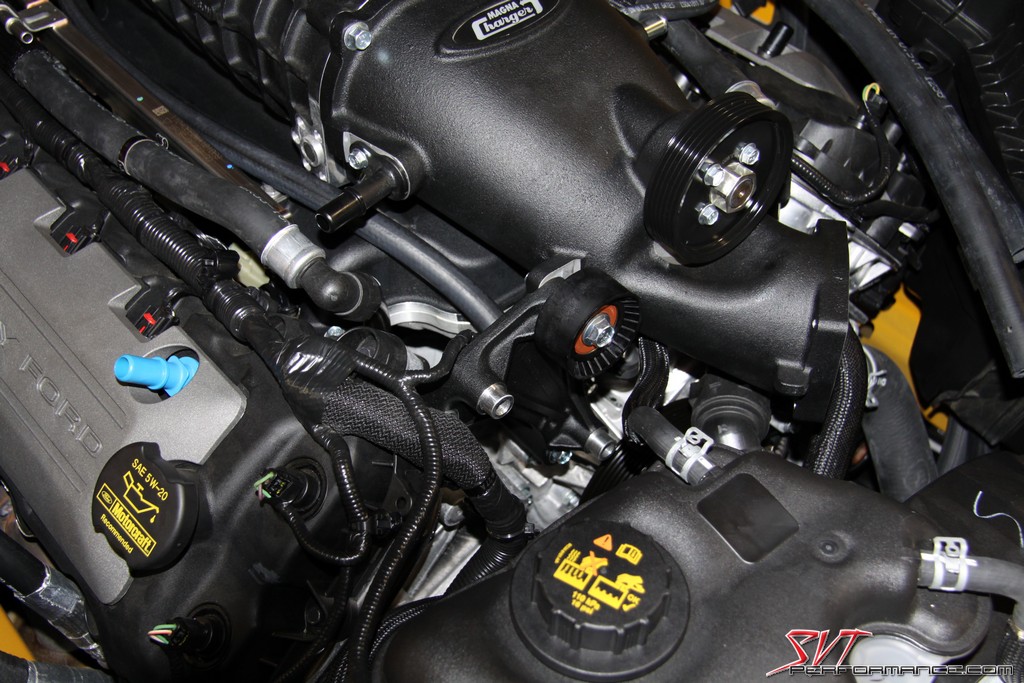
This small bracket is one of the key features that makes the Magnuson blower kit so easy to install. At some point I installed the nipple for the passenger side PCV hose.
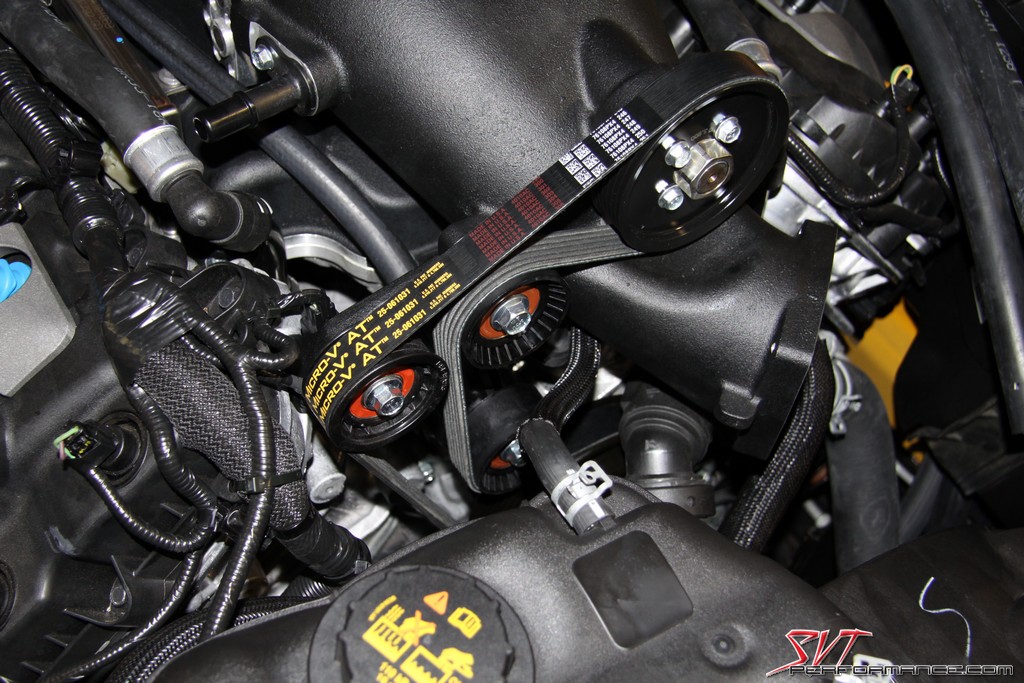
Here the Gates belt included in the kit is installed.
Ready to have the throttle body reinstalled.
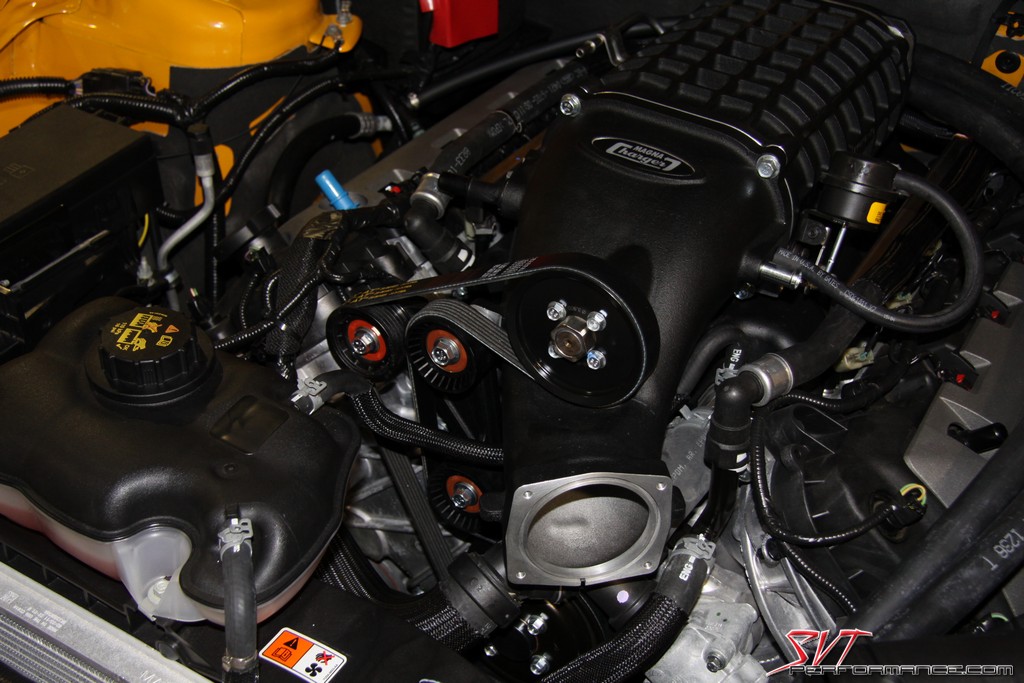
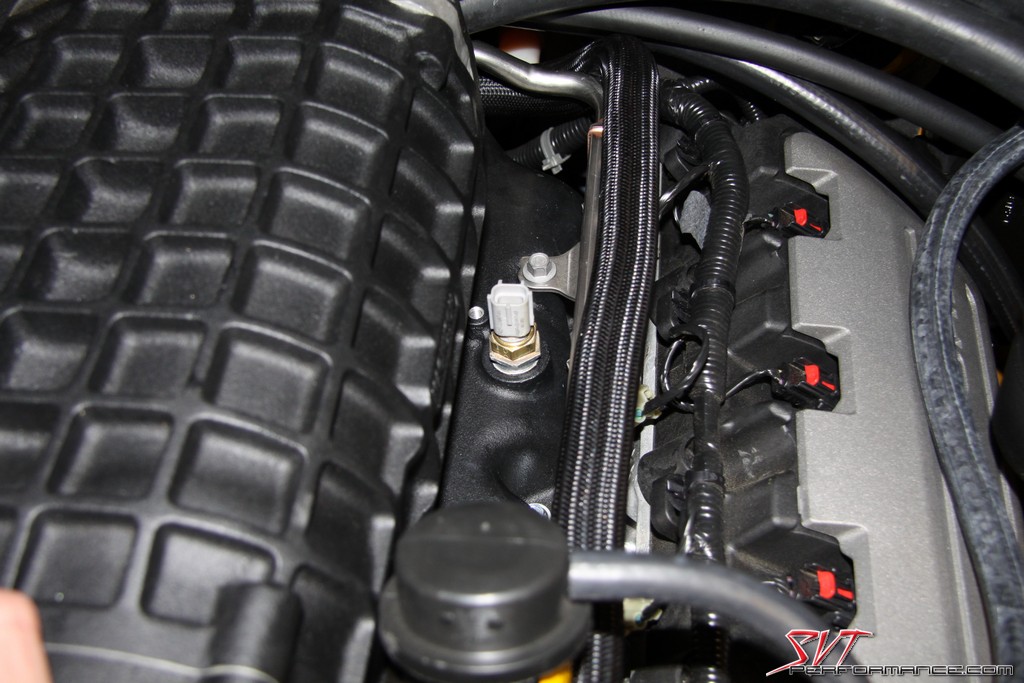
With the aid of a jumper wiring harness the the Magnuson kit redirects the IAT signal from the MAF sensor to a new sensor in an intake runner after the air charge passes through the intercooler.
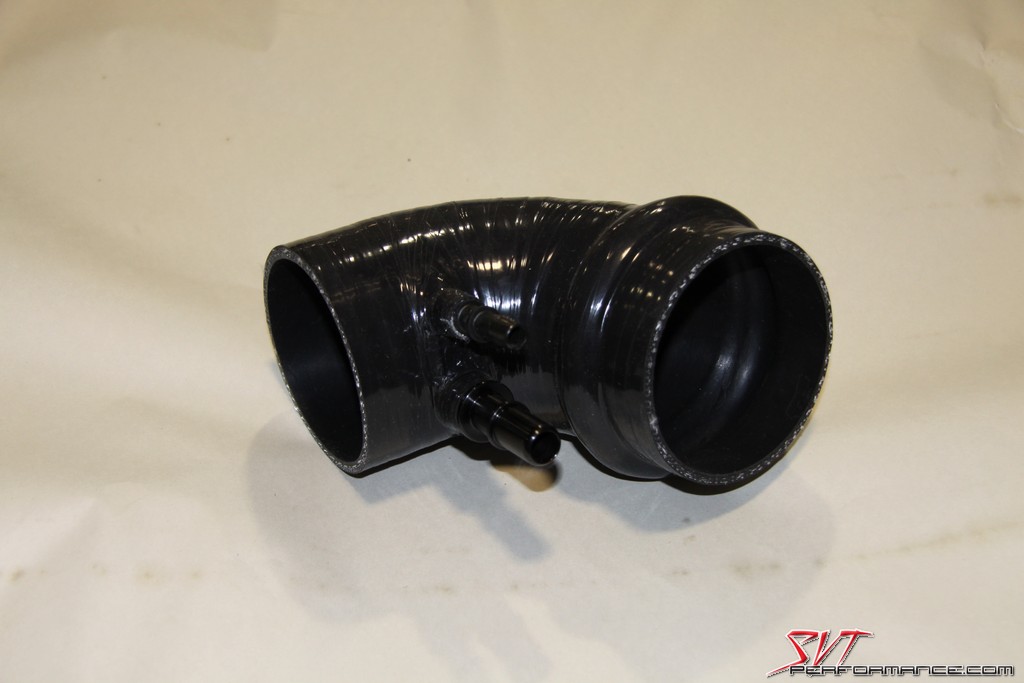
The silicone intake elbow included in the kit is a very well made high-quality piece.
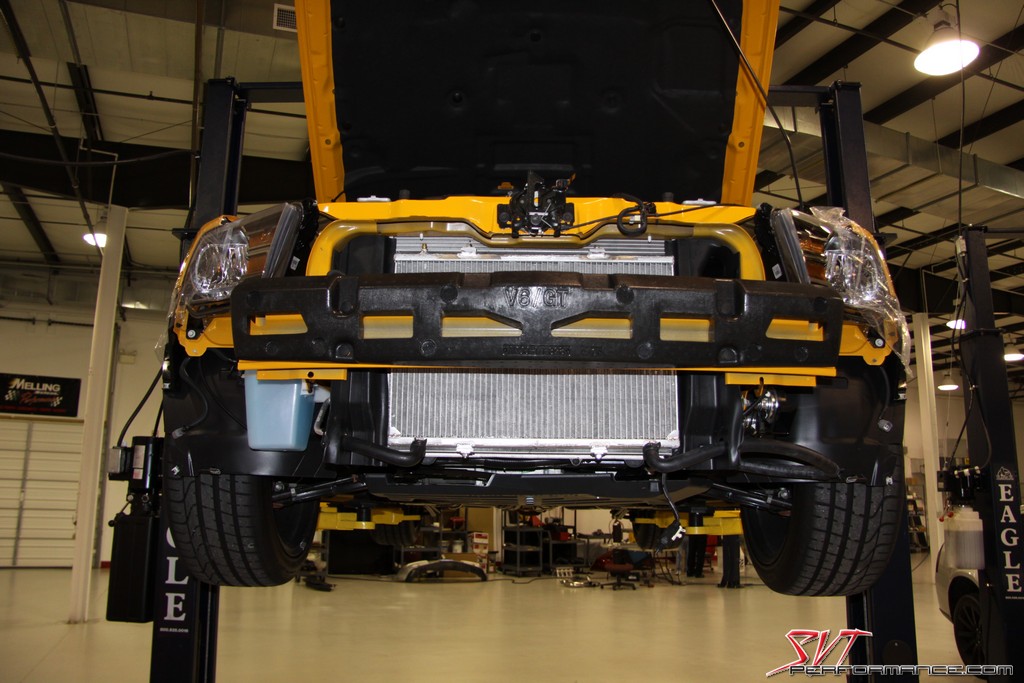
The heat exchanger takes up a lot of real estate in front. It should get plenty of airflow.
Ready to have the body work reinstalled.
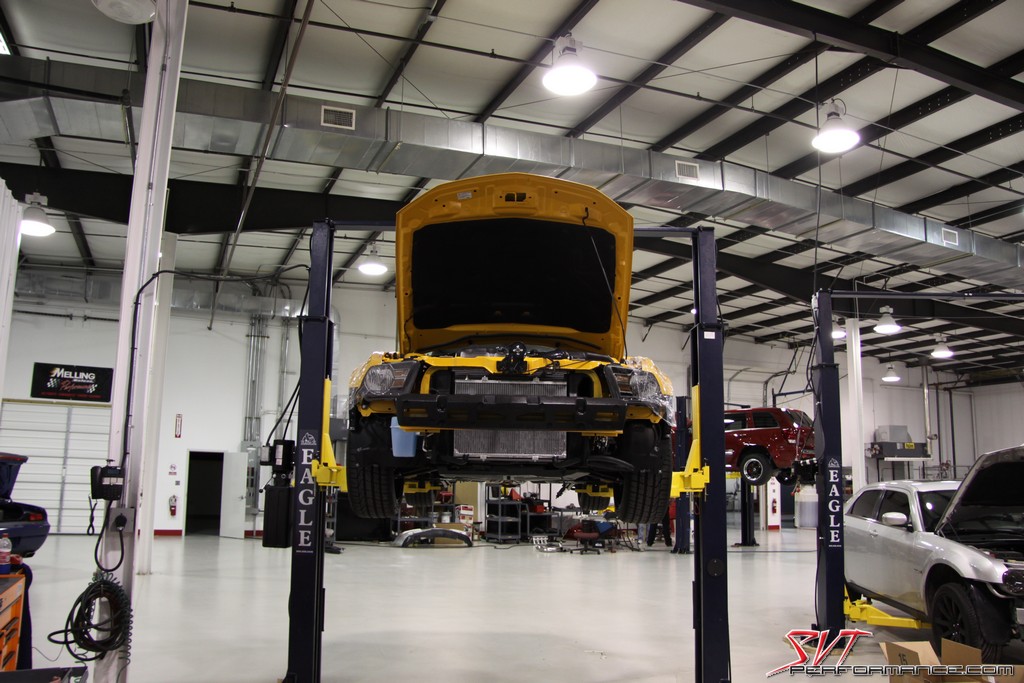
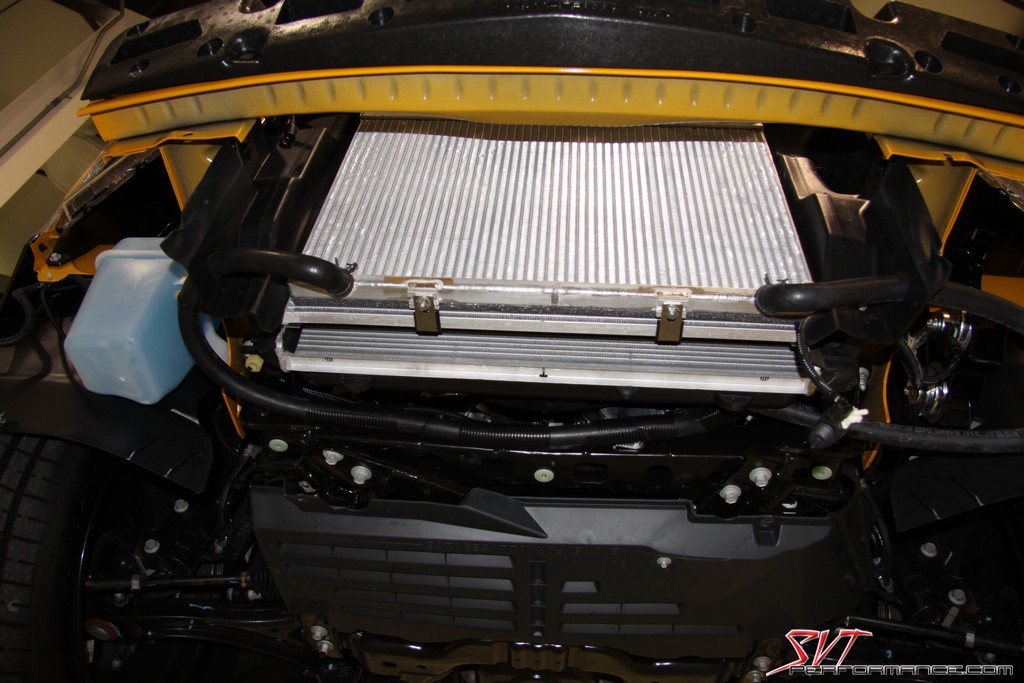
Here is the final hose routing after being zip-tied and covered with protective loom.
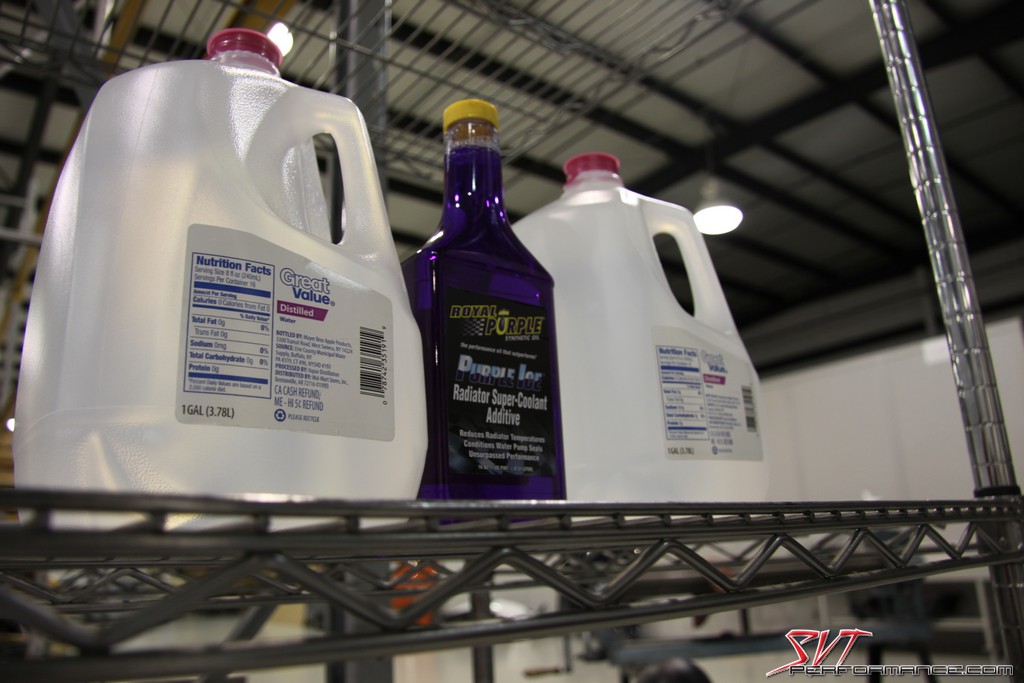
Here is our choice for intercooler fluid, distilled water and Royal Purple : Purple Ice Coolant Additive.
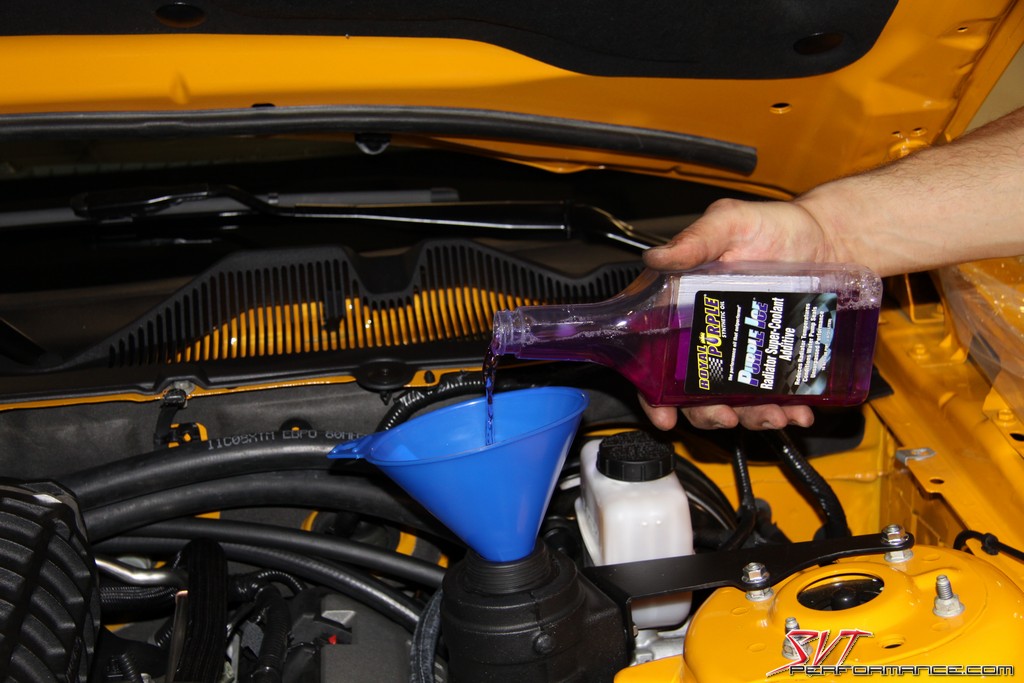
The Royal Purple : Purple Ice coolant additive works as a surfactant to reduce the hydrogen bonding effect between the water molecules in the coolant, thus lowering its surface tension and increasing its ability to absorb/dissipate heat.
There she is, all dressed up and ready for her date with the dyno.
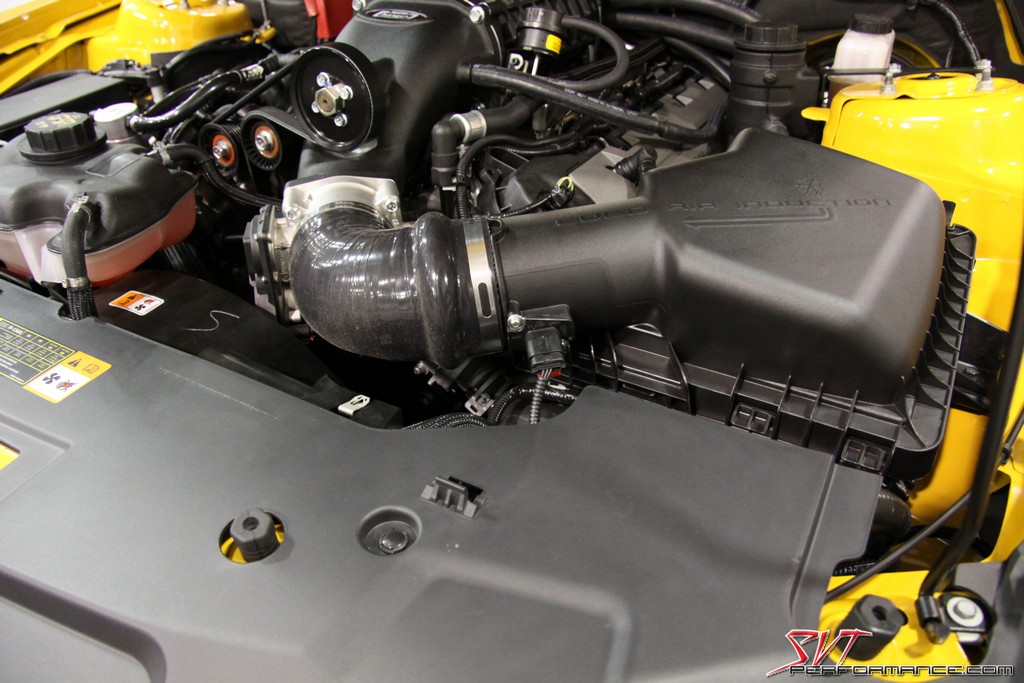
The Magnuson idler setup provides pretty good belt wrap.

As with all cars getting underhood work at Arrington, the SVTP GT had its paint protected by some cling-on plastic wrapping.

With the engine cover and strut tower brace out of the way we're ready to get to work.

This is where it all begins. A lift isn't necessary for the install but it makes life much easier, especially when you have to take a lot of pics.

You'll need to remove the plastic lower body work.

Can anyone guess which toolbox in this pic belongs to the guy who doesn't do rely on his mechanical abilities to put food on the table?

All these panel bolts have to be removed.

A 1/4 inch drive ratchet will make quick work of them.

Once the panels are removed you're ready to remove the front fascia. You can see the SVTP GT's Royal Purple oil filter.

Again, the 1/4 inch ratchet dispatches the work quickly.

With the header panel and all the bumper cover bolts removed you can unplug the lights and start removing the fascia.

As unnerving as it is, you have to pull out on the front bumper to release it from its clips.

With the bolts removed, the lights unplugged, and the clips released the fascia can be lifted off and stored somewhere out of the way.

I'm betting it wouldn't take much of a hit on the passenger side to rupture that blinker fluid reservoir.

We start the installation process by installing this jumper strap on a fuse. After such heavy lifting you might need to take a break at this point.

The fuse is then placed back into it spot in the under hood fuse block.

The power wire in the pump harness can then be installed on the jumper and routed through the block.

For those interested, this is the scoop that feeds outside air to the airbox.

We then installed the mounting bracket onto the intercooler pump. It can then be mounted on the K-member and plugged into its wiring harness.

The heat exchanger included in the kit is thin, but it is very tall and wide compared to the heat exchangers we're used to seeing on Cobras and Lightnings.

These are the brackets that mount the heat exchanger to the A/C evaporator core.

These rubber pads help protect the core from vibrational damage.

This foam is also added to the hear exchanger to protect the A/C core.

The heat exchanger just drops into place.

This is the bleeder screw that helps evacuate any air out of the intercooler system.

Here you can see how the heat exchanger mounts to the A/C core at the top...

...and at the bottom.

Due to its large surface area and exposure to massive amounts of airflow the heat exchanger should do a great job at dissipating heat from the intercooler fluid.

A hole has to be made with a hole saw in the fender liners on both sides of the car for the coolant hoses to pass through. They're a little rough looking when freshly cut.

A little work with the deburring tool and the newly drilled hole looks like it was put in by the factory.

Unplug the fuel injectors and using the supplied tool the fuel line can then be disconnected from the fuel rail. It's a good idea to have some towels ready to soak up the fuel that will inevitably leak out.

To prevent excessive fuel spillage it's a good idea to tie the fuel supply line back in a vertical position. All the intake manifold bolts can then be removed.

The intake manifold can then be removed.

It's a good idea to clean any dirt and debris from around the intake ports.

I see a valve stem poking in. You can see the knock sensors in this pic as well.

It's a good idea to cover the intake runners with some painter's tape. It's not fun wasting an afternoon fishing for a dropped piece of hardware.

It may look like a lot difficult work, but this install is actually pretty easy for those with a little mechanical inclination.

This is the intercooler fluid reservoir and its accompanying bracket and hardware.

It installs on to the strut tower.

Now it's time to install the intercooler hoses.

The intercooler hoses are loosely in place.

Here you can see the bane of my existence, the spring style hose clamp. Working with these things can be a pain if you don't have the proper hose clamp pliers.

Time to start stripping the stock intake manifold of the parts that will be reused with the Magnuson.

First we scavenged the throttle body.

If this opening could could it would probably say "MMmmmm, CAMARO!!! OM NOM NOM!!!"

If you haven't gotten a good look at one yet, this it the Coyote throttle body.

Though you can reuse the stock throttle body gasket we elected to use a new one. We bought ours from SVTP Vendor Tousley Ford.

The stock gasket is a great quality piece. Much better than the paper gaskets of years past.

Like the stock manifold, the Magnuson blower has grooves machined in it to accept (IMO) Ford's best designed intake gaskets.

Again, even though you can reuse the stock manifold gaskets we elected to give Tousley Ford a call and get some new ones.

The manifold gaskets are a similar design to the throttle body gasket and come 4 to a pack.

The individual gaskets can then be installed into their respective machined grooves. These separate gaskets are much easier to deal with than the old 2V modular units I'm used to dealing with.

The Magnuson kit includes these new fuel injectors. They are actually the same ones used on the 2011-2012 SVT Shelby GT500.

The stock injectors are a four-hole design, whereas the new ones utilize six-holes. That should help flow more fuel and improve atomization.

Magnuson even includes this little tube of grease to lube the fuel injector o-rings.

The new injectors are clipped into place on the rails.

The evaporative emissions purge valve gets relocated to the Magnuson blower case.
We then started with the plumbing work.

The coolant lines get installed on the back of the supercharger.

With all the wiring and coolant hoses safely out if the way it's now time to drop the blower on the engine.

This is the part where you get two mechanics to carefully lower your precious supercharger in place while you stand back and take photos.

Because there are so many possible obstructions to hold back and move out of the way it really helps to have two sets of hands during this step.

However, once it's setting in place you can really step back and appreciate how awesome this blower looks on the 5.0.

At this point it's time to bolt the supercharger assembly to the cylinder heads with the supplied hardware.

A couple of the blower bolts are a different length than the others, you'll have to pay special attention and make sure they are installed in the proper location.

From here on out the rest of the installation will go fairly quickly.

The fuel rail assembly is reinstalled backwards from its stock position.

This front cover bolt must be removed in order to install the idler bracket, which thankfully requires no cutting or grinding of the front cover as part of the installation.

The bolt which holds this idler pulley in place also attached the idler bracket to the blower case. A third bolt connects the bracket to a preexisting tapped hole in the engine block.

This small bracket is one of the key features that makes the Magnuson blower kit so easy to install. At some point I installed the nipple for the passenger side PCV hose.

Here the Gates belt included in the kit is installed.

Ready to have the throttle body reinstalled.

With the aid of a jumper wiring harness the the Magnuson kit redirects the IAT signal from the MAF sensor to a new sensor in an intake runner after the air charge passes through the intercooler.

The silicone intake elbow included in the kit is a very well made high-quality piece.

The heat exchanger takes up a lot of real estate in front. It should get plenty of airflow.

Ready to have the body work reinstalled.

Here is the final hose routing after being zip-tied and covered with protective loom.

Here is our choice for intercooler fluid, distilled water and Royal Purple : Purple Ice Coolant Additive.

The Royal Purple : Purple Ice coolant additive works as a surfactant to reduce the hydrogen bonding effect between the water molecules in the coolant, thus lowering its surface tension and increasing its ability to absorb/dissipate heat.

There she is, all dressed up and ready for her date with the dyno.

The Magnuson idler setup provides pretty good belt wrap.

Then came the time; the time to turn the key, depress the clutch, cry havoc, and let slip the dogs of war. As soon as the engine fires over you are greeted by the pleasant tick of high flow fuel injectors and the ever present whir of the TVS rotors inside their black powder-coated cast aluminum case. After a quick check over all the newly installed parts we were ready to go for a little test drive. The first thing you notice is the torque produce by the Magnuson TVS inducted 5.0L 2012 GT is as constant as The Northern Star. It just pulls, and pulls, and just when you think the torque rush may be dropping off it keeps pulling more.
Each time you depress the accelerator you are greeted by a bit of blower whine and an instant hit of power. There is absolutely no delay and in the power delivery. Boost is always on tap. Our test drive took us onto some winding mountain roads along The Blue Ridge Parkway. Being able to lay down some serious torque exiting the steep curves is enough to put a smile on any gearhead’s face, and the Magnuson blower delivers that experience in spades. The SVTP GT is equipped with the Brembo package so it hangs in the curves pretty well, but now it has more than enough power to correct any understeer we might experience.
Speaking of power, it was time to conclude our little test drive and head back to Arrington for a date with the dyno. I had stretched the GT’s legs a little on my test drive, but I had yet to really open it up. Well that ended as soon as we strapped the car down to the big-ass science machine. The SVTP GT and Arrington’s dyno are quite familiar with one another, as we have used it previously to test several different parts on our 5.0.
Before the blower install the SVTP GT visited Arrington's Superflow dyno in stock form one last time.
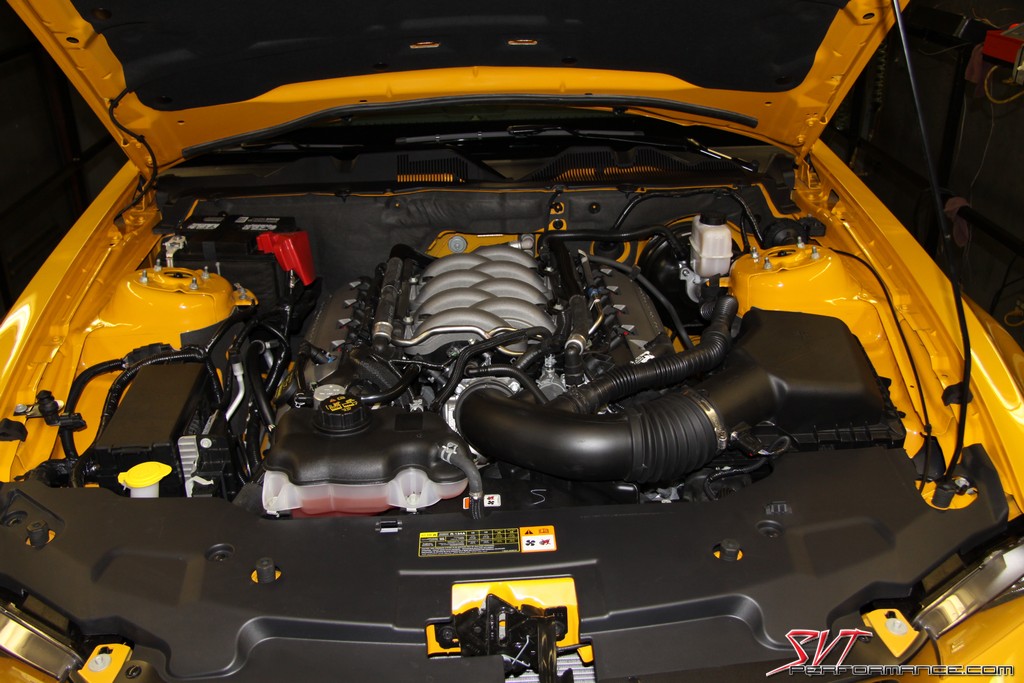
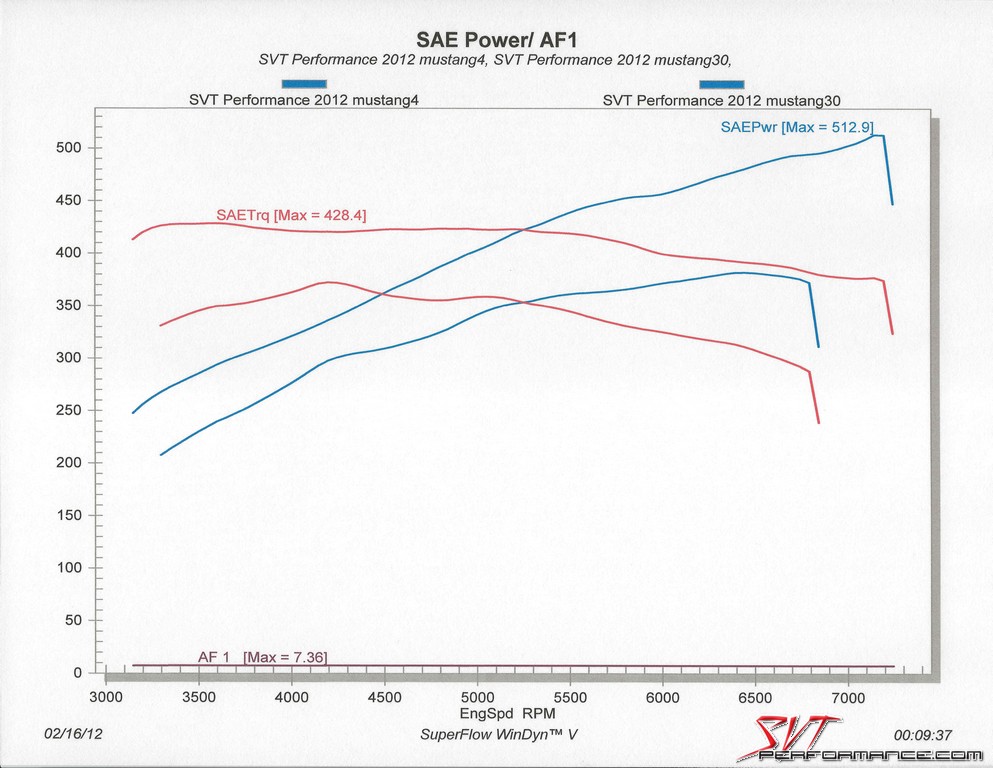
Our baseline with the car in bone stock condition was 381.8 HP and 372.2 TQ.
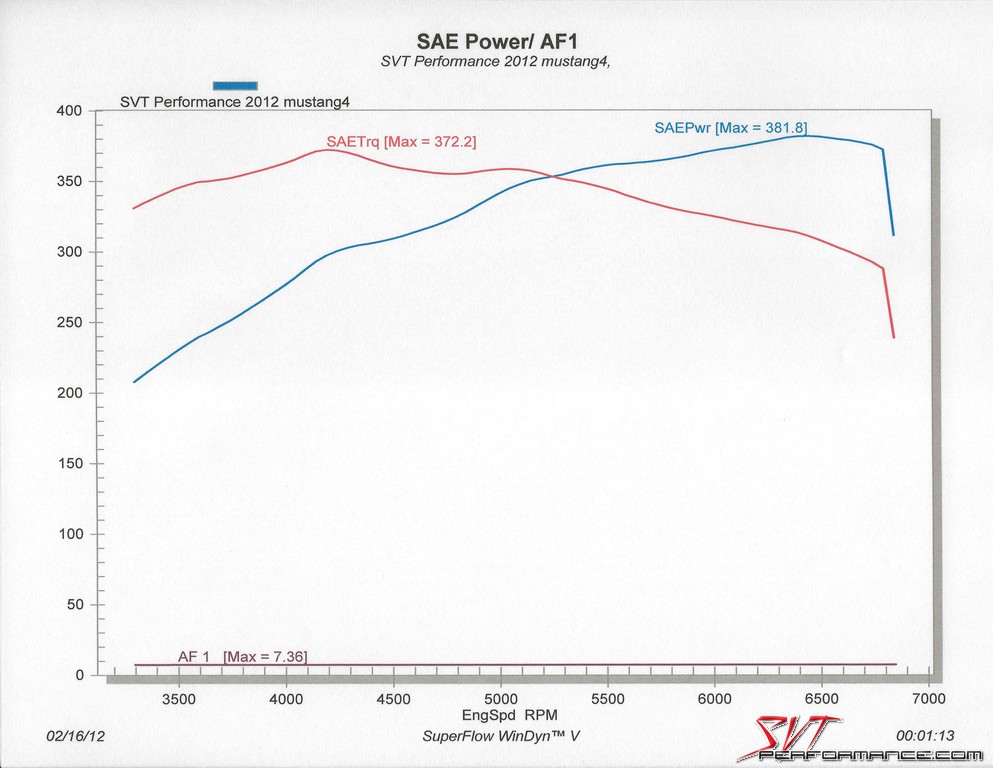

Our baseline with the car in bone stock condition was 381.8 HP and 372.2 TQ.

This is pretty damn good for a bone stock 2012 GT, but with seven pounds of boost from a 2.3L TVS huffer I knew we could do much better. And that’s exactly what we did. With the blower now installed we hit the rollers yet again.
After working on 6.4L Hemi cars all day the guys at Arrington are always interested in seeing what the 'little' Ford 5.0 can do.
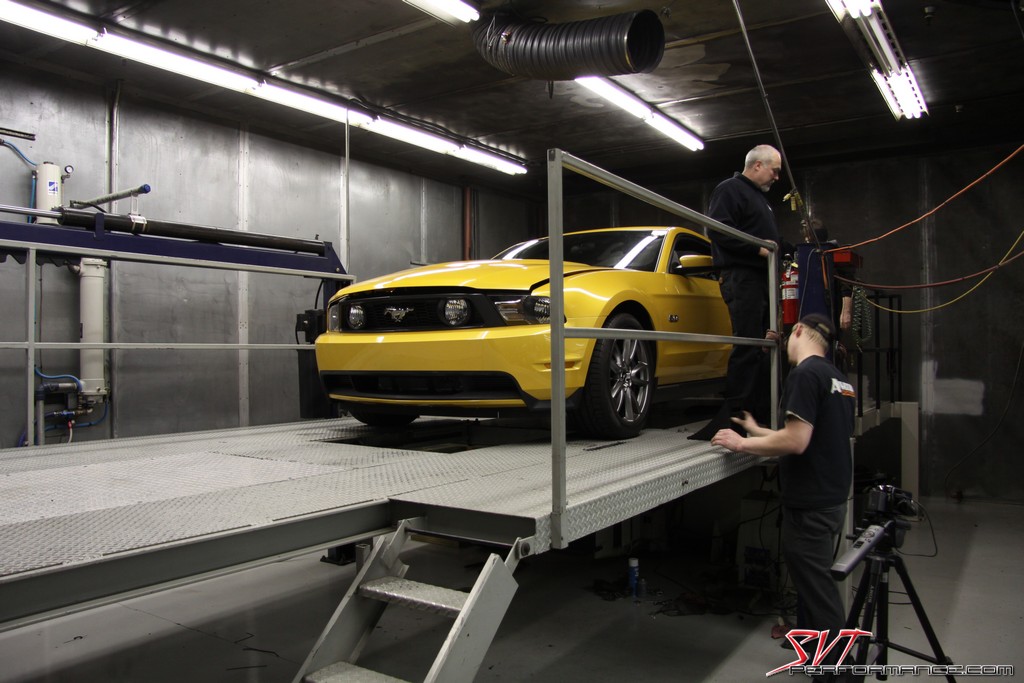
All strapped down and ready to make some serious power.
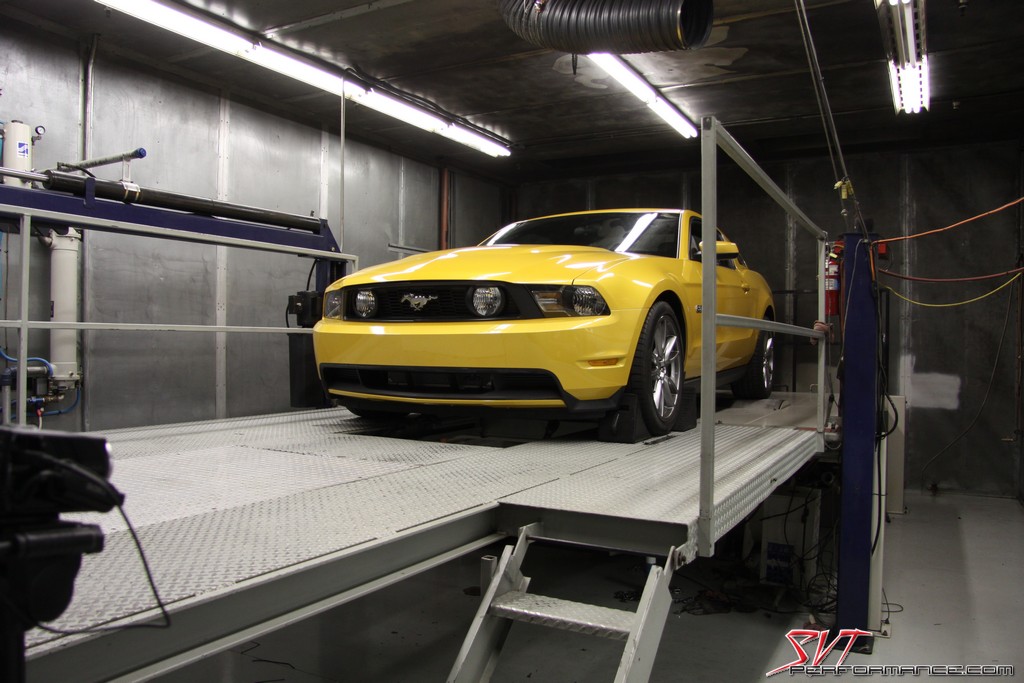
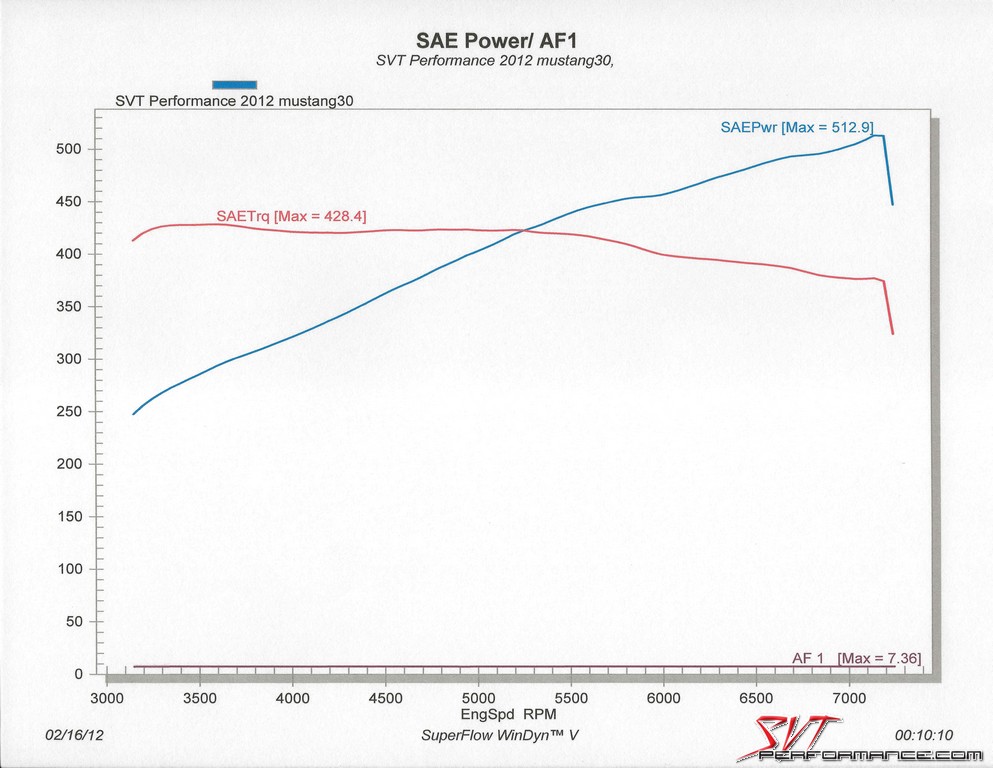
With the Magnuson Supercharger bolted down and our BBR tune in place the SVTP GT belted out 512.9 HP and 428.4 TQ.
That gives us and impressive increase of 131.1 HP and 56.2 TQ.
With that much extra power on tap these rear tires just aren't going to cut it anymore.
A little video never hurt anyone, except that one from the movie where that girl climbs out of the well and you die. But don't worry, this isn't that video.
<iframe width="853" height="480" src="YouTube" frameborder="0" allowfullscreen></iframe>

All strapped down and ready to make some serious power.

With the Magnuson Supercharger bolted down and our BBR tune in place the SVTP GT belted out 512.9 HP and 428.4 TQ.

That gives us and impressive increase of 131.1 HP and 56.2 TQ.

With that much extra power on tap these rear tires just aren't going to cut it anymore.

A little video never hurt anyone, except that one from the movie where that girl climbs out of the well and you die. But don't worry, this isn't that video.
<iframe width="853" height="480" src="YouTube" frameborder="0" allowfullscreen></iframe>
The increase in power is enough to rearrange your internal organs. It’s probably unnecessary to mention, but you can really feel a 130+HP increase. The GT now feels like an all new car. I’m really looking forward to getting a lot more street time and a trip to the track in to really acclimate to the altered driving dynamics. I just hope my launching skills are up to the task of presenting the car’s true abilities. I guess we’ll come up in the next couple months.
However, while our power numbers were impressive and the car pulls like a freight train we did notice something a bit disconcerting. As should be standard for everyone dynoing a new high-powered (especially supercharged) setup we did some fairly extensive datalogging. While making our runs and gathering data we noticed that the mass air-flow sensor seemed to start running out of resolution at about 6,000 RPM. We instantly knew that the problem was the retention of the stock airbox with the Magnuson kit (a necessary evil to obtain CARB certification). While pegging the MAF didn’t pose a really safety issue it was putting a severe damper on our power production. Our next SVTP GT article will cover our custom solution to this problem, and I think everyone will be blown away by the results. Stay tuned.
Special Thanks To:
Magnuson Superchargers
Arrington Performance
Blow-By Racing
Click Here for Installation Instructions for the 2012 Mustang 5.0 Magnuson Supercharger Kit
-SID297:beer:
Last edited:


