New project - 1988 Thunderbird Turbo Coupe

DRTYAPE_SRT

Well-Known Member
Established Member
Joined
Oct 17, 2019
Messages
152
Location
Arizona
Haven’t done too much lately, just some bodywork from the previous owner backing a gooseneck into the c pillar. It had a nice deep crease, so bad we had to end up doing a few relief cuts to flatten the metal out. Also had to shrink the sheet metal from working it too much, it was oil canning a little bit.

Got the timing belt changed, tensioner replaced with a high speed unit.

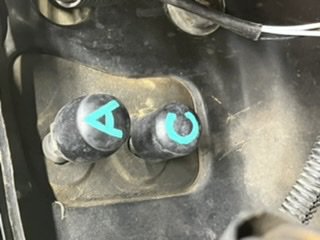
Deleted the AC and heat for now just to simply things for the time being. Most likely will keep the ac off.

More to come.
2EA214EA-AA6A-494C-942E-6245AD9F897C.jpeg
0638C497-6576-43A8-9943-A5E1C387DBB9.jpeg
ADCD128D-7867-4975-88BE-7E2775DEEBC2.jpeg
DEC75640-38E8-4810-9B6D-008A168D5631.jpeg
E26F378B-FAC7-4142-9F7A-E711AE530C5F.jpeg
 

Attachments

  • C8FAA1F2-34D1-44F8-90BF-AD2ADB9D5A3C.jpeg
    C8FAA1F2-34D1-44F8-90BF-AD2ADB9D5A3C.jpeg
    26.5 KB · Views: 85

DRTYAPE_SRT

Well-Known Member
Established Member
Joined
Oct 17, 2019
Messages
152
Location
Arizona
EESH.....005" clearance? I'd keep an eye on that...That's a piece of paper thickness and while it may clear now also think of heat expansion of parts and things flexing.
Sorry that was supposed to be 0.05 , we suggest 0.100 clearance, 0.06-0.05 pushing it.
 

DRTYAPE_SRT

Well-Known Member
Established Member
Joined
Oct 17, 2019
Messages
152
Location
Arizona
Been busy collecting parts to lift my 4Runner and have finally been able to get out into the garage since it’s cooled down a bit here in AZ.

Did a timing belt and couldn’t get the car to start, I thought I had the timing out of whack until I hit the tb with some starting fluid and it would run then die, had my father in law spay while I cranked and it ran like a top on the fluid.

No fuel at the rail, chased it all the way back to my one year old (temporary fuel pump) and it looked like the picture below.

So I decided to do the in trunk fuel cell, combined with a Holley in-cell fuel pump assembly and Holley HydraMat.

Made a stencil and cut out a piece of aluminum to flatten out the bottom of the spare tire well.

Still more to do but it’s coming around… slowly but surely.

6023E4F8-2F6D-480F-AB56-855A4AAAF0EB.jpeg
57F47C77-5F3F-4AFD-B0DD-39C06A8BA2D9.jpeg
75AD4E3F-A9EC-4876-8DEE-DBAA8B748165.jpeg
1193AA0D-3E85-4C11-A1F1-C212228A05E2.jpeg
FB1CE194-CE91-4EC4-BE64-DA19AD356B9D.jpeg
8C9796C0-4418-4268-B8A0-D0343D725ADC.jpeg
E9717697-400A-437E-BFC3-482E02F05ABB.jpeg
 

DRTYAPE_SRT

Well-Known Member
Established Member
Joined
Oct 17, 2019
Messages
152
Location
Arizona
Was about to drop in the pump assembly and noticed the sending unit float was clocked in a position that it would just hit the side of the tank at a 1/4 way full.

Removed sending unit and repositioned it but then realized it was going to hit the fuel pump so I had to do a little bending to make it all work.
B527A00B-4D94-4168-B95D-9024B594F6E8.jpeg
228E87E6-F3D3-4A61-AE7A-A6226272E5C5.jpeg


Pump with the Holley HydraMat on.
4D2E28E5-739F-4FE3-A56A-AFFC90F637FD.jpeg


Fitting from pump adapter HydraMat
23134B35-A1FA-4B17-BA43-AB2EFE3FF2BD.jpeg


Fuel pump adapter
5D76A2C3-CD60-49D8-BF39-42572078953B.jpeg


Steam cleaned carpet.
43A3CE8D-B78B-4FF1-90A2-FCD4A2725034.jpeg
 

DRTYAPE_SRT

Well-Known Member
Established Member
Joined
Oct 17, 2019
Messages
152
Location
Arizona
the c-pillar damage wasn’t shaping up to my liking, I was going to have to put more filler on than I wanted, so after a failed attempt to pull an entire quarter panel six months months ago I finally found another junk car to cut the panel out of.

I’m going to butt weld the panel in and see what happens from there…

I’m just a weekender when it comes to body work/paint so if it end up as a ten footer I’ll be happy.

FEB51B18-A89F-4280-98B5-7F078FCE2F84.jpeg
EDCA5FCB-0495-43A8-AB7F-7AA5C4F1E99A.jpeg

70AC1056-40AF-4937-9476-6583063874B0.jpeg
2696ED18-8623-4EFF-96FE-D6DBDBE5B30E.jpeg


Found an old blue moroso battery box and installed it and ran two vents to a couple of bulkhead fittings.

Also added a vent and tip valve to the fuel cell.
21F2AC38-7876-40A0-B0DE-8BD36D0AABC1.jpeg
 

DRTYAPE_SRT

Well-Known Member
Established Member
Joined
Oct 17, 2019
Messages
152
Location
Arizona
Inner door panels were trashed, they were held together with an array of different screws, rivets, washers, epoxy’s etc… I pulled the usable parts off and fanned up some simplified panels from som ABS plastic.

I added the top trim piece back on and covered it with some fake alcantara. Then I attached the original velour door card back on.

I still have to install the door lock switches and I’m going to fan a cover for the door handle mechanism out of kydex.
F4FD81B4-7A9B-49DE-8CD5-F85A9B2659CB.jpeg
69E2847A-01BE-4B90-B4B8-454BB2D36561.jpeg
86F69F47-0223-4955-95C7-88D01ABA71C9.jpeg
 

DRTYAPE_SRT

Well-Known Member
Established Member
Joined
Oct 17, 2019
Messages
152
Location
Arizona
Added some gauged and eliminated the Radio equalizer and hvac controls. Will be adding an electric ac compressor in the trunk and a condenser in the void where the gas tank was.

Also have a wide band a/f and mounting bracket to replace the clock on the dash.
5192F6F3-C08E-4E68-9BB0-6B905C17C6D2.jpeg
8DB4DD26-3745-4A11-840B-C1C0323F1A2A.jpeg
95CF2119-4BAD-495A-B06F-6B9D759428BB.jpeg
A33B0B9D-A421-4A3F-93D6-F9FBE9D456FC.jpeg
4FB0477B-A507-495B-8582-9B788EE93F32.jpeg
 
Last edited:

DRTYAPE_SRT

Well-Known Member
Established Member
Joined
Oct 17, 2019
Messages
152
Location
Arizona
Also moving forward with the manual swap, just going to toss in the 4Cyl t5 that came with the purchase of the car.

The previous owner also had the pedal assembly for a 87-88 tc so that’s away a huge plus.

I have everything I need for the swap besides the driveshaft (I plan on picking on up while on vacation in October) and a trans mount.

I actually drove the car on Christmas Eve of last year and the 4aod was completely whooped.

Still a TON to do and slowly moving forward.
B45BD442-956F-4C02-95CE-967A45BE3EBF.jpeg
3256C703-1EF9-4EE8-BEA4-B77CDBF43772.jpeg
72C884D7-41B3-4C77-B55E-7276575B204B.jpeg
F3BCCFA3-6A84-4030-80E8-F6831FE1BDFF.jpeg
C58C9434-3176-45CD-BEFF-0EC17C3AFC14.jpeg
C6E8160C-9CB5-42C9-8BB8-9355F9DDB2DB.jpeg
040F0C56-91D3-49FF-B664-F479AE7390D6.jpeg
F24BD39E-033E-4300-9CC9-8540E2CF5E16.jpeg
 

andymarkv

Well-Known Member
Established Member
Joined
Mar 19, 2010
Messages
951
Location
Upstate NY
Very cool to see some updates on this! That C pillar repair...damn, that sucks because it looks like a super clean car otherwise!
LOVE seeing the manual swap! (was bummed to see the AOD) although, turbo cars are usually faster auto..? Just definitely not as much fun.
Leaving the AC out in AZ...? Is that even an option? lol!
 

DRTYAPE_SRT

Well-Known Member
Established Member
Joined
Oct 17, 2019
Messages
152
Location
Arizona
6EB40C99-0333-4CE5-B22C-9F6C0869C9C5.jpeg
7FC8B47F-0022-454B-A3D3-63A8F0BF7D67.jpeg
C3C38E27-D38A-4EF0-AF08-F68E066E99A0.jpeg
47545857-7537-403A-B278-0A5A4C8AD339.jpeg
B3CB906A-922D-4F2A-B267-A04D25ACC048.jpeg
9B84C7AC-FD8C-42DA-BA58-6E39AA0C1C5A.jpeg
640DDB41-12EB-470D-93EE-80D27F808F8C.jpeg
4CF1A192-9FF9-47F5-ADBB-AFA4108D68C2.jpeg
8E76DEB7-CA30-43BA-8666-76F787DD3E54.jpeg
It’s been slow going ( as usual ) but even slower as I’ve suffered a knee minor injury.

Got the transmission pulled.

Installed pilot bearing.

Replaced rear main seal.

Went to install clutch and realized I didn’t have the pressure plate dowels so I had to order a set.

I purchased a driveshaft while on vacation back in October in Cali, unfortunately I just realized that the seller gave me a mustang unit instead of the turbo coupe specific drive shaft I asked for(45.5” instead of 48”)… still working on a resolution.

Pulled the steering column to install firewall boot specific for the hydro clutch master and clutch pedal assembly.

Replaced steering rack and hoses.

Removed cornering lights and replaced with NOS solid fender moundings.
 

Users who are viewing this thread


Top