I know there are a lot of these online, but I figured I'd add one to the list.
I tried to get every single step, but I realize I didn't get the removal of the battery (which you do before anything else) and the removal of the fuel pump fuse to release the fuel pressure. But I think I have most of everything else.
This took about a day and a half because I did not have the correct bolts for the EGR.
For some reason the stock bolts did not fit the new blower, after asking here I got some help, and apparently the newer TVS units use the stock Eaton bolts, but the older ones that came out before do in fact use different bolts.
I'm not a mechanic by any means, but other than the bolt issue and some other electrical issues (not related to the install) it was pretty straightforward and fun")
Ok on to the install!
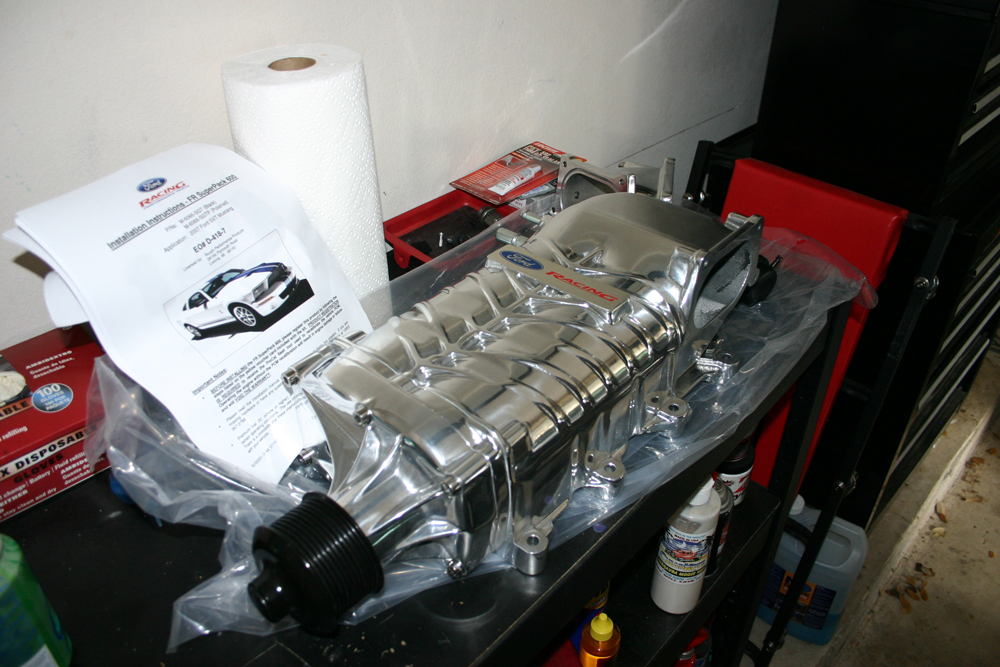
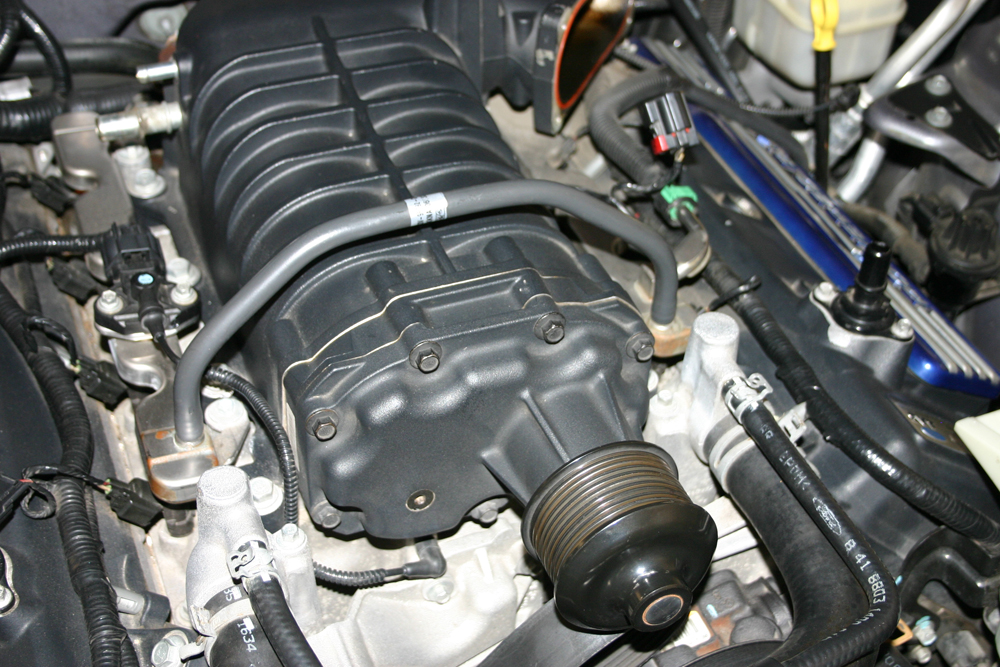
My newly polished TVS waiting to be put on... aint it purrty!
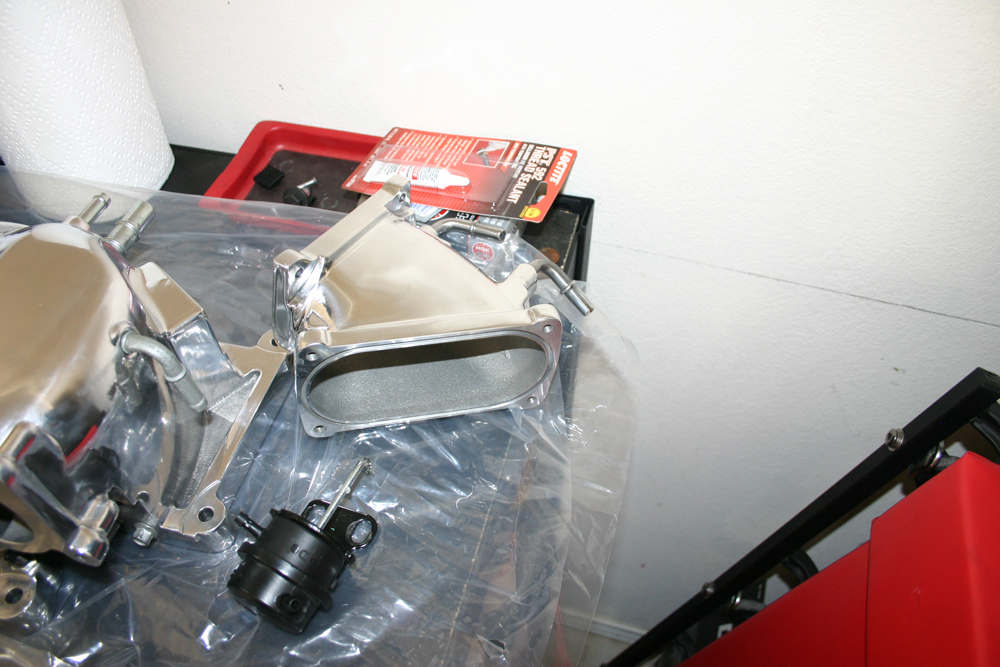
Had to put the bypass valve back on the blower since it required removal for the polishing.
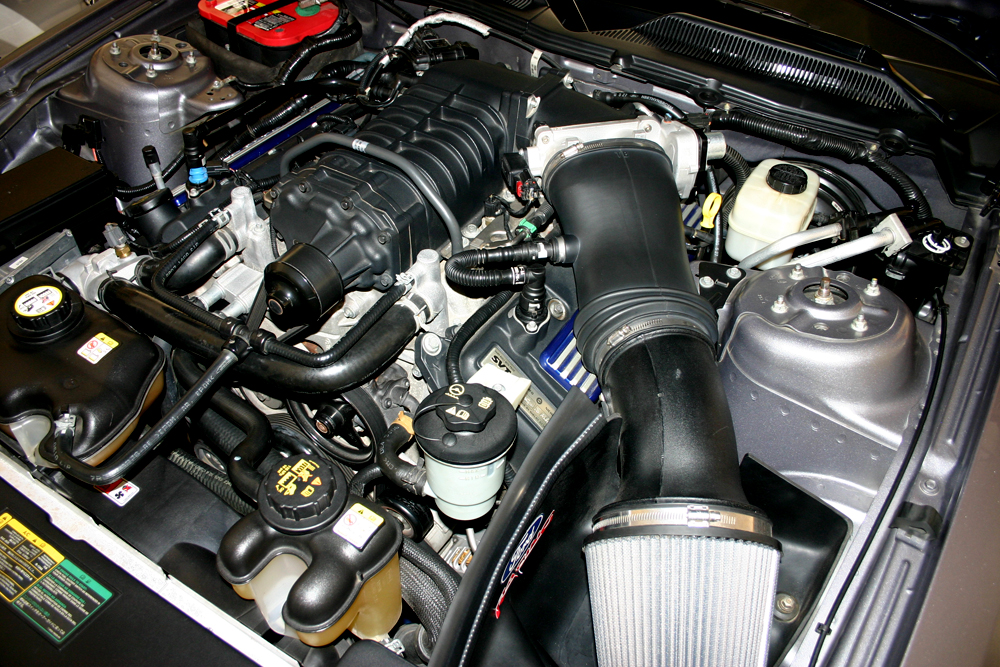
The stock Eaton in place with the FRPP CAI.
I didn't have any pics of removing the CAI but it's extremely simple and you basically just need to remove the two bolts by the air filter. You'll need a socket wrench, I don't remember the diameter, but I think it was 5/8. and the hose clamp at the top of the CAI and you're done.
Make sure you also remember to unplug the mass air sensor which is down closer to the air filter. There's no need to unscrew it or anything, unless you are using another CAI, just pop the clip and pull it off.
You'll also have to remove the PCV line from the engine to the CAI as well. You just need to squeeze the little tabs and it will come right off.
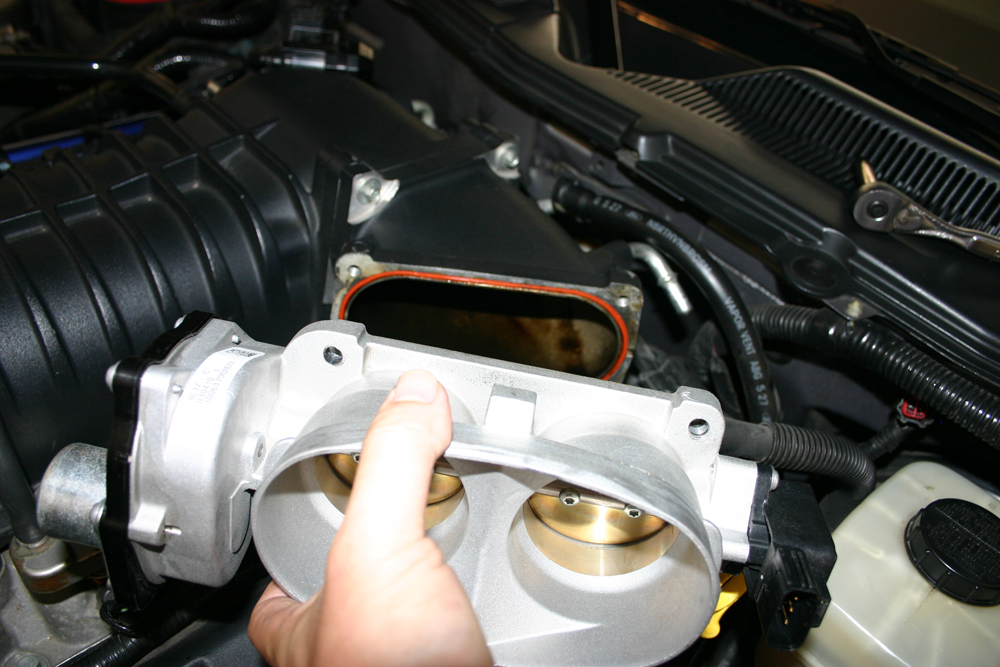
Removing the stock throttle body after the CAI removal.
There are four bolts here and the one in the back is a little tight, but not bad at all.
My bolts were allen heads, but I've seen others that were regular hex bolts.
You'll need to unplug the throttle body, on the top right there's a black plug. You need to slide the little tabs forward and then just pull back.
The next step I did was to remove the elbow.
This is four bolts as well, but the front lower one here:
Is kind of tricky to get to. I used a ratchet wrench for this and it worked great. If you don't have a ratchet wrench you can probably get it with an extension and a socket... up to you.
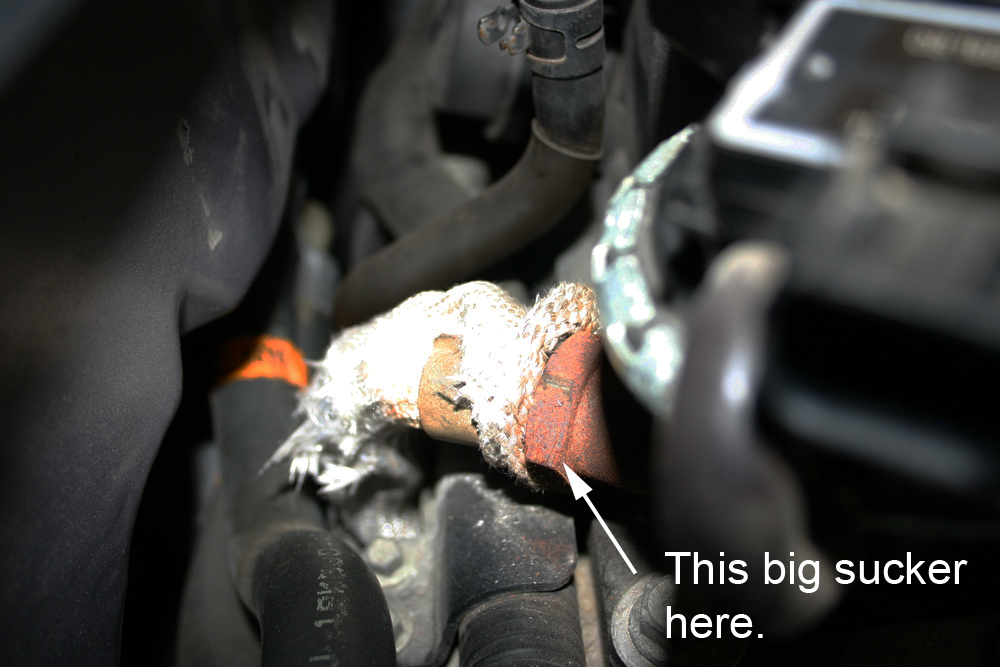
Once the elbow was off I took a look at it state and it was pretty oiled up.
I didn't have a catch can on the car... but after seeing this I ordered one from JLT which is now on the car
Make sure you remember to transfer the gasket from the stock elbow to the new TVS elbow if you are using a new one. If not then you'll just be putting the stock elbow back in place.

Good thing I did a writeup.... I forgot to transfer the OTHER gasket on the other side of the elbow. Didn't notice it until I went through these pictures. So make sure you transfer BOTH gaskets and don't forget one like I did or you'll have to pull the elbow off again... like I did
Off of the old.
Onto the new!
The next step was to pull the belt off of the blower.
But you need to remove the coolant tank to get access to the tensioner to release the belt.
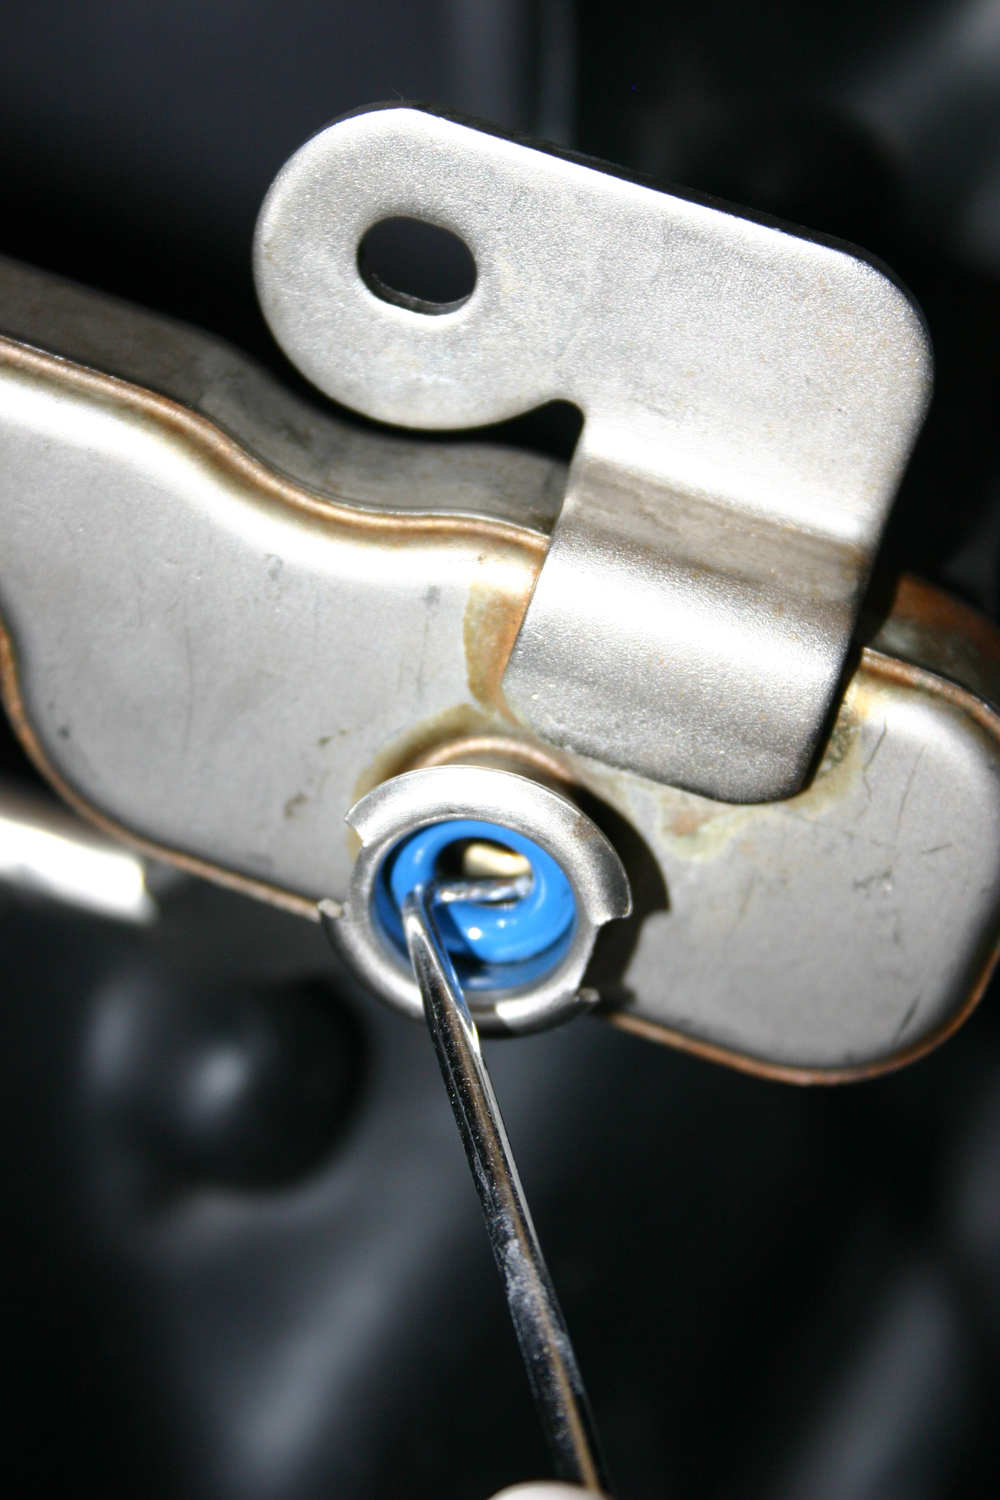
There are two bolts securing the tank. Make sure you are careful to not pull the metal clips away when you remove the tank otherwise you'll go looking for them... ask me how I know
Now this part was pretty strenuous for me because I didn't have a breaker bar. I HIGHLY suggest you use one to remove the belt, and save yourself the pain
This is what I used:
The old box end of the wrench around the ratchet trick. Worked ok, but again not NEARLY enough leverage for it to be easy... that sucker is TIGHT.
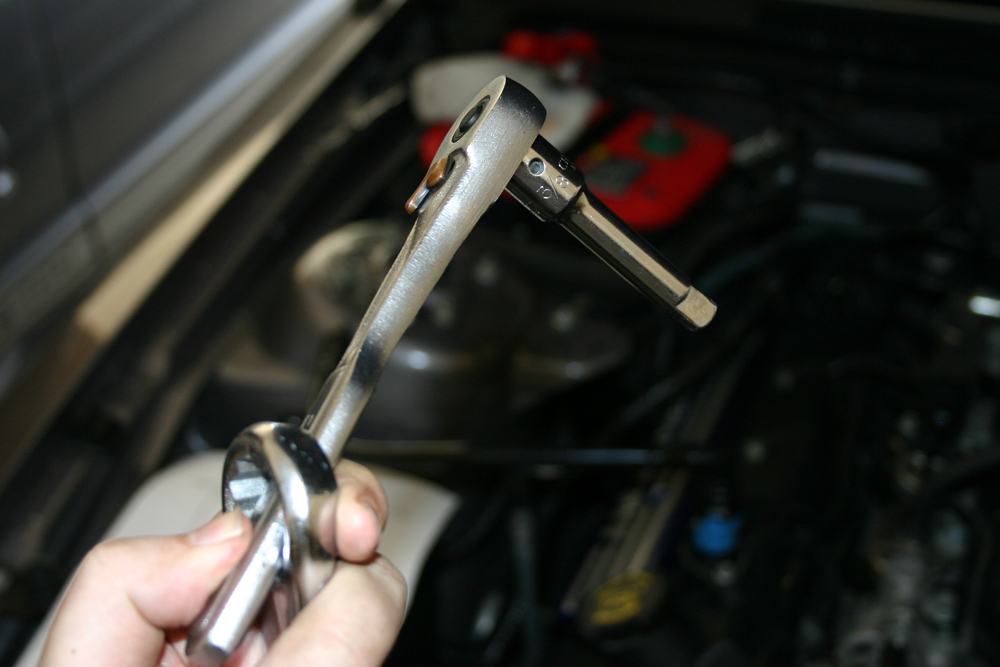
You'll just need the end of an extension to fit into the box cavity of the tensioner.
Rotate Clock-wise to loosen.
YAY it's off!
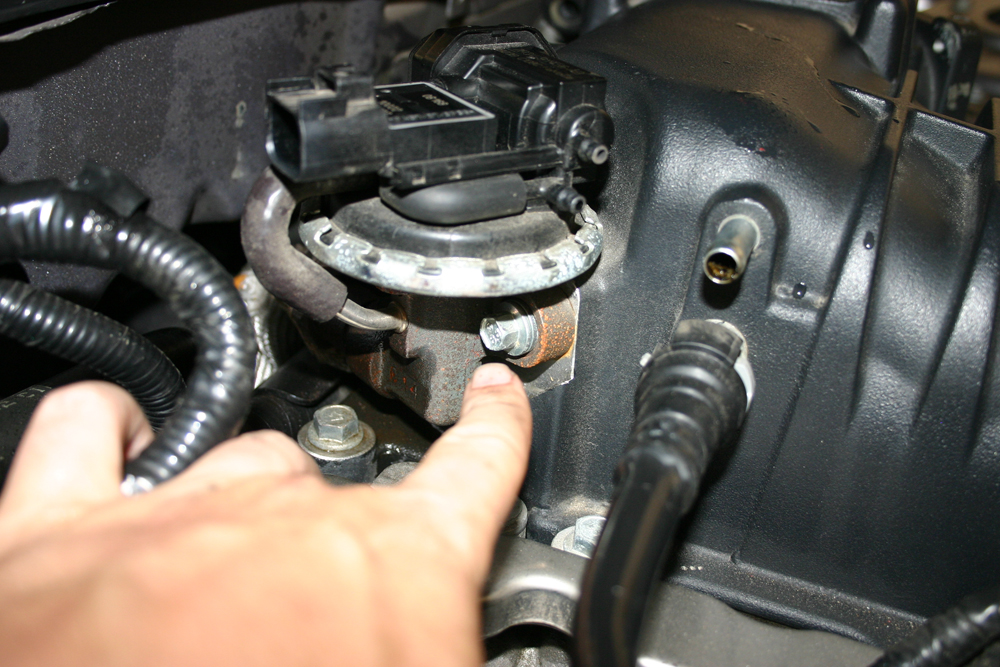
Up next was the EGR Valve. Although in the Ford Racing instructions they refer to it as the "ESM" but anyway.
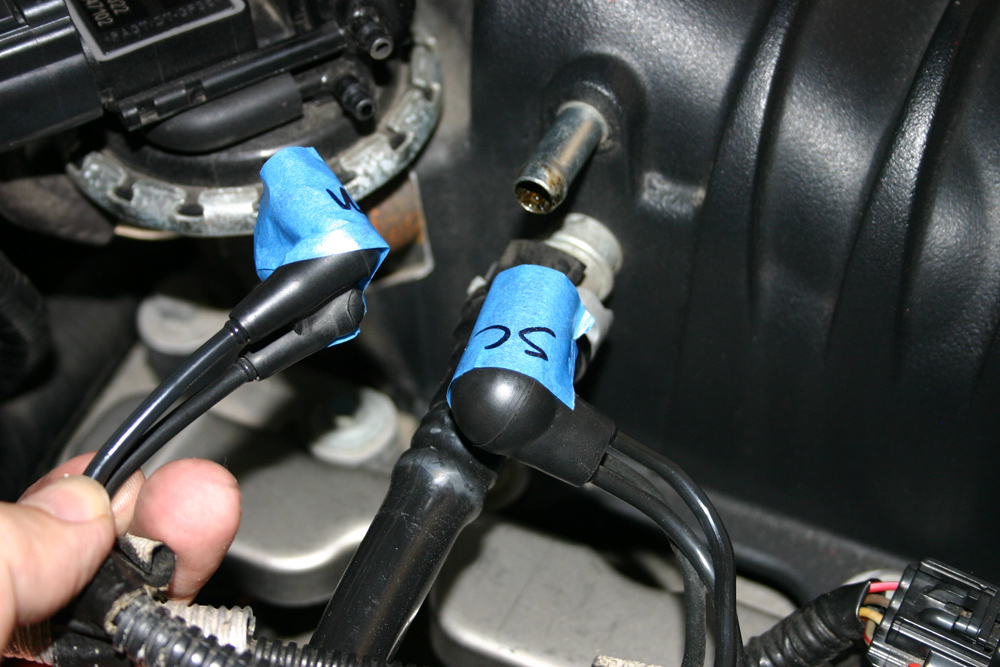
I removed the vacuum lines from the egr and blower and labeled them so I wouldn't forget what went where.
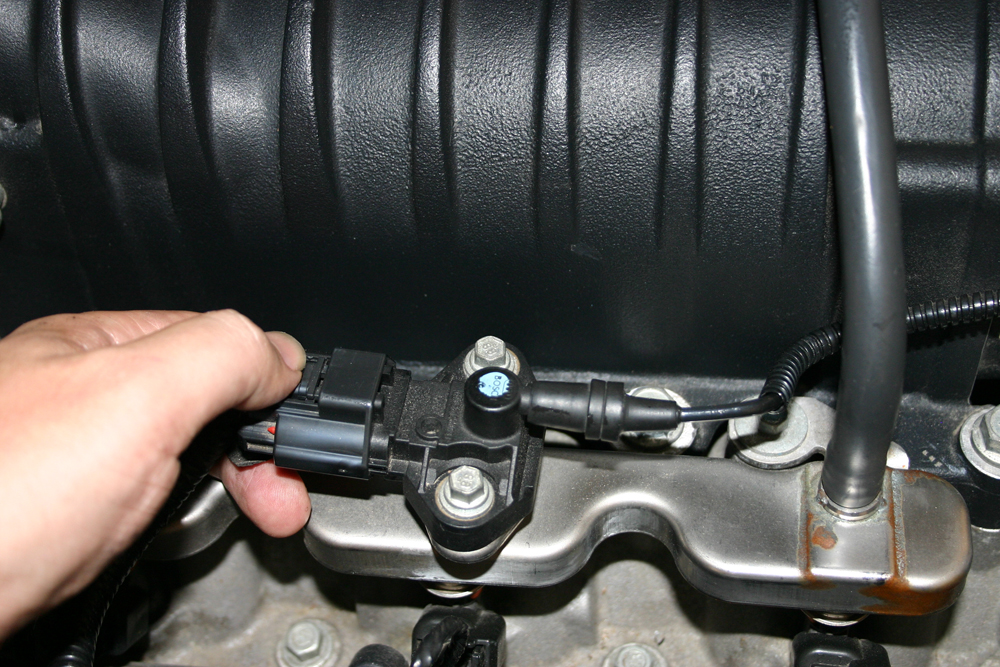
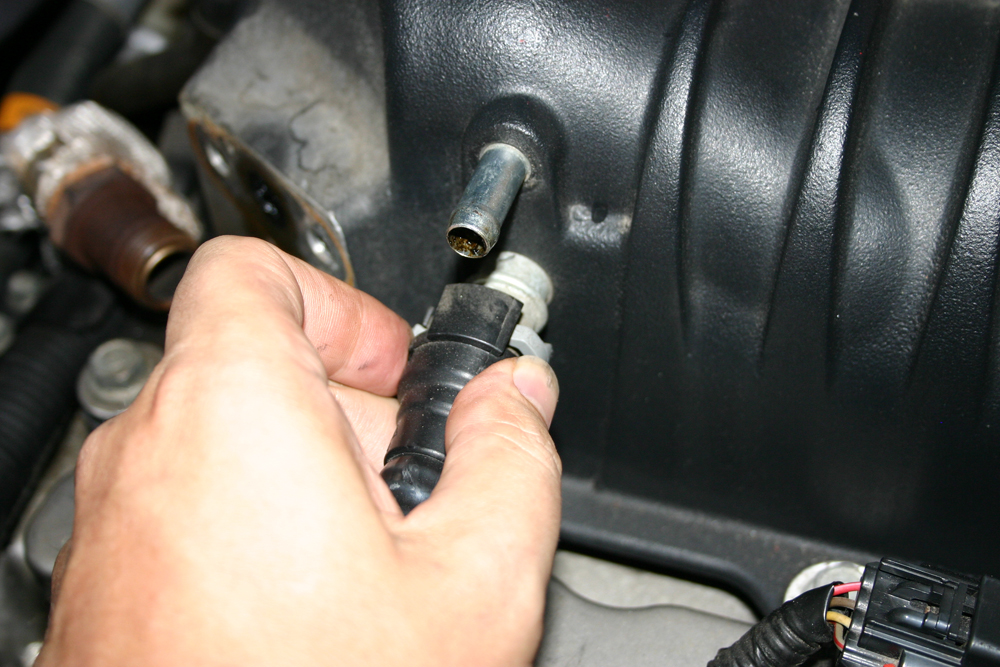
Then you need to unplug the EGR wire at the top which has the same sliding mechanism as the plug the throttle body used.
Then there are two more plugs by the fuel rail.
And then the PCV line, like on the other side which is removed the same way by pinching and pulling.
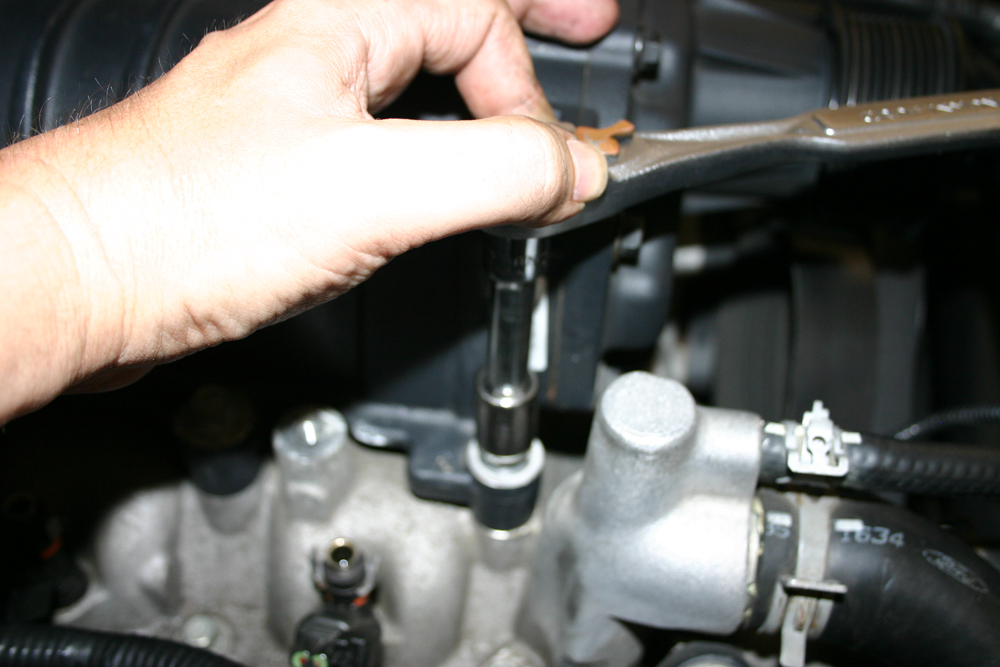
Once you have all of those off then it's on to the big PITA EGR Bolt.
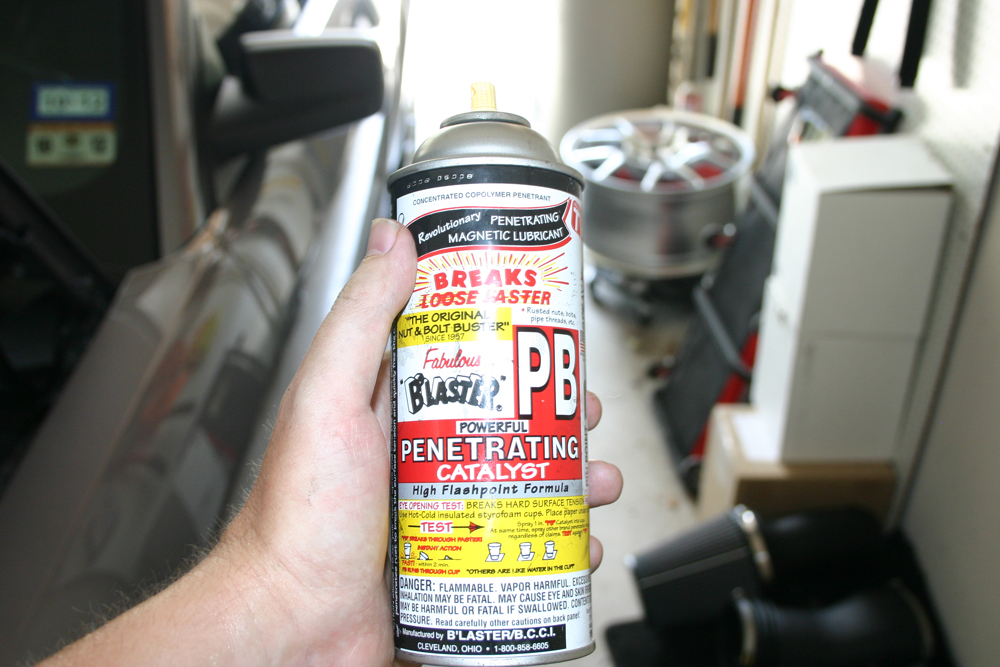
I used this
And let it sit for a while while I was removing the other vacuum line on the back of the blower.
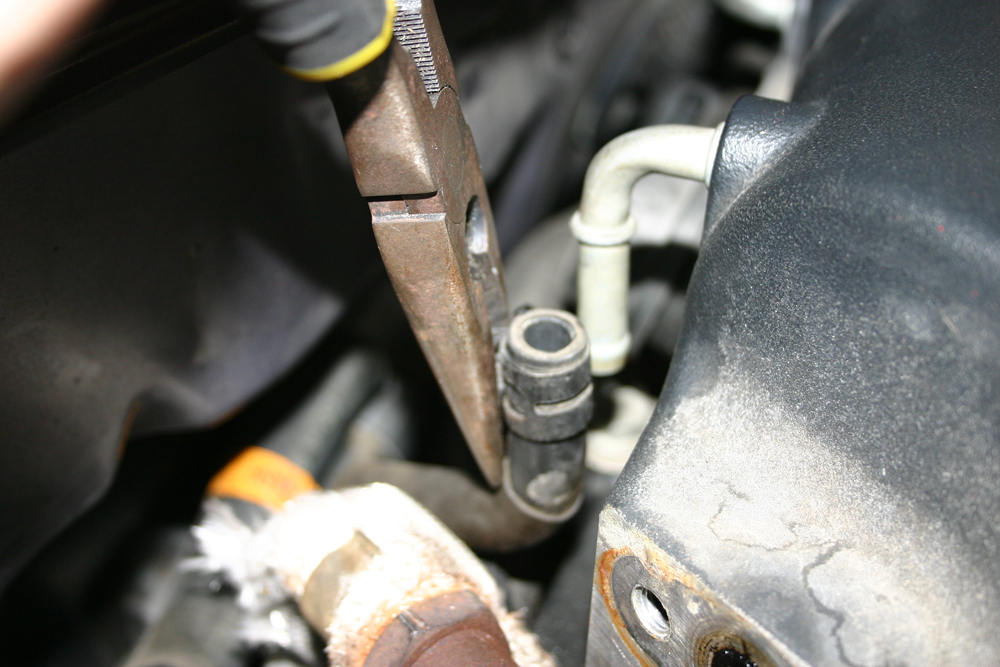
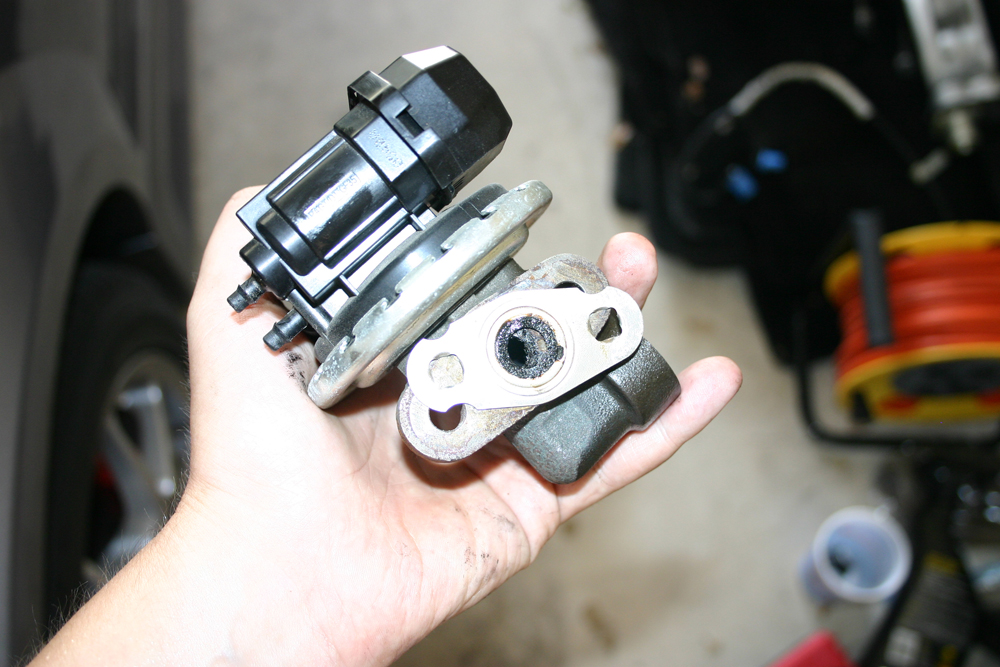
The EGR bolt is HUGE. I didn't have a wrench big enough to fit the bolt (bigger than 1") so I used a heavy-duty locking plyer to fit to the bolt and it worked like a charm.
It was still a pain to remove though.
This is likely the hardest part of your install (at least it was for me).
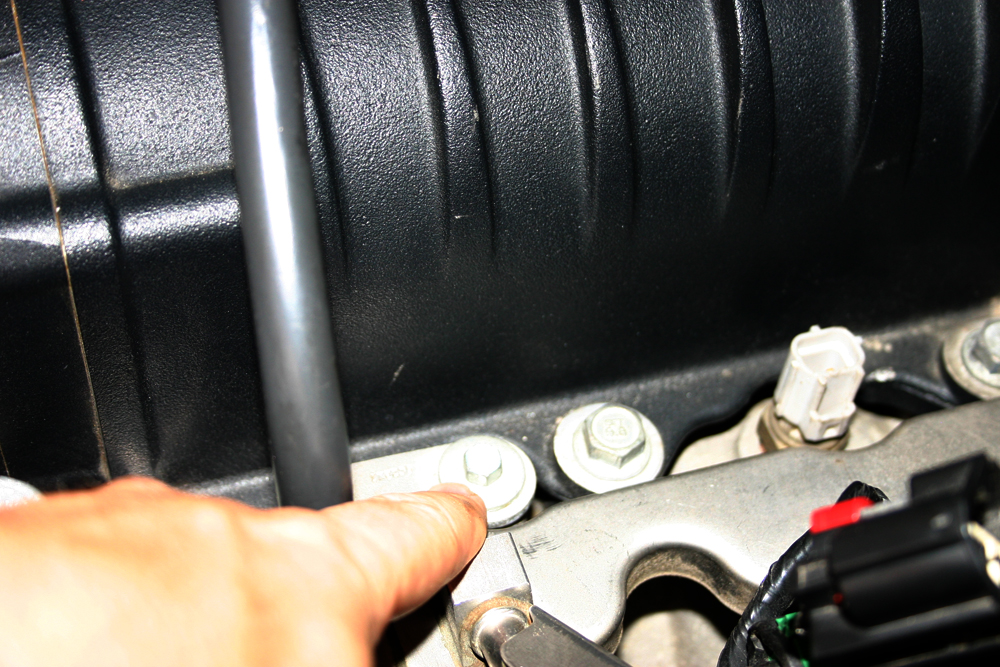
Next there are two bolts for the EGR to remove from the stock blower.
This was the hangup of my install. The two bolts that attach the EGR to the blower did not fit the new blower.
And then it's off... but make sure you don't lose the gasket as you'll be re-using it as well.
Next you'll need to unbolt the fuel rails.
There are two bolts on each side that secure the rail.
Once the bolts are out you'll need to pull up on the rail, rock it back and forth and remove it. There may still be some pressure in the rail so be ready with some rags to catch any excess fuel.
Remove the fuel pump module fuse (F41) per FRPP instructions and follow the FRPP procedure to release fuel pressure. (Basically remove the fuse and crank the car and let it run out of gas)
I did have some fuel leak out when I pulled mine. Not a lot but some.
All of my injectors stayed in the engine, I've read where some of them come out. None of mine did, but the O-rings that go around the injectors did come off with the rail.
Make sure you replace them if this happens.
Place them back on the injectors, and when you're ready to install the rails again use a little dish soap on the rings to help them slide onto the rails. I didn't use any lubrication the first time and tore a ring... another hiccup that cost me some time.
Do not worry with removing the fuel line from the rails. I tried this and I have yet to figure out how the damn thing works.
No matter though, all you need to do is lay them to the side.
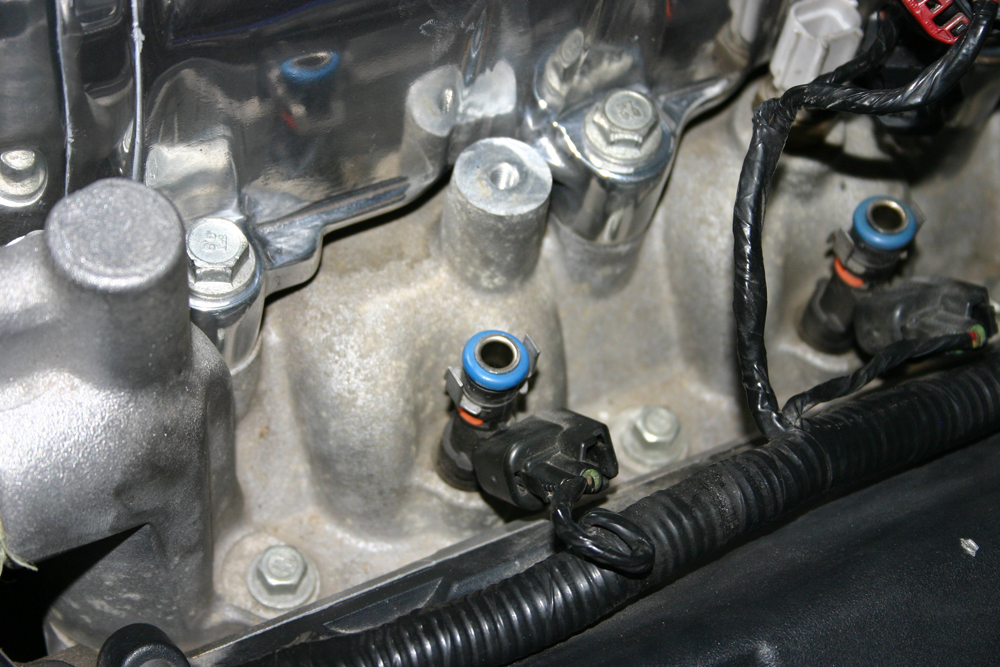
Also take note of the two electrical connectors on the driver's side of the rail.
I accidentally slipped those connectors UNDER the rail and wound up having to remove the rail AGAIN because they wouldn't reach after doing that... nice boneheaded move on my part
Those go on the OUTSIDE of that rail.
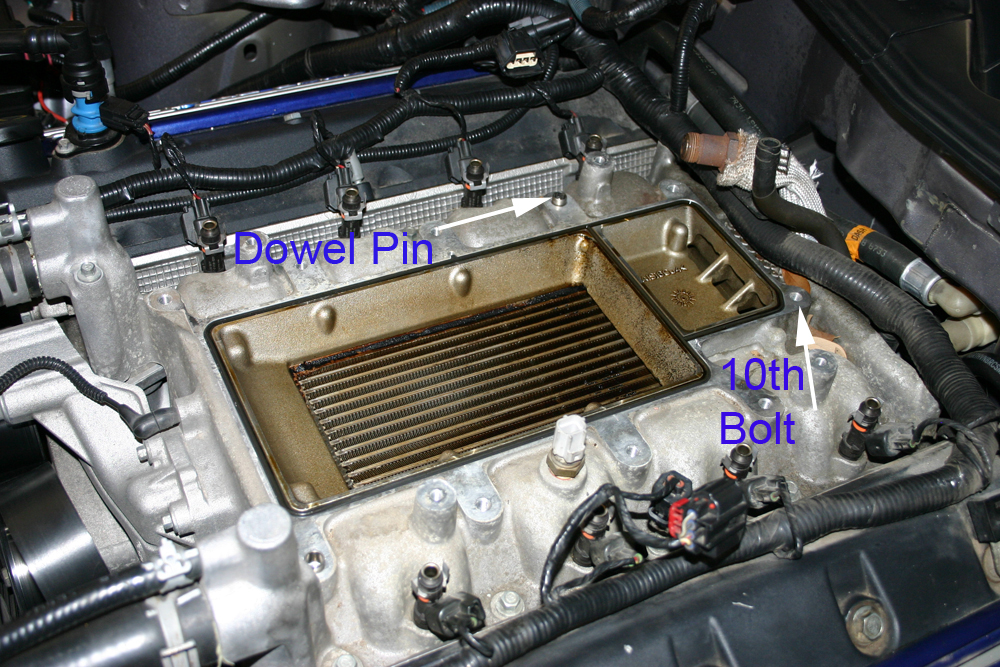
Now you're finally ready to remove the blower. There are ten bolts (I believe there are then) which are easy to see.
But there is one more in the back of the blower that you cannot see.
Don't forget this one too.
I didn't have a helper, and could remove the blower, but it is kind of heavy so it might not be a bad idea to have someone help you lift it off.
Once it's off make sure you remove the dowel pins from the stock blower and put them on the new TVS.
All you need is some plyers and they pull right out.
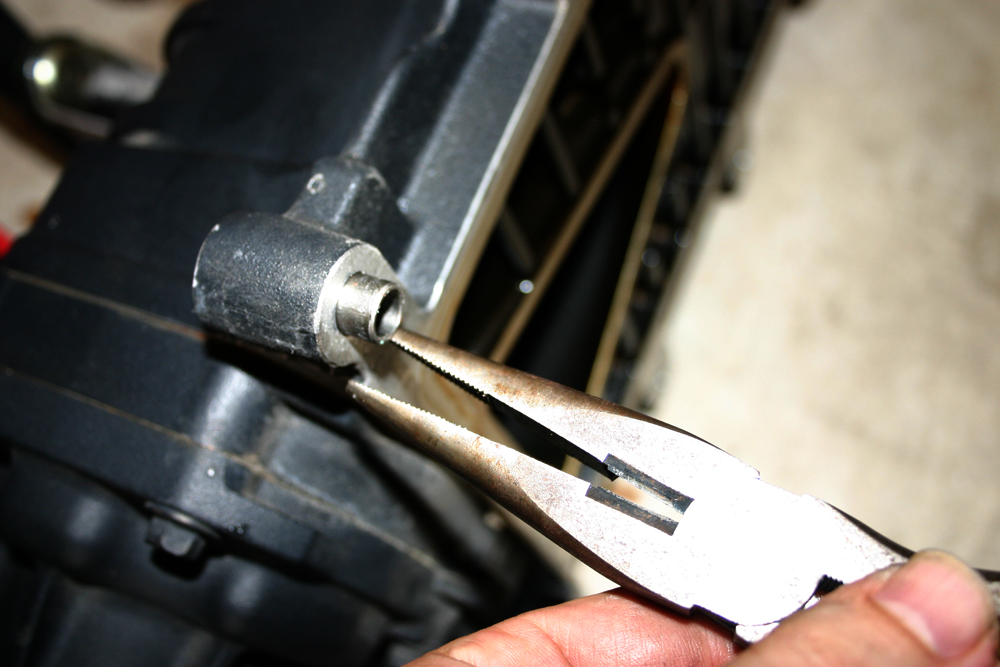
After pulling the blower I saw the oil residue on my intercooler and AGAIN realized I sorely needed a catch can.
You can also see the dowel pins that didn't come out with the stock blower... remove those and put them on the new one. And there's that pesky 10th bolt!
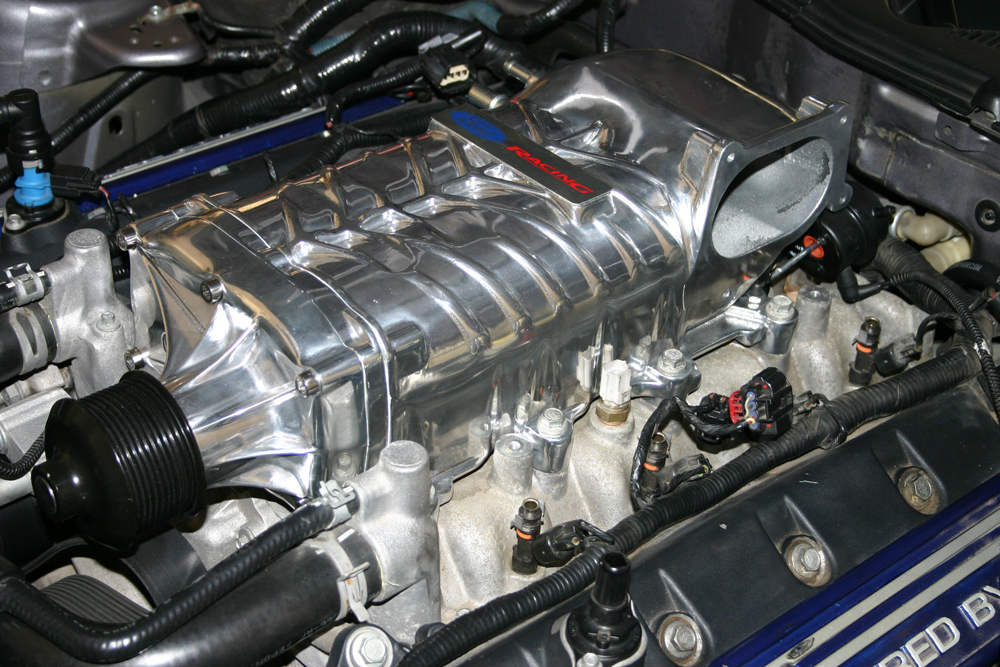
Now it's pretty much smooth sailing for you.
Put the new dowel pins in the new blower and bolt it down per FRPP instructions... I used the instructions found at VMP's website here:
http://vmptuning.com/GT500/TVS/FRPPTVSINSTRUCTIONS.pdf
Torque all bolts to spec and you're new blower is bolted in.
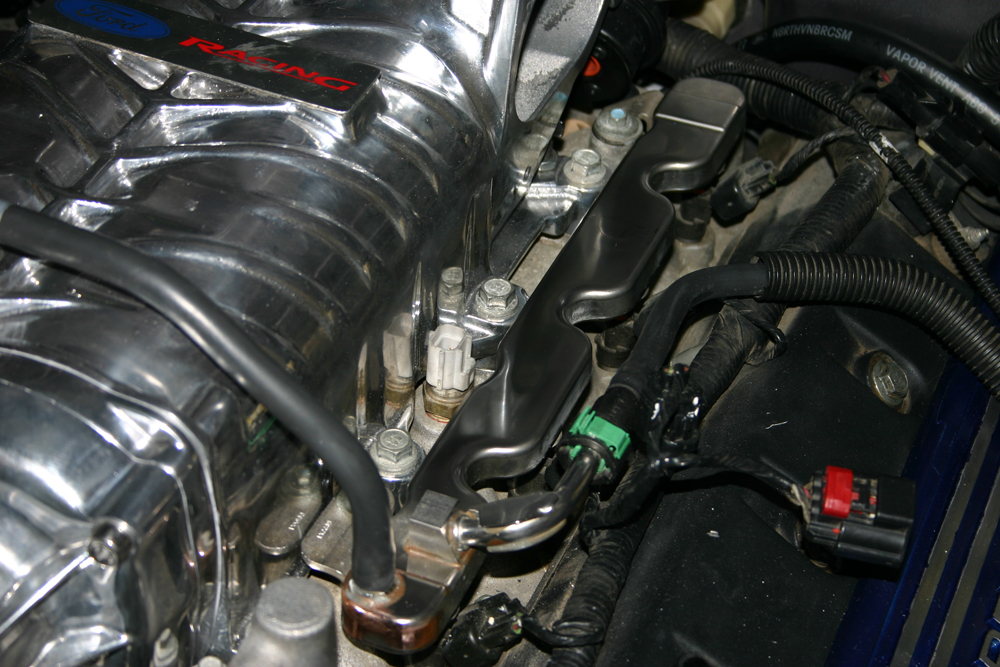
Next put your fuel rails back in place. Again make sure to lubricate the O-Rings with a little dish soap (some people use oil, but dish soap doesn't leave any residue).
They should slide on with a little pressure, then bolt them down with the four bolts.
I polished mine up a bit to try and match the blower, but wasn't able to really get the brown crap off. I'll likely go for some aftermarket rails at some point.
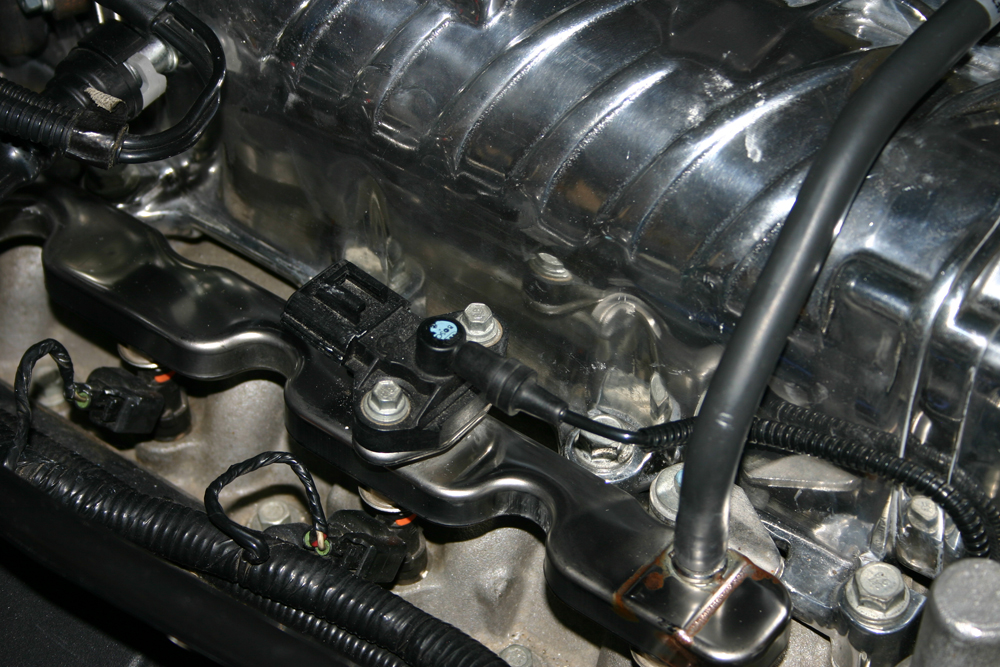
From here you'll need to bolt back up the EGR onto the blower, connect all your labeled vacuum hoses, and then of course put that BIIIIG EGR bolt back onto the EGR and tighten it up.
You'll likely have to wrestle with the bolt a bit to get it into the hole on the blower, but it can be done.. I did it so anyone could do it
After the EGR is bolted back on you can go ahead and put your belt on the new blower. Putting ON the belt is harder than pulling it off so again... breaker bar!
Then just bolt back up your coolant tanks, an all your other lines and re-attach your CAI and you're done!
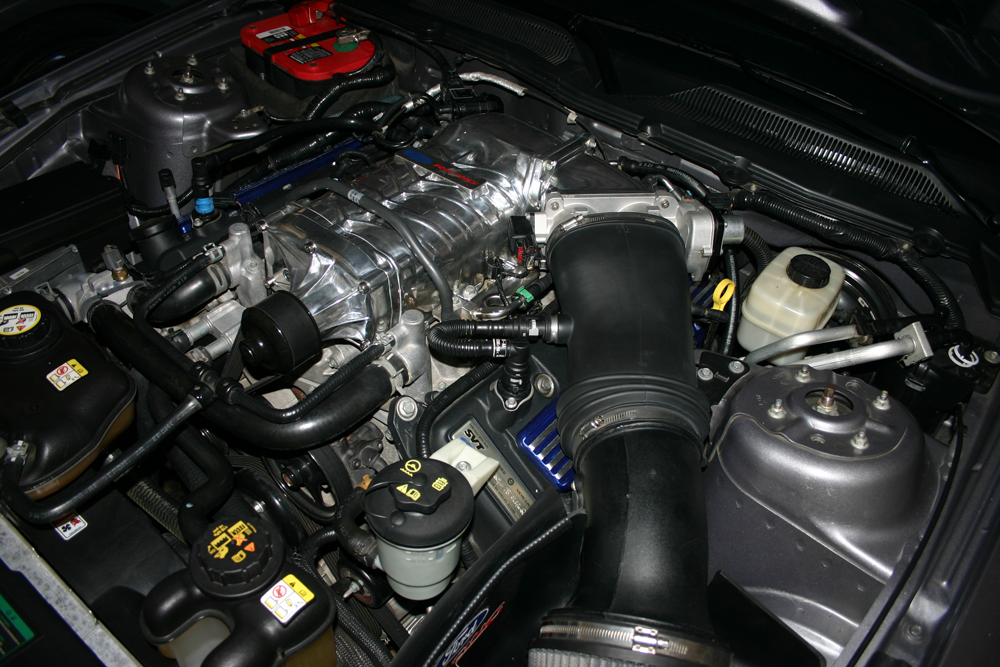
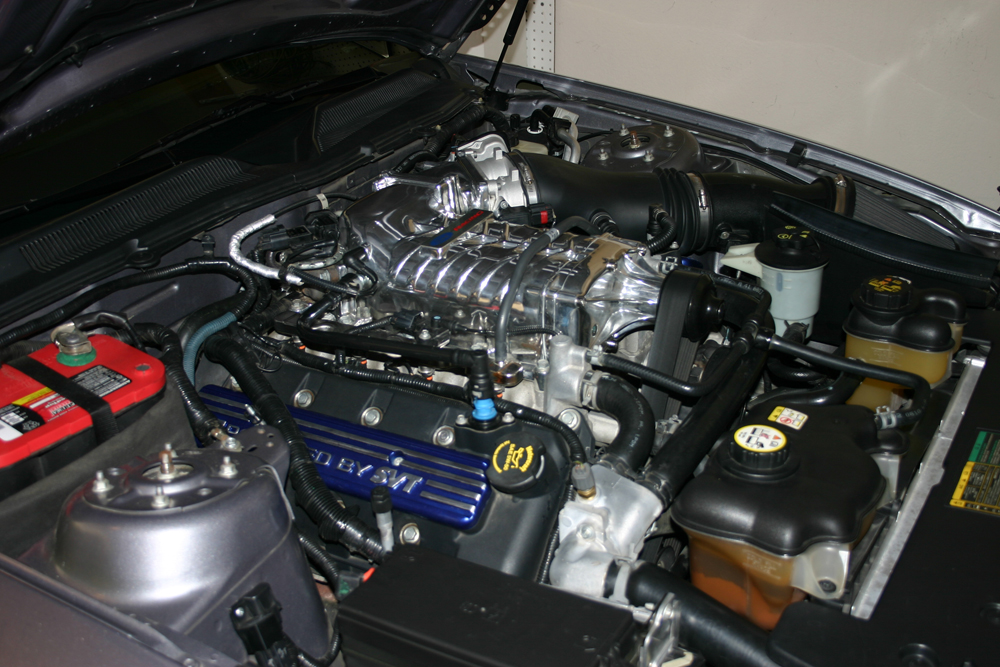
All that's left is to re-attach your battery (making sure your fuel fuse is back in first) and then load your tune and you're ready to rock!
If anyone has any questions just let me know. Like I said there are plenty of these around but I figured I'd try and add to the list. Hope it's helpful to someone.
I tried to get every single step, but I realize I didn't get the removal of the battery (which you do before anything else) and the removal of the fuel pump fuse to release the fuel pressure. But I think I have most of everything else.
This took about a day and a half because I did not have the correct bolts for the EGR.
For some reason the stock bolts did not fit the new blower, after asking here I got some help, and apparently the newer TVS units use the stock Eaton bolts, but the older ones that came out before do in fact use different bolts.
I'm not a mechanic by any means, but other than the bolt issue and some other electrical issues (not related to the install) it was pretty straightforward and fun
Ok on to the install!
My newly polished TVS waiting to be put on... aint it purrty!
Had to put the bypass valve back on the blower since it required removal for the polishing.
The stock Eaton in place with the FRPP CAI.
I didn't have any pics of removing the CAI but it's extremely simple and you basically just need to remove the two bolts by the air filter. You'll need a socket wrench, I don't remember the diameter, but I think it was 5/8. and the hose clamp at the top of the CAI and you're done.
Make sure you also remember to unplug the mass air sensor which is down closer to the air filter. There's no need to unscrew it or anything, unless you are using another CAI, just pop the clip and pull it off.
You'll also have to remove the PCV line from the engine to the CAI as well. You just need to squeeze the little tabs and it will come right off.
Removing the stock throttle body after the CAI removal.
There are four bolts here and the one in the back is a little tight, but not bad at all.
My bolts were allen heads, but I've seen others that were regular hex bolts.
You'll need to unplug the throttle body, on the top right there's a black plug. You need to slide the little tabs forward and then just pull back.
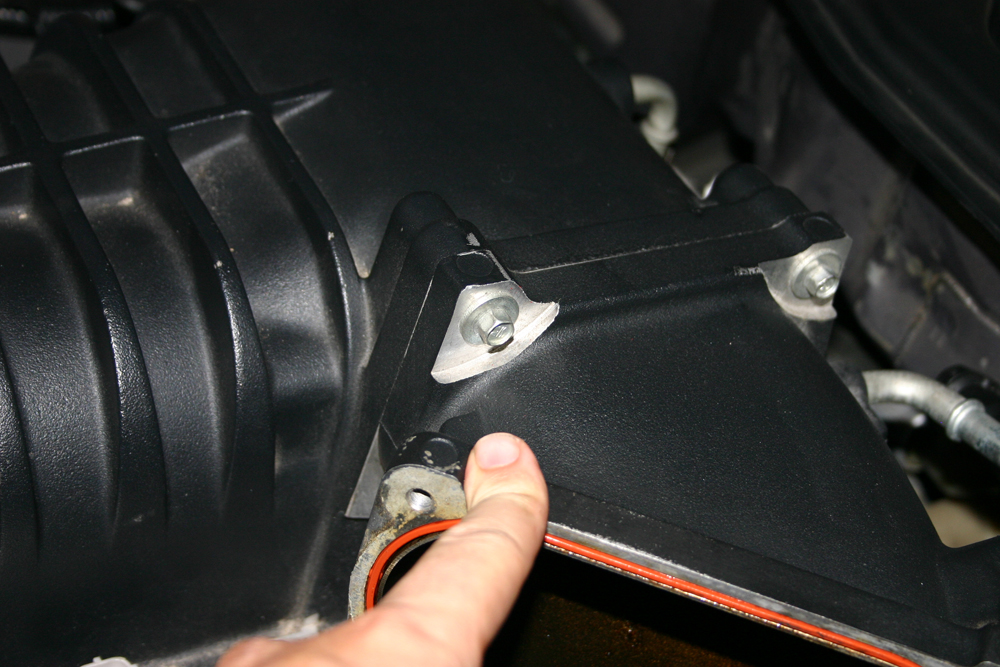
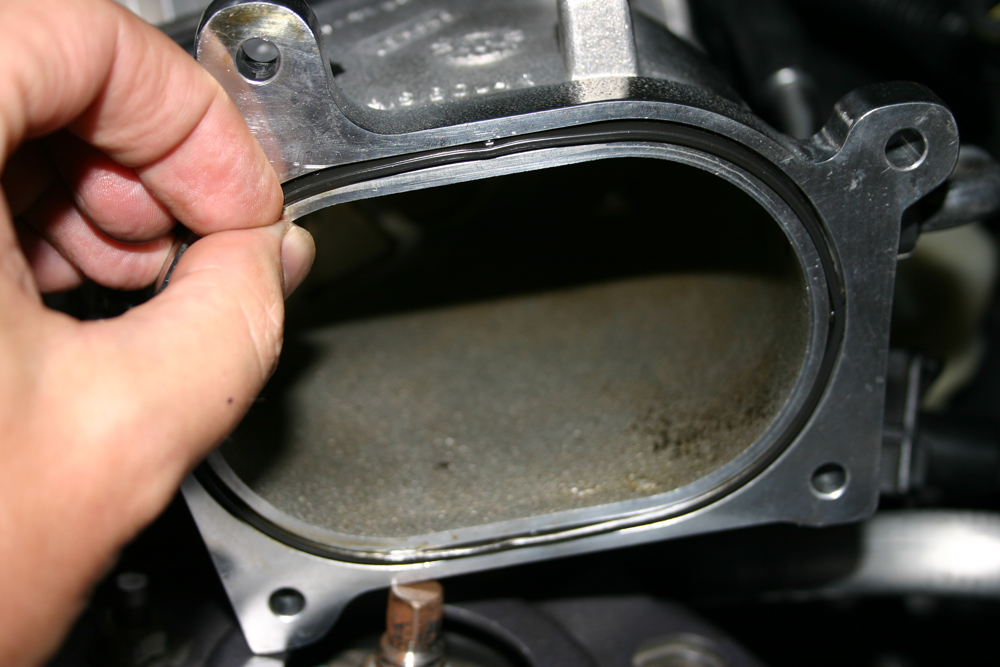
The next step I did was to remove the elbow.
This is four bolts as well, but the front lower one here:
Is kind of tricky to get to. I used a ratchet wrench for this and it worked great. If you don't have a ratchet wrench you can probably get it with an extension and a socket... up to you.
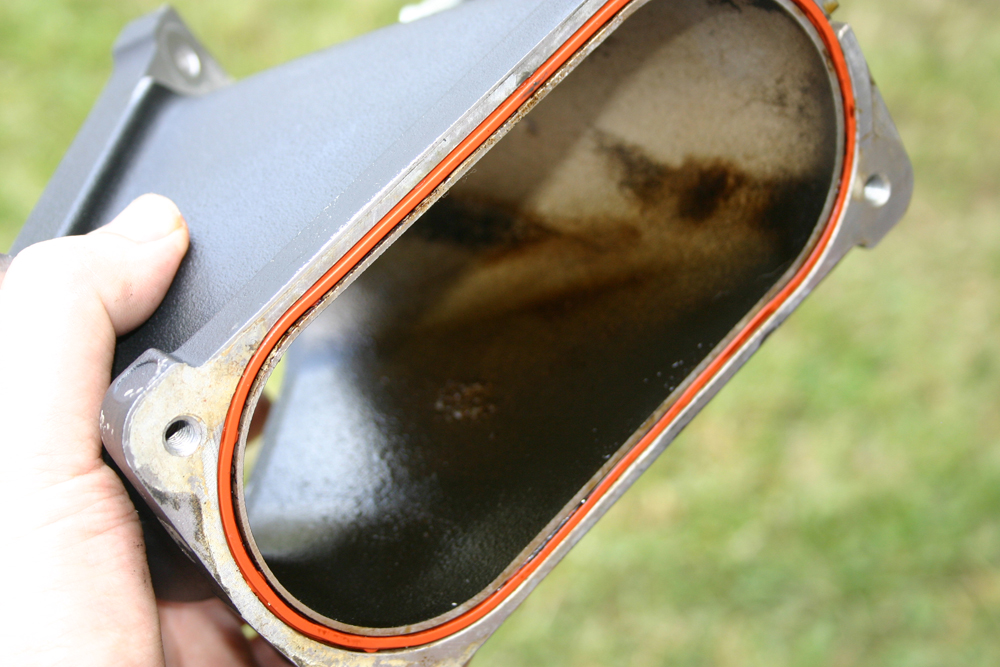
Once the elbow was off I took a look at it state and it was pretty oiled up.
I didn't have a catch can on the car... but after seeing this I ordered one from JLT which is now on the car
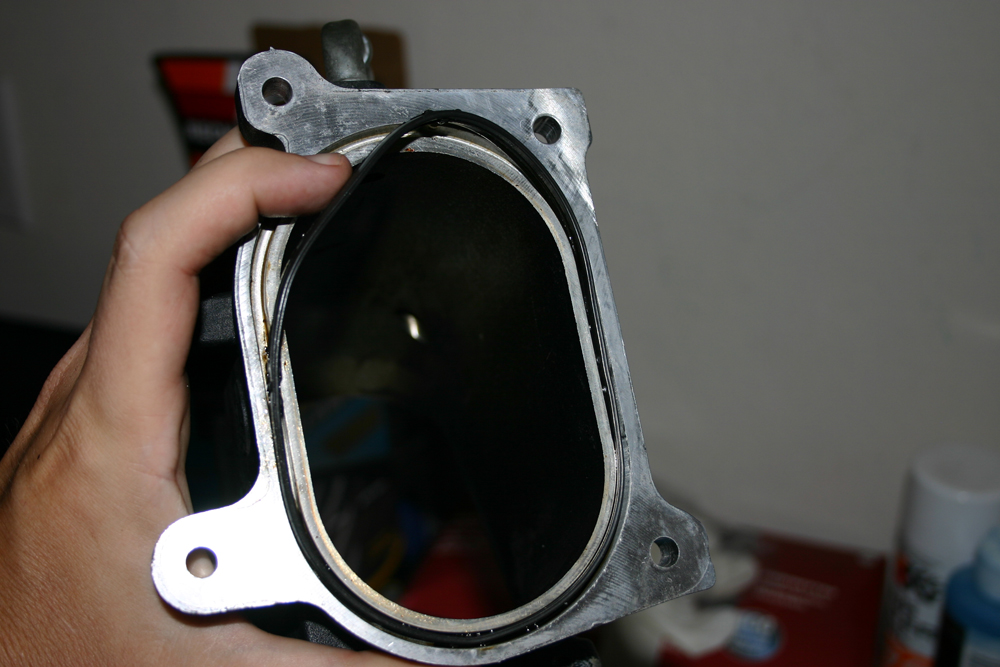
Make sure you remember to transfer the gasket from the stock elbow to the new TVS elbow if you are using a new one. If not then you'll just be putting the stock elbow back in place.
Good thing I did a writeup.... I forgot to transfer the OTHER gasket on the other side of the elbow. Didn't notice it until I went through these pictures. So make sure you transfer BOTH gaskets and don't forget one like I did or you'll have to pull the elbow off again... like I did
Off of the old.
Onto the new!
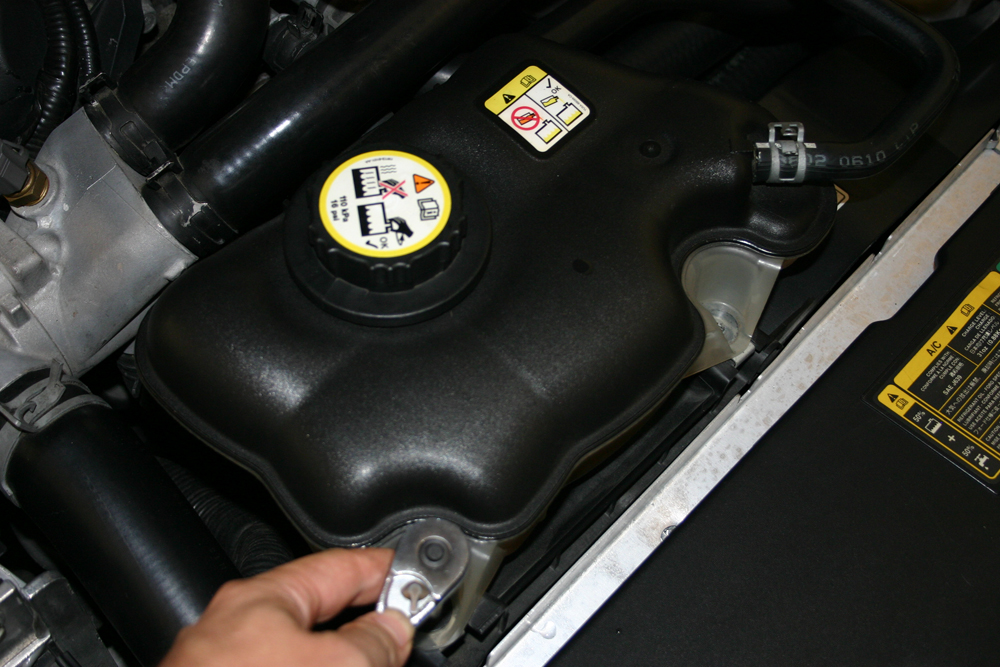
The next step was to pull the belt off of the blower.
But you need to remove the coolant tank to get access to the tensioner to release the belt.
There are two bolts securing the tank. Make sure you are careful to not pull the metal clips away when you remove the tank otherwise you'll go looking for them... ask me how I know
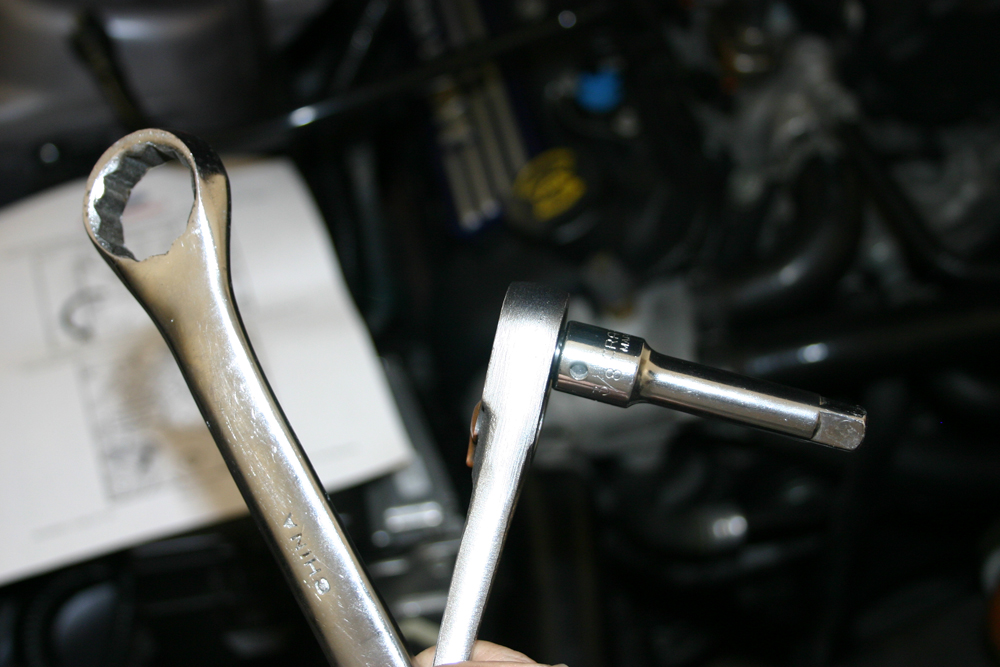
Now this part was pretty strenuous for me because I didn't have a breaker bar. I HIGHLY suggest you use one to remove the belt, and save yourself the pain
This is what I used:
The old box end of the wrench around the ratchet trick. Worked ok, but again not NEARLY enough leverage for it to be easy... that sucker is TIGHT.
You'll just need the end of an extension to fit into the box cavity of the tensioner.
Rotate Clock-wise to loosen.
YAY it's off!
Up next was the EGR Valve. Although in the Ford Racing instructions they refer to it as the "ESM" but anyway.
I removed the vacuum lines from the egr and blower and labeled them so I wouldn't forget what went where.
Then you need to unplug the EGR wire at the top which has the same sliding mechanism as the plug the throttle body used.
Then there are two more plugs by the fuel rail.
And then the PCV line, like on the other side which is removed the same way by pinching and pulling.
Once you have all of those off then it's on to the big PITA EGR Bolt.
I used this
And let it sit for a while while I was removing the other vacuum line on the back of the blower.
The EGR bolt is HUGE. I didn't have a wrench big enough to fit the bolt (bigger than 1") so I used a heavy-duty locking plyer to fit to the bolt and it worked like a charm.
It was still a pain to remove though.
This is likely the hardest part of your install (at least it was for me).
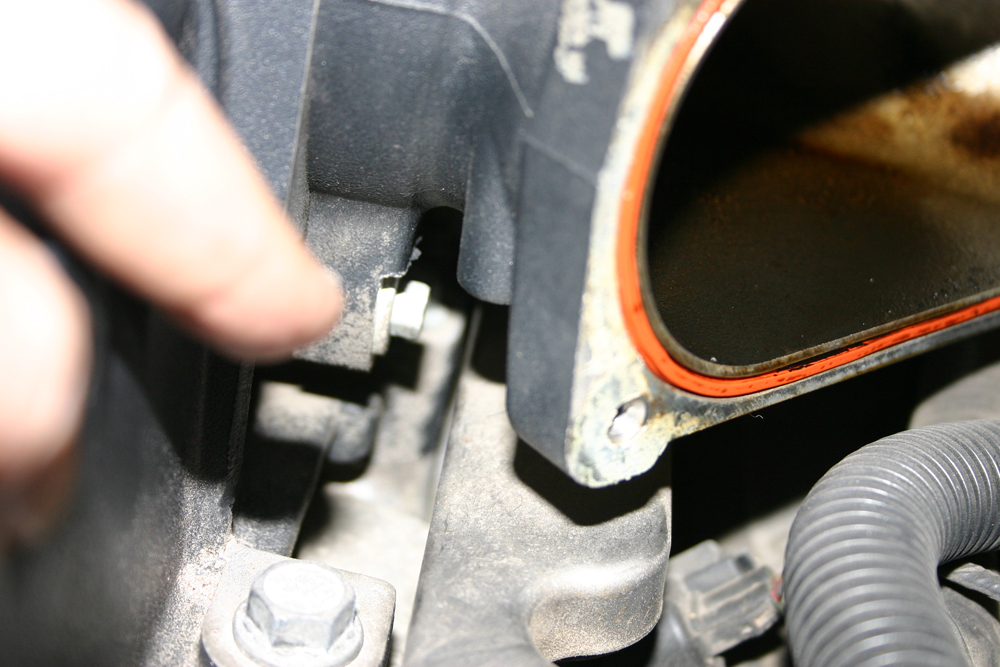
Next there are two bolts for the EGR to remove from the stock blower.
This was the hangup of my install. The two bolts that attach the EGR to the blower did not fit the new blower.
And then it's off... but make sure you don't lose the gasket as you'll be re-using it as well.
Next you'll need to unbolt the fuel rails.
There are two bolts on each side that secure the rail.
Once the bolts are out you'll need to pull up on the rail, rock it back and forth and remove it. There may still be some pressure in the rail so be ready with some rags to catch any excess fuel.
Remove the fuel pump module fuse (F41) per FRPP instructions and follow the FRPP procedure to release fuel pressure. (Basically remove the fuse and crank the car and let it run out of gas)
I did have some fuel leak out when I pulled mine. Not a lot but some.
All of my injectors stayed in the engine, I've read where some of them come out. None of mine did, but the O-rings that go around the injectors did come off with the rail.
Make sure you replace them if this happens.
Place them back on the injectors, and when you're ready to install the rails again use a little dish soap on the rings to help them slide onto the rails. I didn't use any lubrication the first time and tore a ring... another hiccup that cost me some time.
Do not worry with removing the fuel line from the rails. I tried this and I have yet to figure out how the damn thing works.
No matter though, all you need to do is lay them to the side.
Also take note of the two electrical connectors on the driver's side of the rail.
I accidentally slipped those connectors UNDER the rail and wound up having to remove the rail AGAIN because they wouldn't reach after doing that... nice boneheaded move on my part
Those go on the OUTSIDE of that rail.
Now you're finally ready to remove the blower. There are ten bolts (I believe there are then) which are easy to see.
But there is one more in the back of the blower that you cannot see.
Don't forget this one too.
I didn't have a helper, and could remove the blower, but it is kind of heavy so it might not be a bad idea to have someone help you lift it off.
Once it's off make sure you remove the dowel pins from the stock blower and put them on the new TVS.
All you need is some plyers and they pull right out.
After pulling the blower I saw the oil residue on my intercooler and AGAIN realized I sorely needed a catch can.
You can also see the dowel pins that didn't come out with the stock blower... remove those and put them on the new one. And there's that pesky 10th bolt!
Now it's pretty much smooth sailing for you.
Put the new dowel pins in the new blower and bolt it down per FRPP instructions... I used the instructions found at VMP's website here:
http://vmptuning.com/GT500/TVS/FRPPTVSINSTRUCTIONS.pdf
Torque all bolts to spec and you're new blower is bolted in.
Next put your fuel rails back in place. Again make sure to lubricate the O-Rings with a little dish soap (some people use oil, but dish soap doesn't leave any residue).
They should slide on with a little pressure, then bolt them down with the four bolts.
I polished mine up a bit to try and match the blower, but wasn't able to really get the brown crap off. I'll likely go for some aftermarket rails at some point.
From here you'll need to bolt back up the EGR onto the blower, connect all your labeled vacuum hoses, and then of course put that BIIIIG EGR bolt back onto the EGR and tighten it up.
You'll likely have to wrestle with the bolt a bit to get it into the hole on the blower, but it can be done.. I did it so anyone could do it
After the EGR is bolted back on you can go ahead and put your belt on the new blower. Putting ON the belt is harder than pulling it off so again... breaker bar!
Then just bolt back up your coolant tanks, an all your other lines and re-attach your CAI and you're done!
All that's left is to re-attach your battery (making sure your fuel fuse is back in first) and then load your tune and you're ready to rock!
If anyone has any questions just let me know. Like I said there are plenty of these around but I figured I'd try and add to the list. Hope it's helpful to someone.
Last edited:

