Hello guys,
I have a 2010 gt500 with oem hid headlights, I have recently bought a complete set of 2013 headlights. I ordered a harness from project retrofits 2 weeks ago with no order or shipping confirmation and after reading another thread on that company I decided to tackle the project myself.
Thankfully my 2013 headlights came with the 13 pin connector and turn signal connector, so I just had to figure out the wiring. After some time i figured out the wiring, and will post pictures of how I wired each connector below. If you decide to use this write up to wire your 2013 headlights it is at your own risk and i am not responsible for any potential damage.
Here is what you need:
-oem 13 pin and turn signal connectors
-a way to splice the wires together.
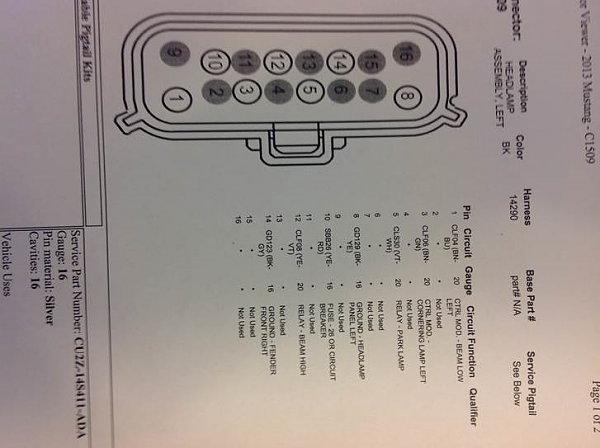
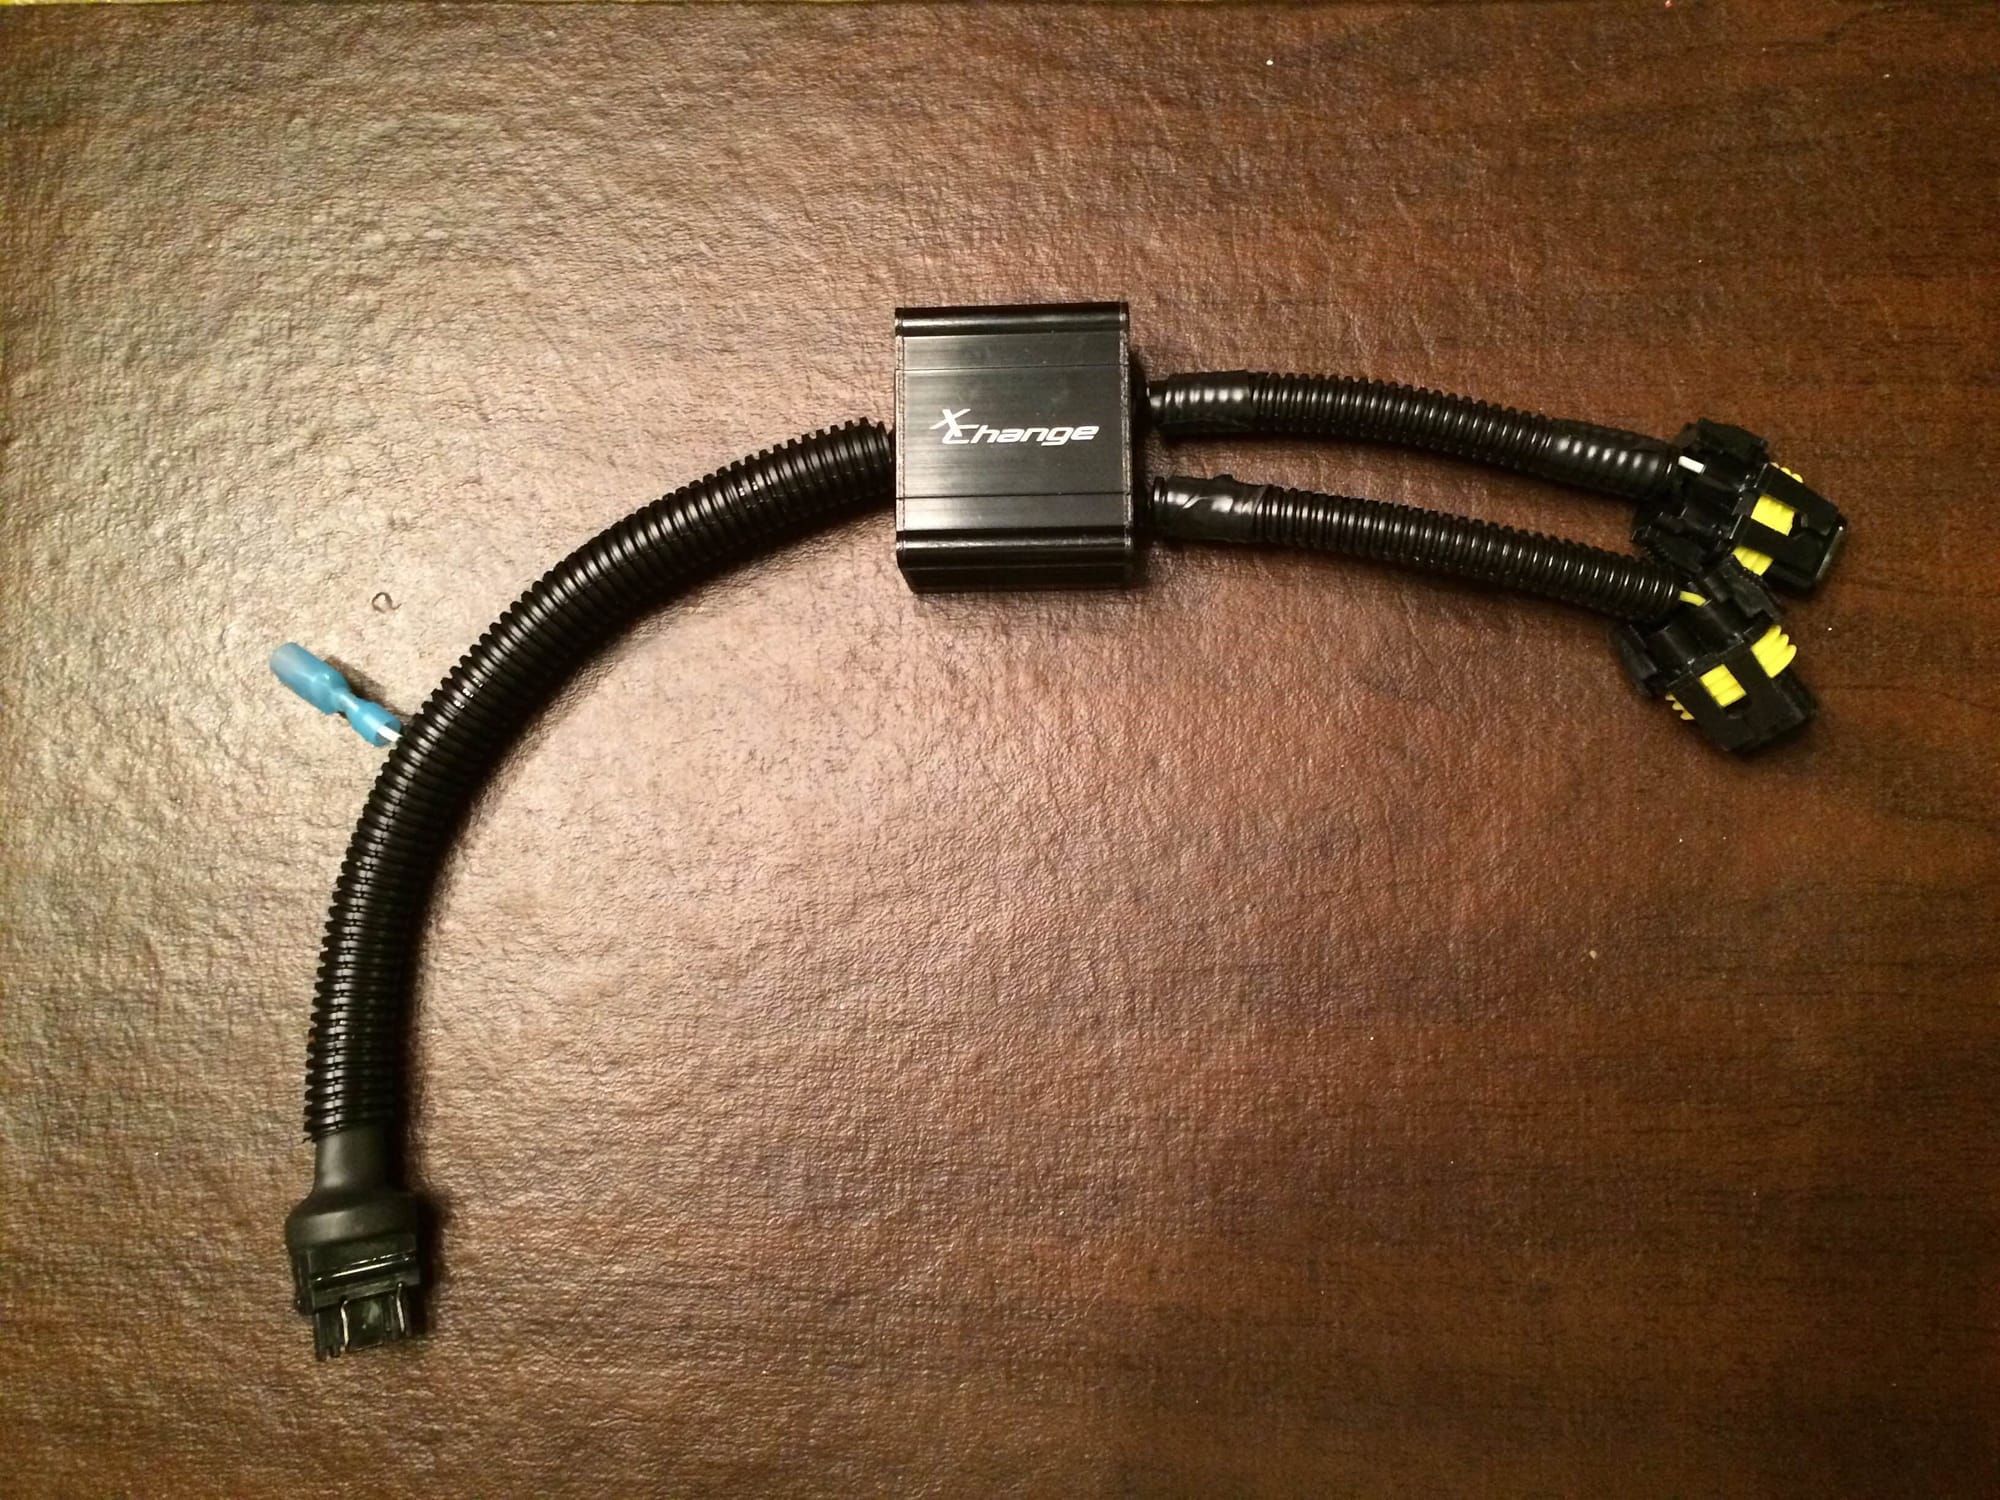
Alright so here is the 2013 driver side 13 pin connector:

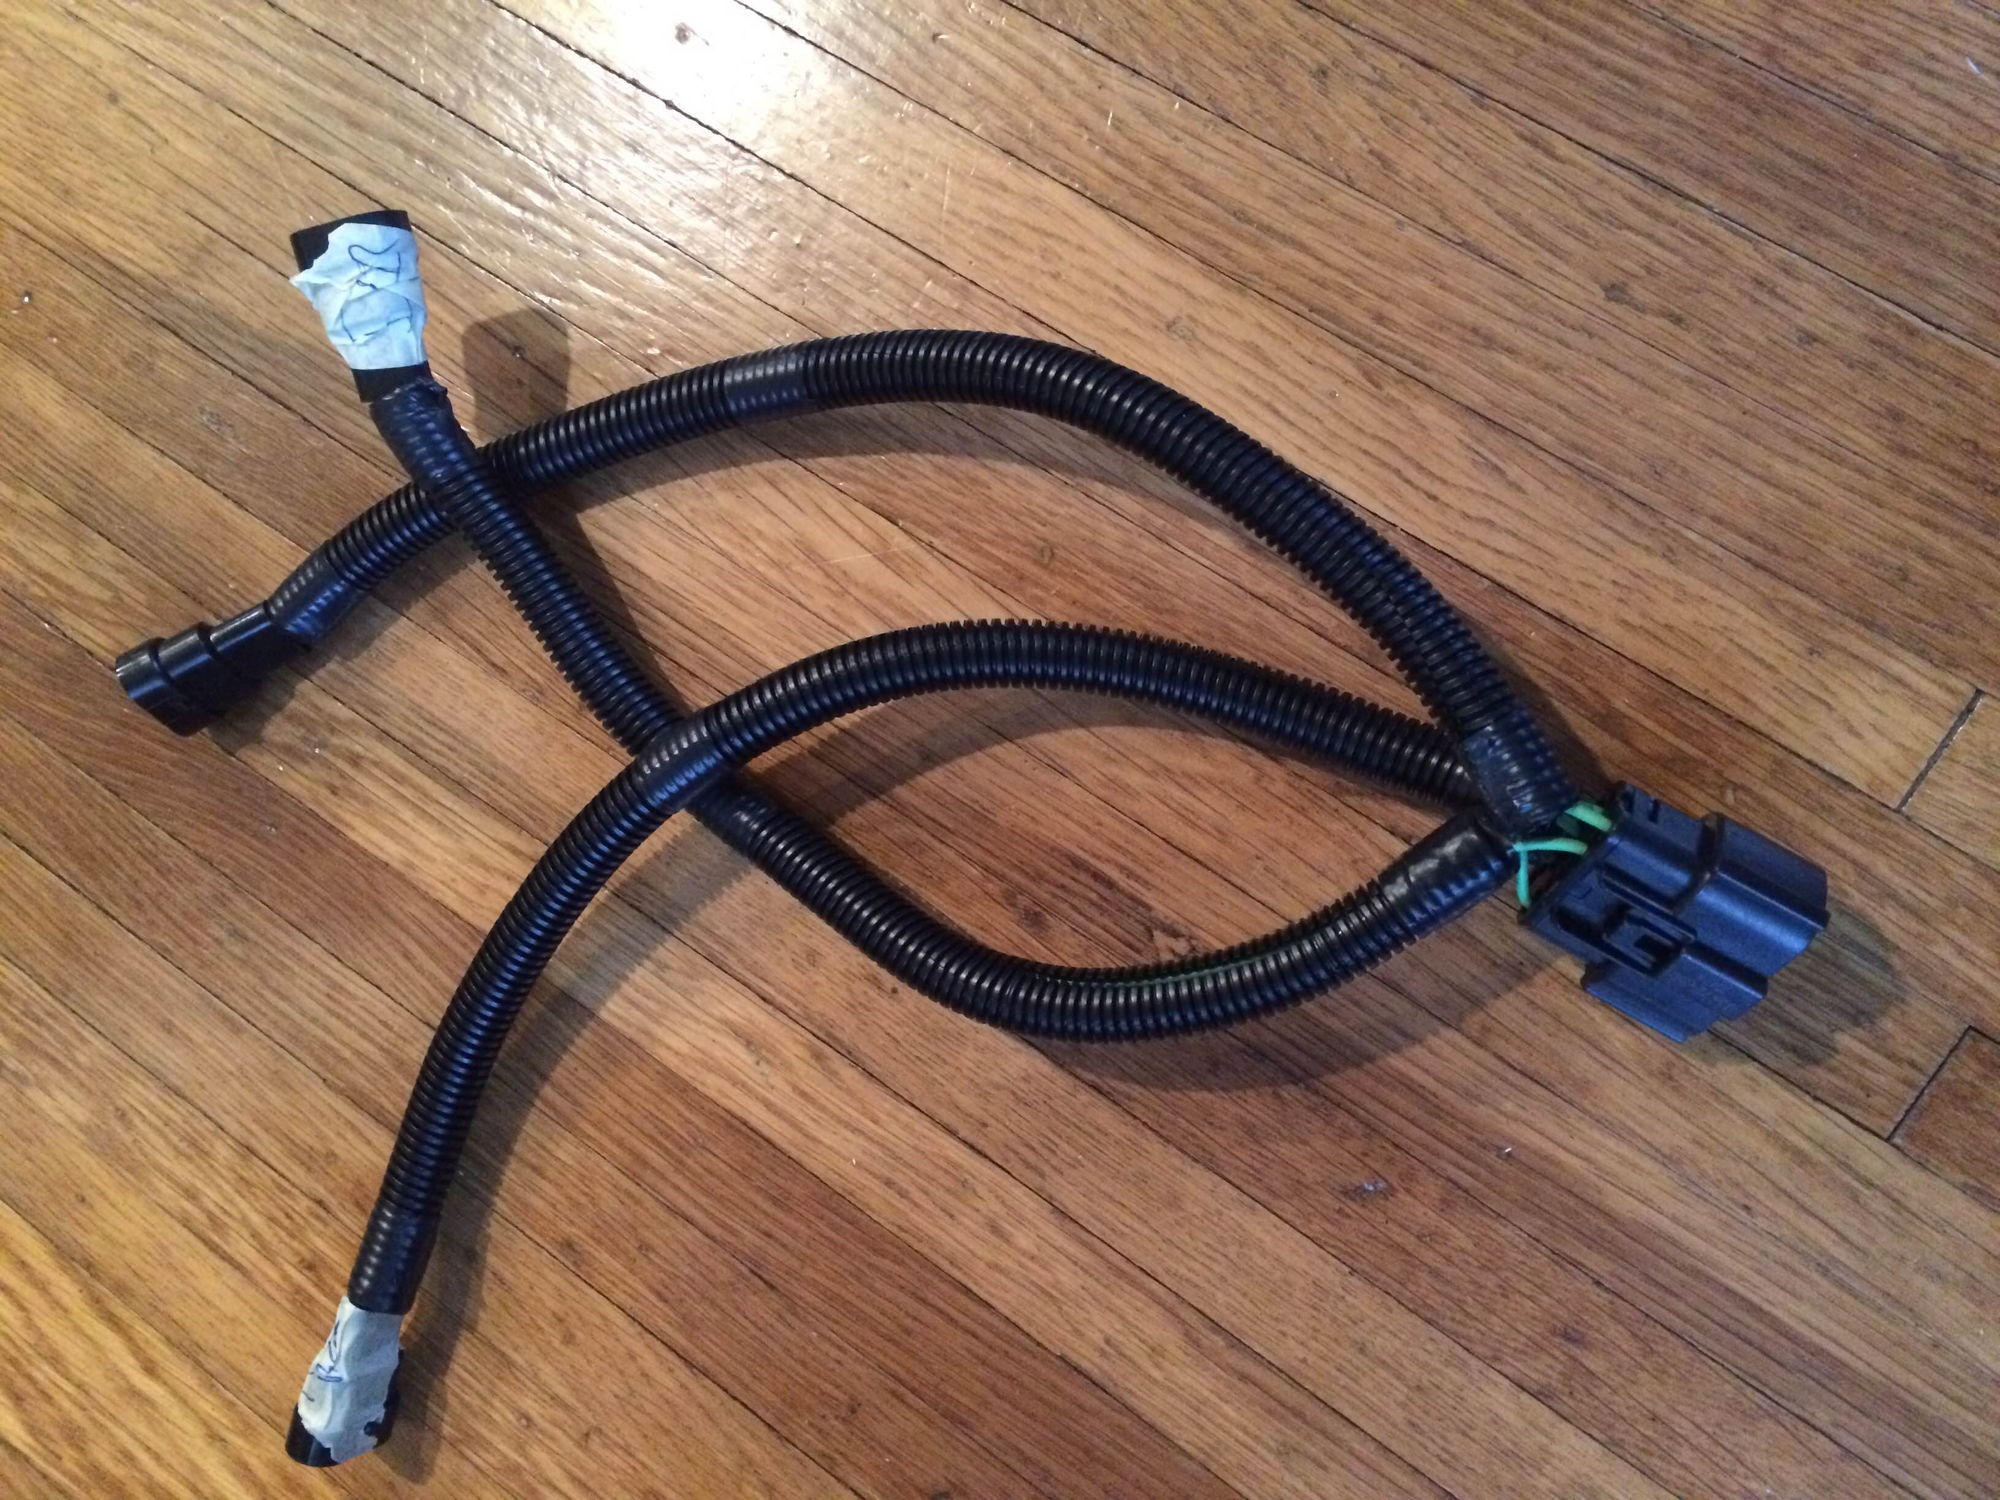
And here is the OEM 4 pin connector:

And here is how I wired them together:
-Yellow/red to yellow/red
-light purple to light purple
-yellow/purple to yellow/purple
-black/yellow to black/yellow black and brown (brown is ground for led strip and 2 blacks are for headlight)
-You will be left with a purple wire, that is the positive for the led strip. I wired it to fuse #39 under the hood. anytime the ignition or car is on your led drl's will be on if you wire it this way. (just like the 2013)

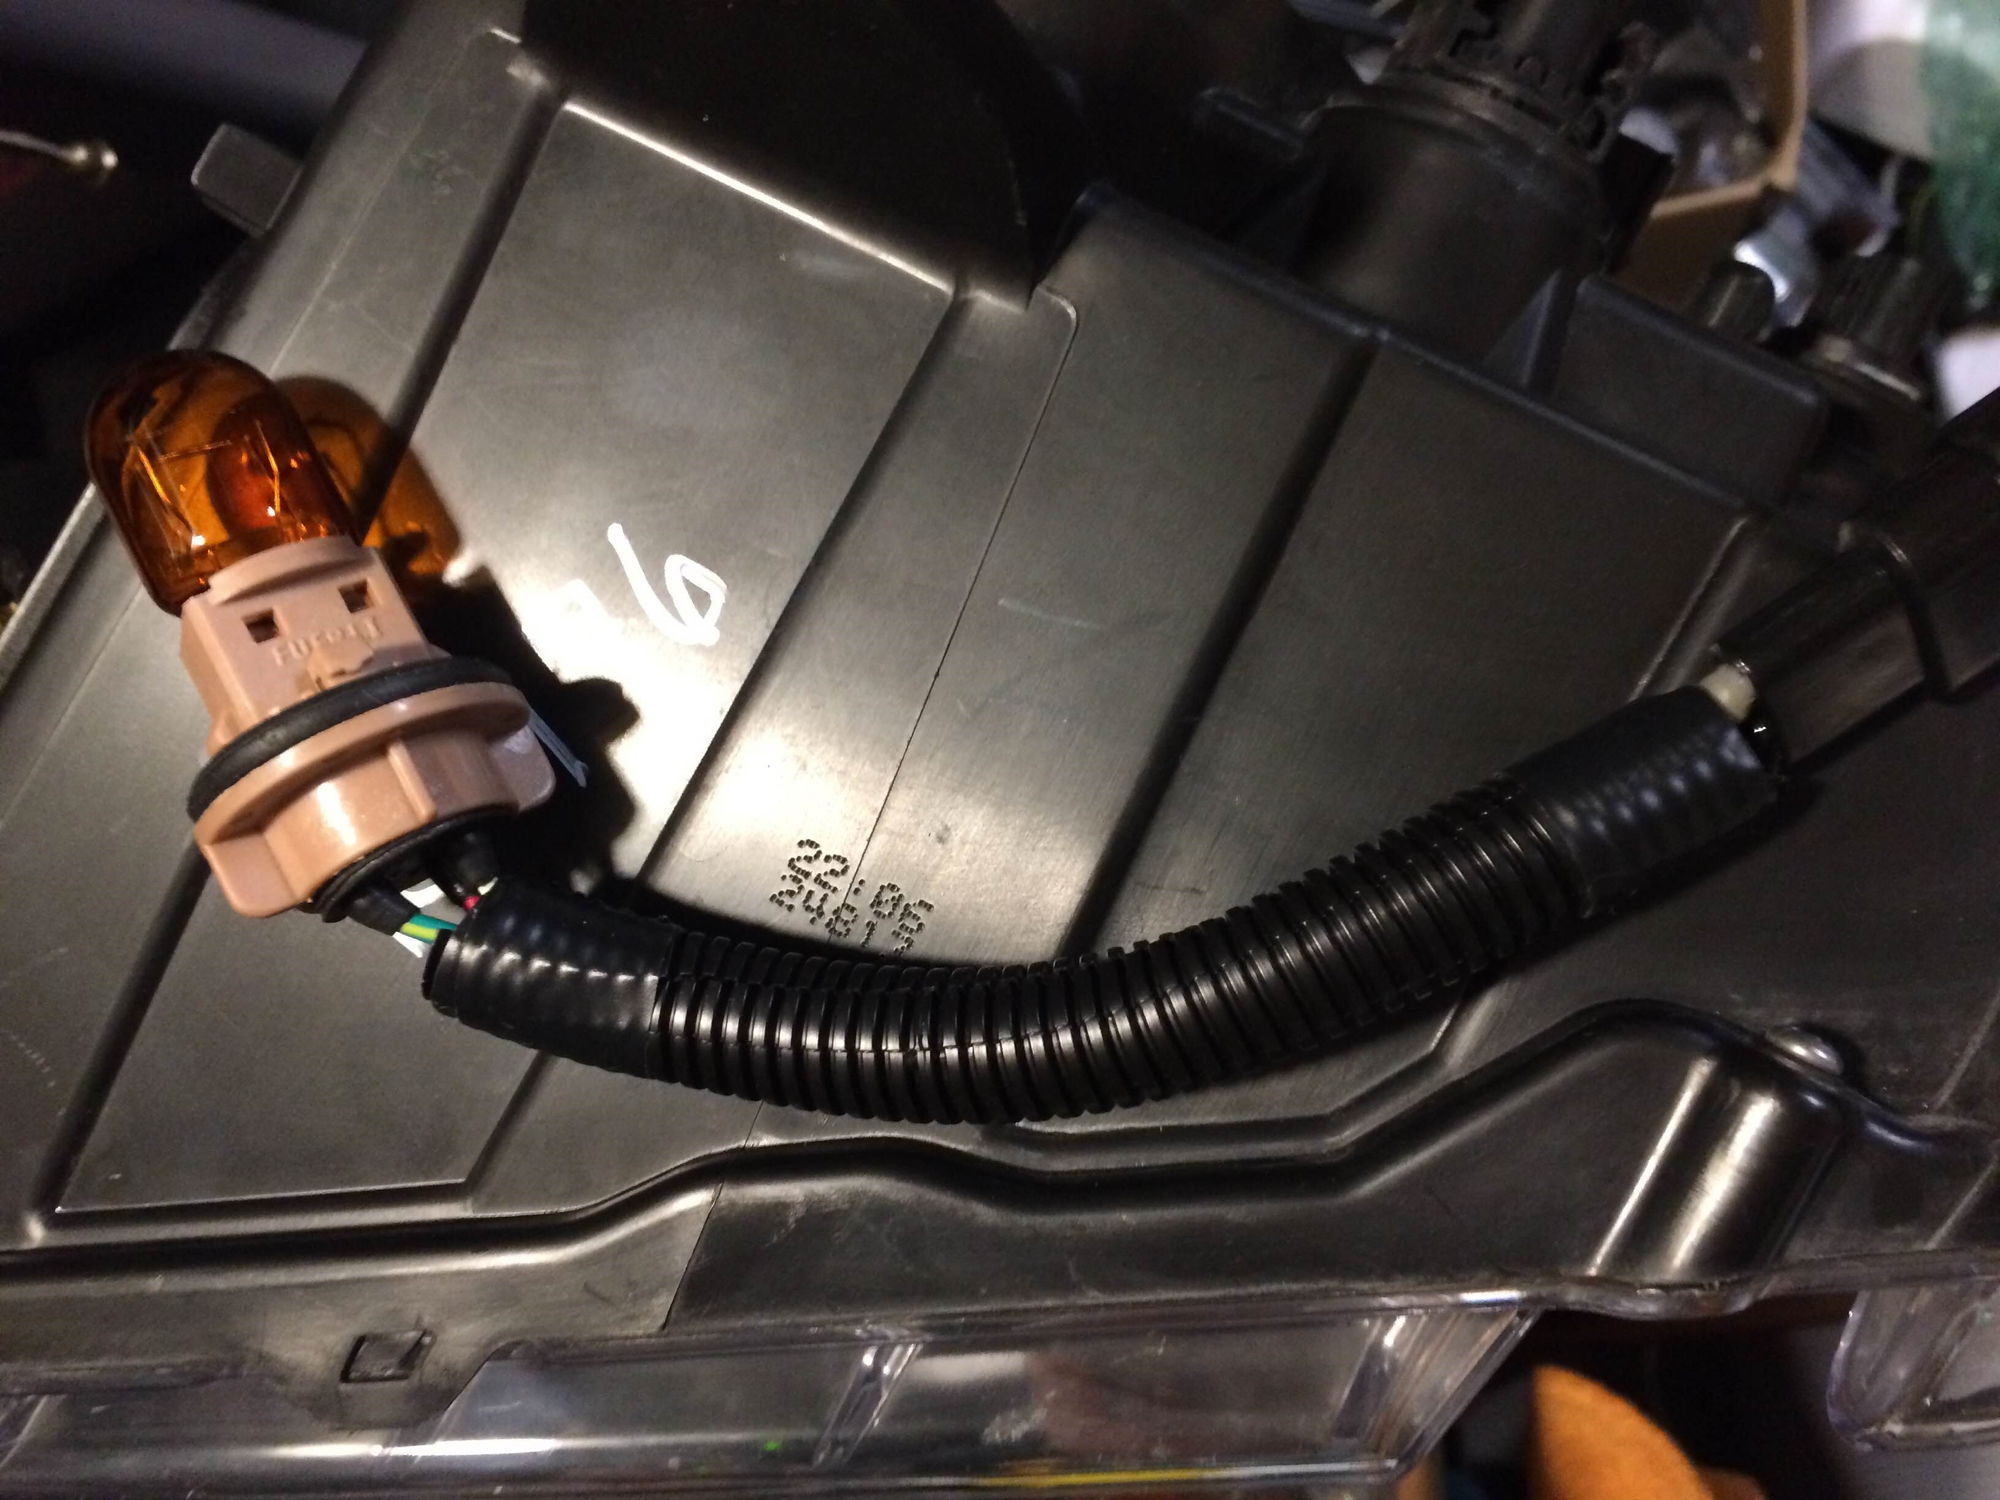
Here is the driver side turn signal:
-blue to blue
-black to black
I did not wire the purple so that way the turn signals ONLY turn on when your using your turn signals.

Here is the passenger side 13 pin to 4 pin wiring:
-blue/green to blue/green
-blue/purple to blue/purple
-yellow/purple to yellow/purple
-black/yellow to black/yellow, black, and light grey(ground for led)
-remaining purple wire to #39 fuse for led drl

Passenger side turn signal:
-black to black
-yellow to yellow

Here is a before picture with the 2010 OEM hid's

Here is an after picture with the low beams on:

Here it is with just the car on:

I have a 2010 gt500 with oem hid headlights, I have recently bought a complete set of 2013 headlights. I ordered a harness from project retrofits 2 weeks ago with no order or shipping confirmation and after reading another thread on that company I decided to tackle the project myself.
Thankfully my 2013 headlights came with the 13 pin connector and turn signal connector, so I just had to figure out the wiring. After some time i figured out the wiring, and will post pictures of how I wired each connector below. If you decide to use this write up to wire your 2013 headlights it is at your own risk and i am not responsible for any potential damage.
Here is what you need:
-oem 13 pin and turn signal connectors
-a way to splice the wires together.
Alright so here is the 2013 driver side 13 pin connector:
And here is the OEM 4 pin connector:
And here is how I wired them together:
-Yellow/red to yellow/red
-light purple to light purple
-yellow/purple to yellow/purple
-black/yellow to black/yellow black and brown (brown is ground for led strip and 2 blacks are for headlight)
-You will be left with a purple wire, that is the positive for the led strip. I wired it to fuse #39 under the hood. anytime the ignition or car is on your led drl's will be on if you wire it this way. (just like the 2013)
Here is the driver side turn signal:
-blue to blue
-black to black
I did not wire the purple so that way the turn signals ONLY turn on when your using your turn signals.
Here is the passenger side 13 pin to 4 pin wiring:
-blue/green to blue/green
-blue/purple to blue/purple
-yellow/purple to yellow/purple
-black/yellow to black/yellow, black, and light grey(ground for led)
-remaining purple wire to #39 fuse for led drl
Passenger side turn signal:
-black to black
-yellow to yellow
Here is a before picture with the 2010 OEM hid's
Here is an after picture with the low beams on:
Here it is with just the car on: