Tork Tech Terminator Install

tobynt

Active Member
Established Member
Joined
Jan 23, 2011
Messages
2,047
Location
Nashville TN
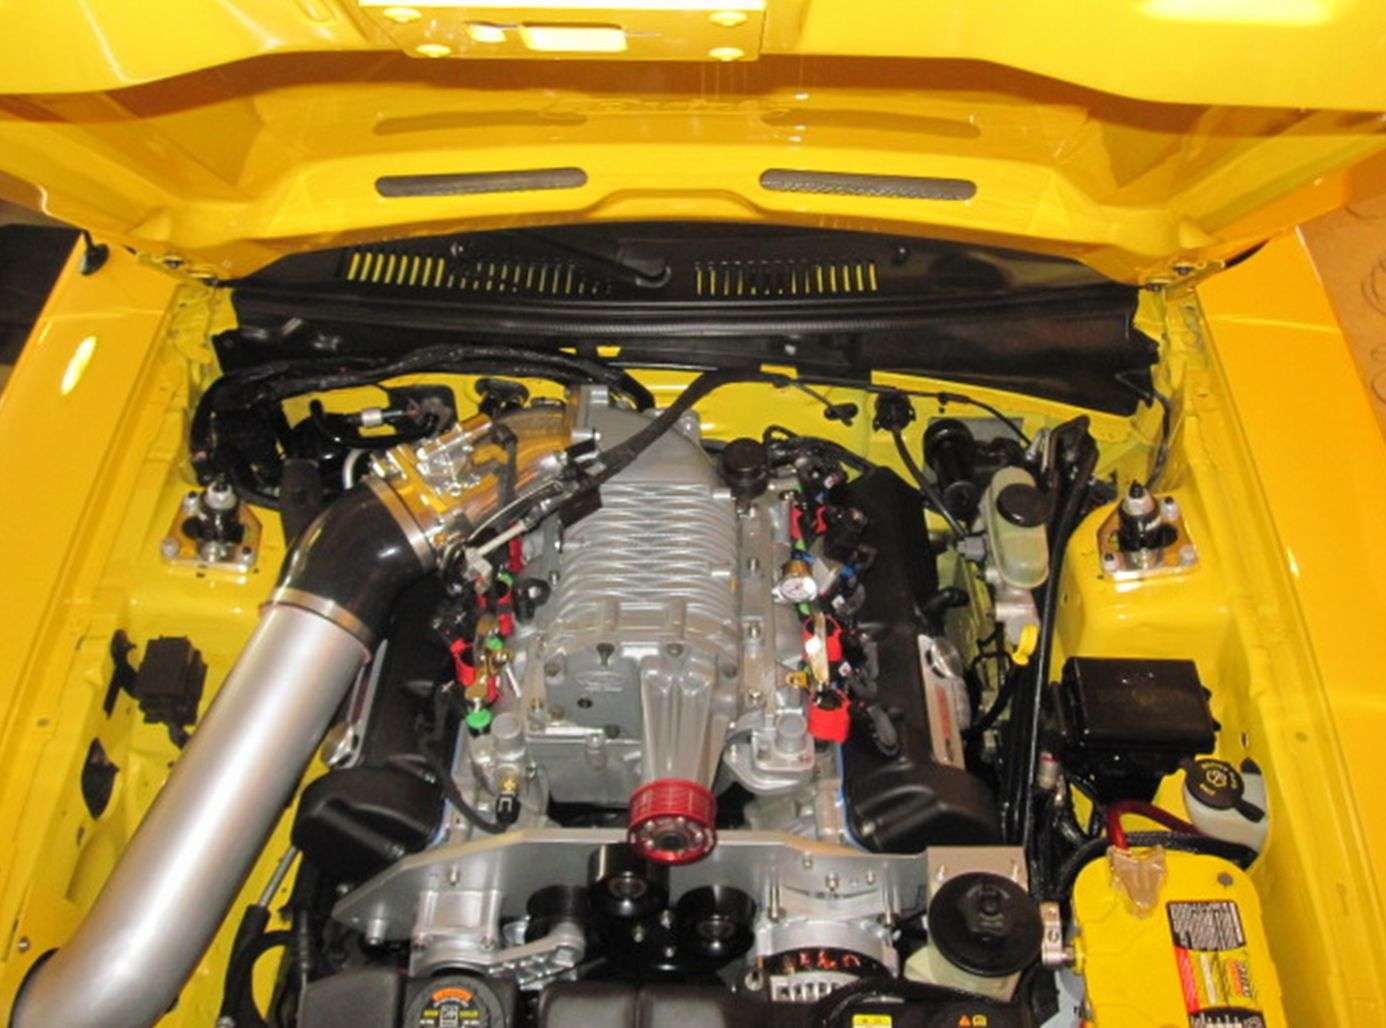
Block Coolant Hose Tork Tech Terminator install

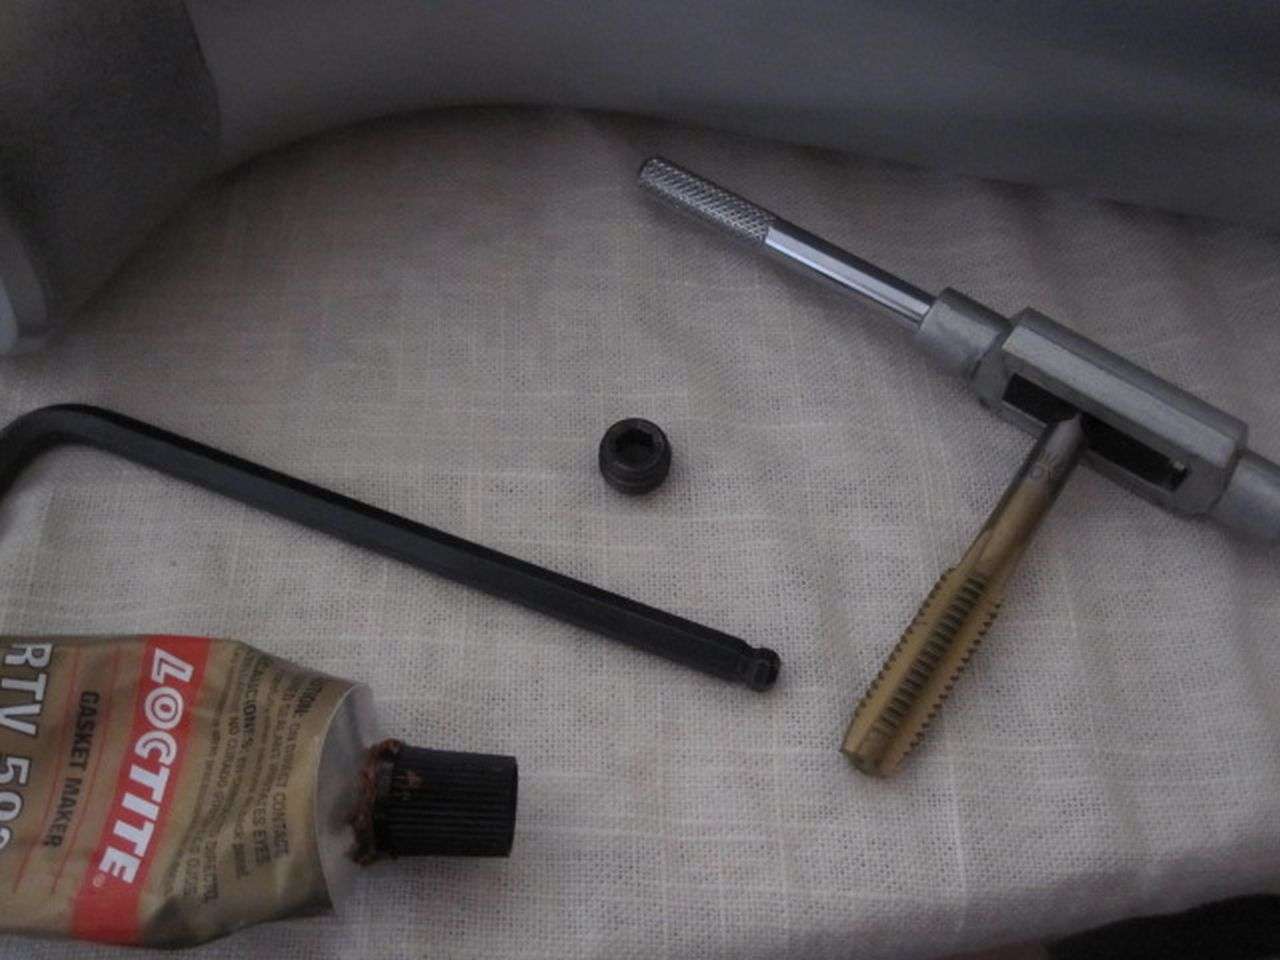
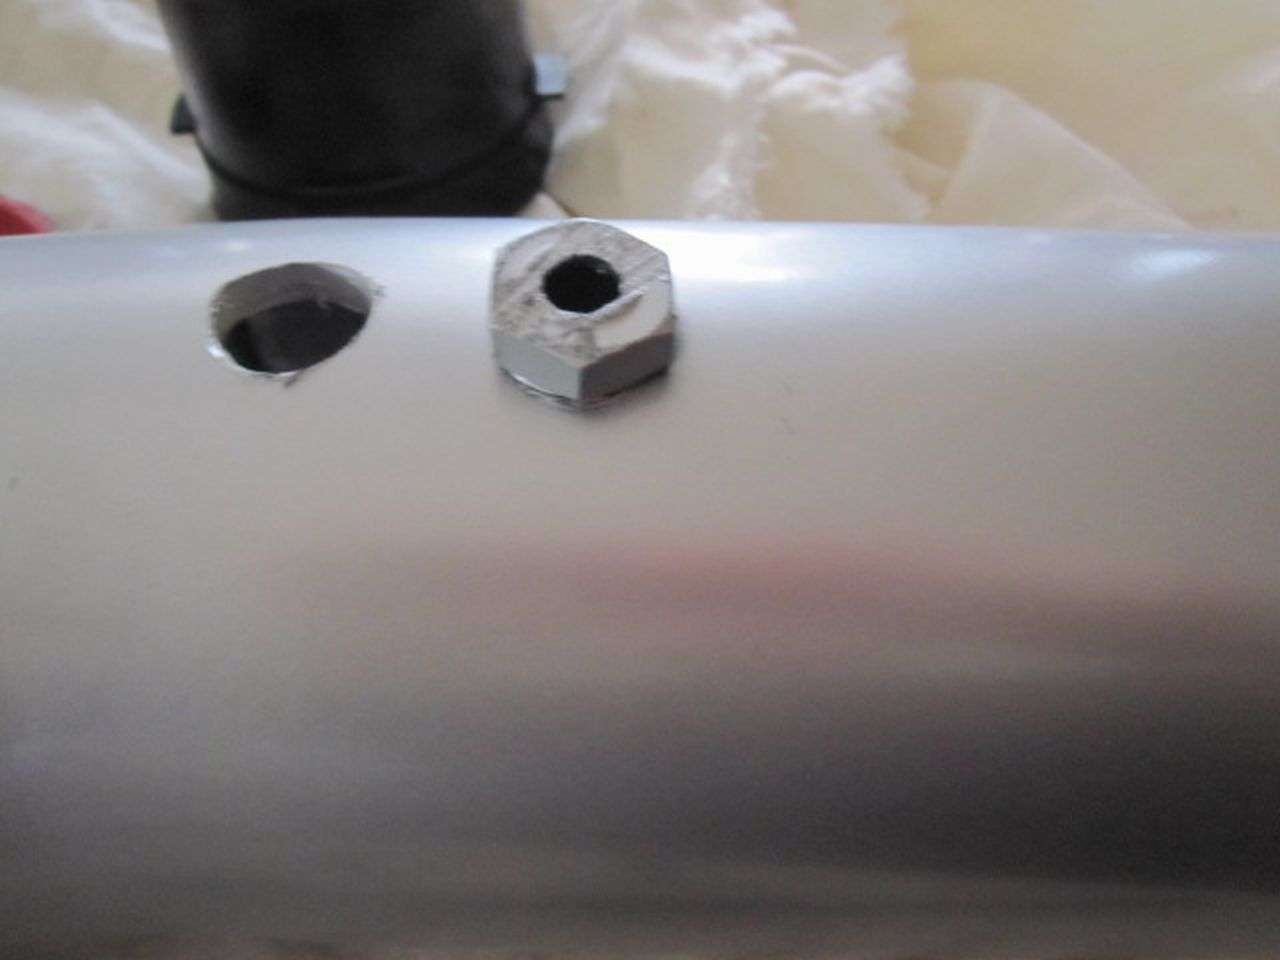
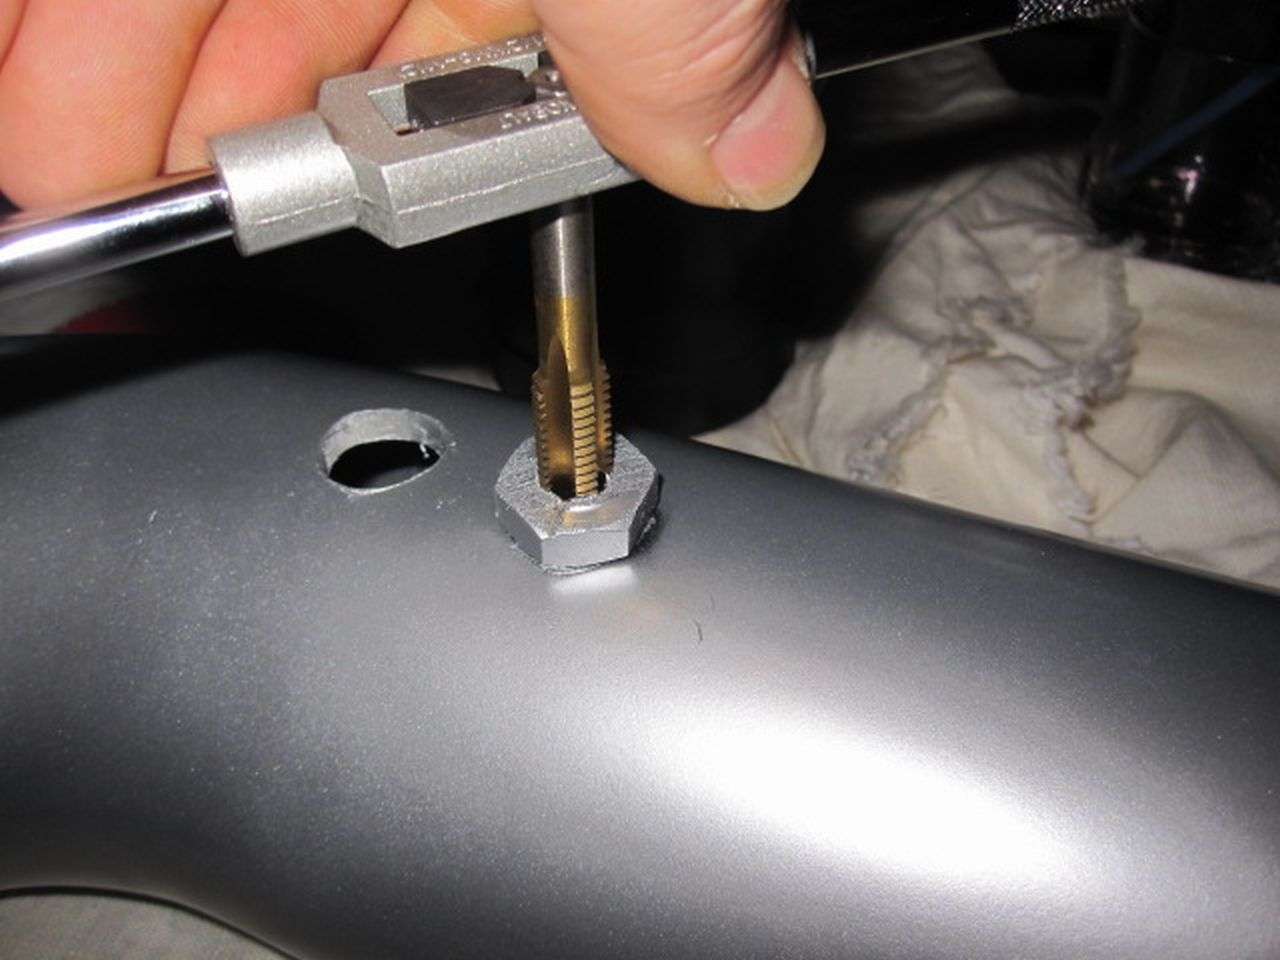
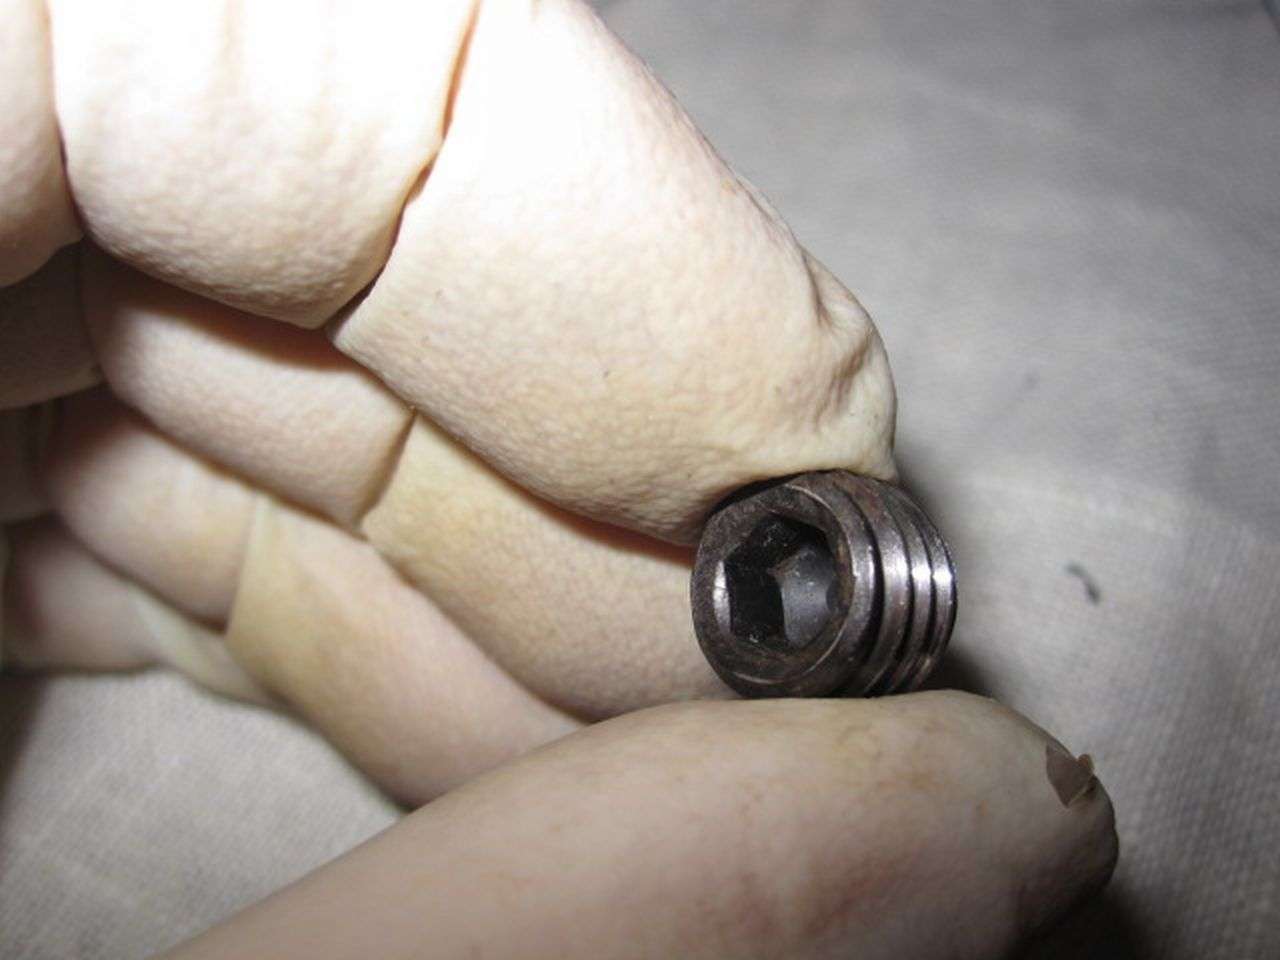
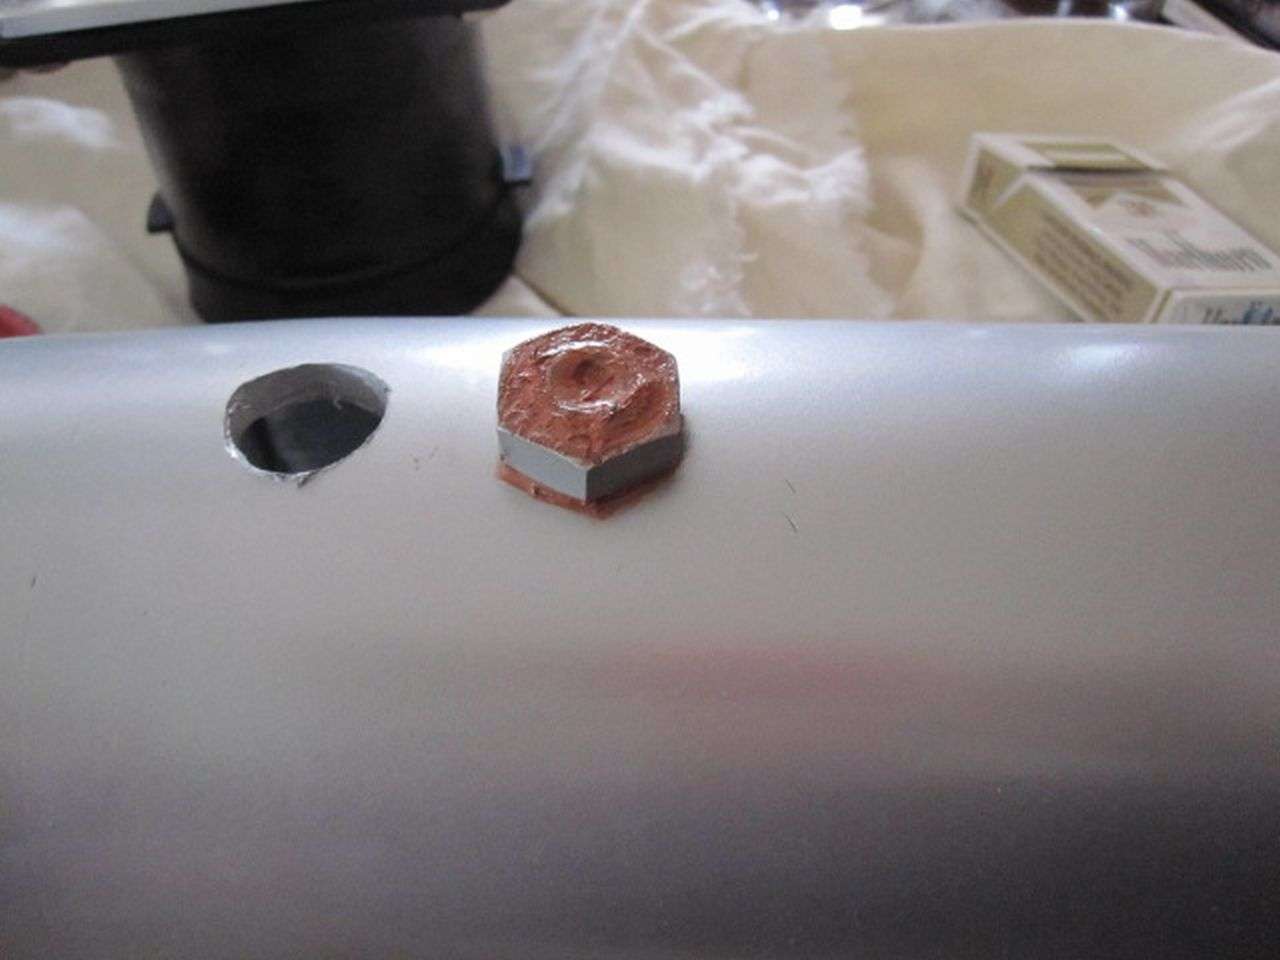
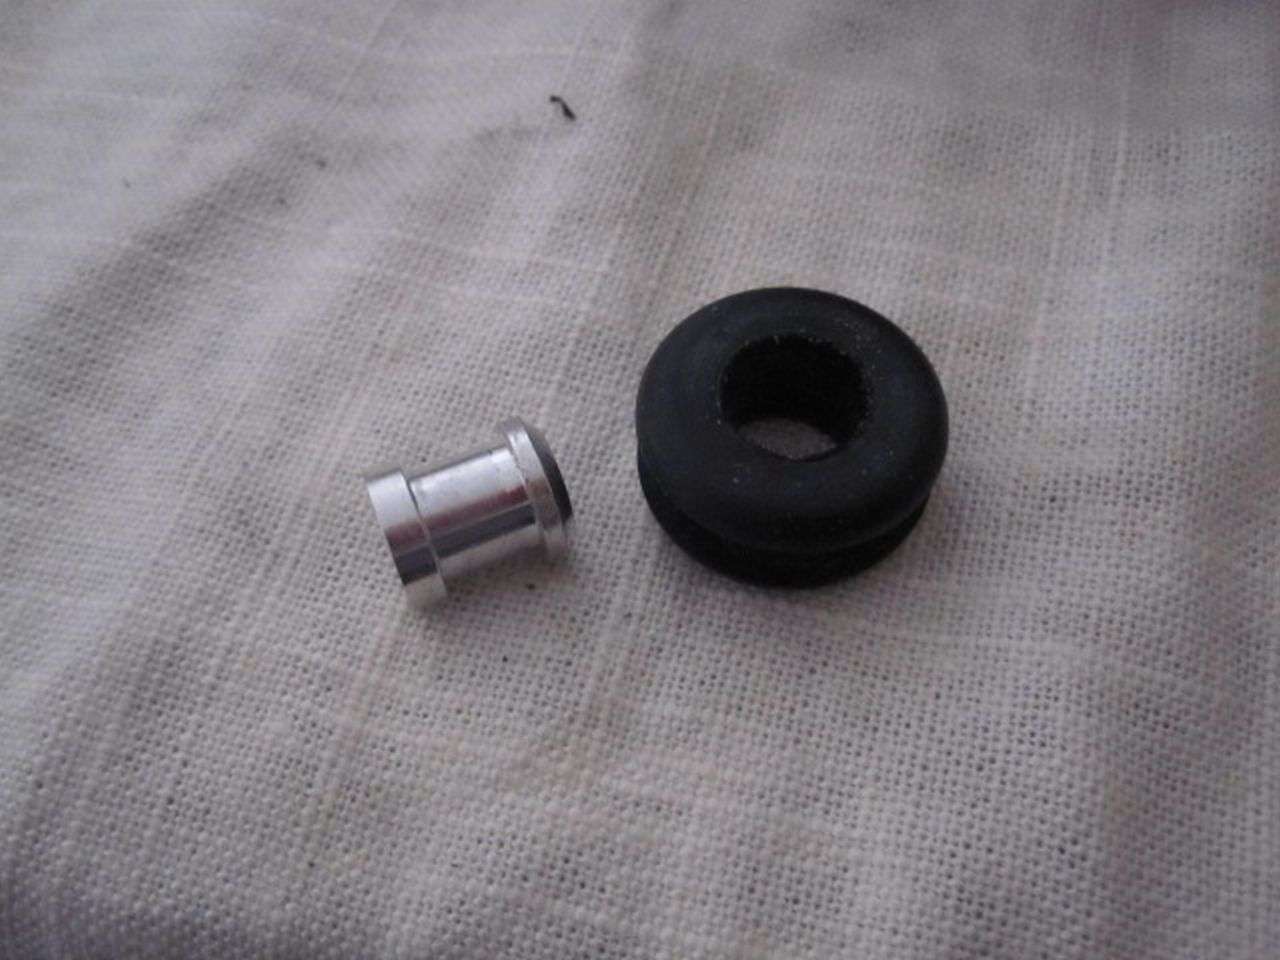
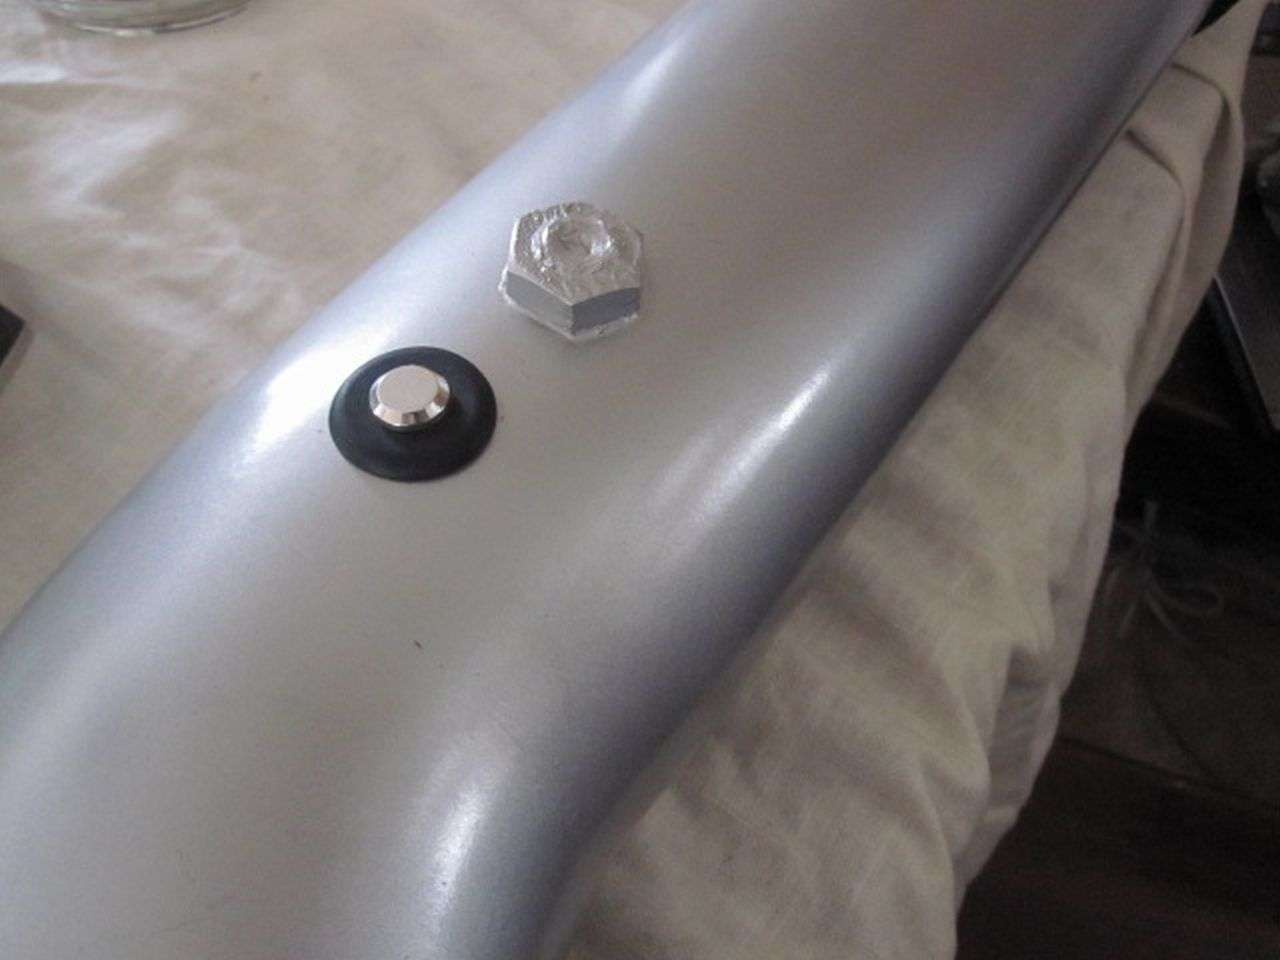
While I have some down time. Thought I would back track a little bit and post a few comments on the cooling pipe that runs in the valley of the block. I think this is the only required step I have not posted yet.

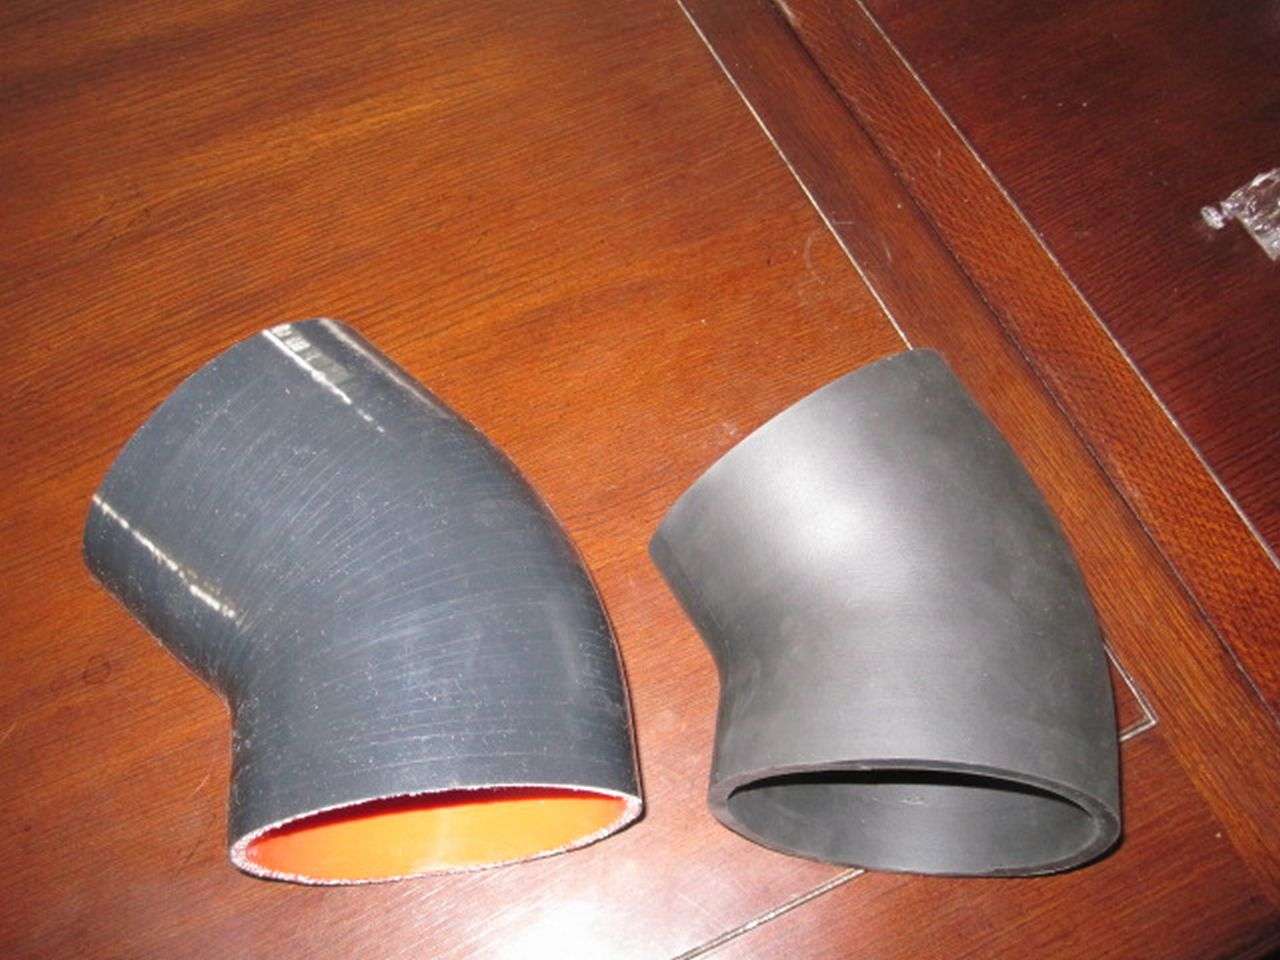
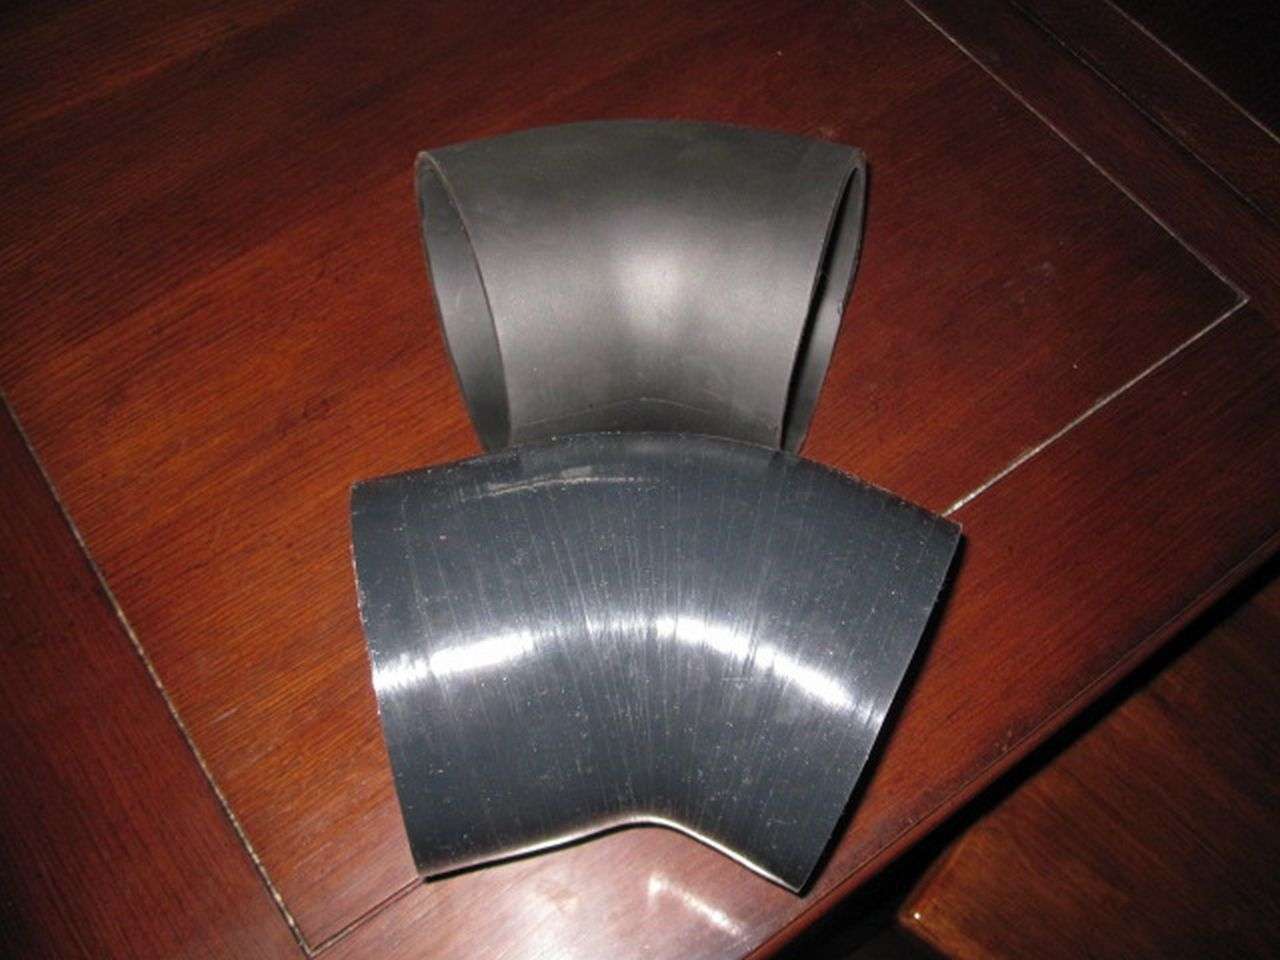
The instructions call for you to cut out an adapter elbow out of the stock heater core hose. Mine didn't have that. So I went to the parts house and asked for a heater hose 5/8" that had a 90 degree bend on it. Go figure, Gates makes one just for the type of job I was doing. joined the stock hose and new hose together.


Coolant Hose in the block valley http://imageshack.us
 
Last edited:

tobynt

Active Member
Established Member
Joined
Jan 23, 2011
Messages
2,047
Location
Nashville TN
3-D Scanning Tork Tech Terminator install

As I noted in previous post. I was going to ditch the coolant crossover tube that "Tork Tech" supplies with the kit.

Turns out, I couldn't have used it any way with the Saleen coolant reservoir. Dureing the process of hacking up the coolant lines that came with the kit and trying to mock or make a new coolant crossover system. I soon realized nothing I could do with connecting soft pipe would look good.

I decided to get out my laser scanner and make a CAD model of what I needed and how I wanted it routed. Now I can send this information off and have someone either make me a new metal tube the way I want it or a custom silicon hose.

Down side to a silicon hose....its expensive to have someone make a "one-off". So, more then likely I will just have to get someone to make a metal pipe for me.

I thought I would entertain a few of you guys and make a video of laser scanning the intake while in the car to make a CAD model to work from.

This is the same process that is used for rapid reverse engineering of prototype parts or just to simply copy something someone else makes so you can make your own part.

I am taking the system so I can scan the locations of the coolant ports in the intake and also scan the location of interference items....such as the blower snot and the inside accessory pulley. This will also allow me to create a CAD model that will connect each side of the intake coolant ports to leave enough clearance at the bottom as not to hit the lines running out for the intercooler.

You Tube Vid I posted showing the process of actually laser scanning the system. The bottom left is a web cam of the scan while the main view is showing the data streaming into CAD live.


[youtube_browser]fEA7BbaGGQo[/youtube_browser]


Here are a few screen shots of the model after I cleaned up what I didn't need. I will come back and post a screen shot of the coolant pipe that I will draw up based off of this data.


Tork Tech Terminator intake 3-D laser scanning on car
cadtoworkfrom.jpg
http://profile.imageshack.us/user/tobynt


Tork Tech Terminator intake 3-D laser scanning on car
cadtoworkfrom2.jpg
http://profile.imageshack.us/user/tobynt
 
Last edited:

tobynt

Active Member
Established Member
Joined
Jan 23, 2011
Messages
2,047
Location
Nashville TN
This point of the thread is where I have finished transferring everything over from the old forum I was on. Tomorrow I plan to do some final install stuff with the JLT True Cold Air intake. More to come......
 

tobynt

Active Member
Established Member
Joined
Jan 23, 2011
Messages
2,047
Location
Nashville TN
I finished installing the JLT True Cold air Kit. Had to make a few mods in order to get it to fit correctly. First thing I had to do was order a longer 45 degree coupler. The one that comes with the kit from JLT would only slip into the tube about a half inch and the end of the tube that fit in the fender well…was pull as far back as possible. I just needed more length on the coupler so it would have a good bite on the tube while also allowing me more slack at the end that went inside the fender well.

I order a silicon piece from “Mandrel Bending Solutions”. I ordered a 4.5” diameter 45 degree silicon coupler and it was only about $30.00. The part I got was long enough to allow me to cut it down the the length I need. As seen in the pictures below. I took a picture of both the stock part and the silicon part I purchased.


JLT CAI Tork Tech True Cold AIr Install
img9960s.jpg
http://profile.imageshack.us/user/tobynt


JLT CAI Tork Tech True Cold AIr Install
img9959p.jpg
http://profile.imageshack.us/user/tobynt


JLT CAI Tork Tech True Cold AIr Install
img9958p.jpg
http://profile.imageshack.us/user/tobynt


A few other modifications I had to make to the JLT tube. I had to plug the PCV fitting. I have eliminated mine so I had to block it off. The IAT sensor port needed to be blocked off as well because on the Tork Tech Terminator kit…its relocated to the lower intake.

I simply cut the “nipple” off of the fitting. Tapped it with a 3/8” tap. Then threaded a cap screw in it. I also coated it with RTV sealant just to make sure I got it sealed up. The port for the IAT sensor. I still had an aluminum plug laying around that came with my old BBK CAI kit. So, I used it to plug that port. After the RTV dried up. I used touch up paint on the sealant so the RTV wouldn’t stick out like a sour thumb.


JLT CAI Tork Tech True Cold AIr Install
img9985u.jpg
http://profile.imageshack.us/user/tobynt


JLT CAI Tork Tech True Cold AIr Install
img9984q.jpg
http://profile.imageshack.us/user/tobynt


JLT CAI Tork Tech True Cold AIr Install
img9986.jpg
http://profile.imageshack.us/user/tobynt


JLT CAI Tork Tech True Cold AIr Install
img9998i.jpg
http://profile.imageshack.us/user/tobynt


JLT CAI Tork Tech True Cold AIr Install
img9988t.jpg
http://profile.imageshack.us/user/tobynt


JLT CAI Tork Tech True Cold AIr Install
img9999gr.jpg
http://profile.imageshack.us/user/tobynt


JLT CAI Tork Tech True Cold AIr Install
torktechjltcaimod2.jpg
http://profile.imageshack.us/user/tobynt


Here are pictures of the JLT True Cold Air CAI installed with the Tork Tech kit.


Tork Tech JLT Mod
torktechjltmod.jpg
http://profile.imageshack.us/user/tobynt


Tork Tech JLT Mod
torktechjltmod4.jpg
http://profile.imageshack.us/user/tobynt


Tork Tech JLT Mod
torktechjltmod3.jpg
http://profile.imageshack.us/user/tobynt


Tork Tech JLT Mod
torktechjltmod2.jpg
http://profile.imageshack.us/user/tobynt


Tork Tech JLT Mod
torktechjltinstall.jpg
http://profile.imageshack.us/user/tobynt
 

glittle75

Member
Established Member
Joined
Sep 5, 2006
Messages
304
Location
North Carolina
AMAZING write-up!!! Every Detail is covered. Keep it up, just read through the whole thing and cant wait to see the finished product.
 

mullet99

New Member
Established Member
Joined
Feb 12, 2012
Messages
10
Location
miami
tork tech

hi been enjoying your ocd on kit i did mine and had about same experience car has a auto and made 370 hp 375 tq real go getter with stock pulley at 8 psi but as you will soon discover you will be dissapointed like i was thougt theres more to get horsepower is crack on steroids just pick up a steggy stage six port 800.00 more does it ever end gonna throw that on this weekend also i did cobra fuel tank swap didnt see your fuel option well enjoy the kit mullet99
 

tobynt

Active Member
Established Member
Joined
Jan 23, 2011
Messages
2,047
Location
Nashville TN
hi been enjoying your ocd on kit i did mine and had about same experience car has a auto and made 370 hp 375 tq real go getter with stock pulley at 8 psi but as you will soon discover you will be dissapointed like i was thougt theres more to get horsepower is crack on steroids just pick up a steggy stage six port 800.00 more does it ever end gonna throw that on this weekend also i did cobra fuel tank swap didnt see your fuel option well enjoy the kit mullet99

Yep, already talked to Steggy, Bob felt pretty comfortable about doing a port job running a 3.4 pulley and stay around 8 lbs to hammer out 400 at the tires.

If you read the first post. I have had the dual pumps and cobra tank for a while.

Good luck with the steggy stage 6
 

mullet99

New Member
Established Member
Joined
Feb 12, 2012
Messages
10
Location
miami
tork tech

well not to jack op thread ill chime in and maybe he can concur its a tuner kit thet get you the manifold to adapt eaton on 2v you scour the ebay world for all supportting mods blower h/x and at the end if your like me i went over board probably 5000 when done not including 400 for good dyno tune i drove it for a week and was baning on it with just some user adjustment on my x3 but i dont reccommend that fired up first time only thing you need too understand is this manifold marries you to the 2v heads so dont assumm you can swap to a 4v hope this helps mullet99
 
Last edited:

KLeech

2V FTW
Established Member
Joined
Feb 1, 2012
Messages
2,689
Location
Indiana
Dude this thread is awesome! Ive been watching it for a few weeks now on the other forum, figured since I was a member here I'd post up. Im in the process of beginning my tork tech swap on my 01, Ive gathered all the parts at least I'm hoping there are no more surprises. Ive got right around 3200 in it right now still needing a tune, which I will probably run Tork Tech's. Im going non intercooled due to I just didnt have the extra funds to go intercooled right now. Man I only hope everything I do to my car will look as good as yours does! Ill probably be starting the tear down and build this next weekend, your thread is favorited on my computer and phone for reference lol Ill quit rambling now but if anything I just wanted to say keep up the awesome work! Im loving all the reading and information coming from your thread!
 

tobynt

Active Member
Established Member
Joined
Jan 23, 2011
Messages
2,047
Location
Nashville TN
Thanks!

Things have been pretty slow for me the last few weeks..well, I guess almost a month now instead of a few weeks.

I did pick up a polished Eaton yesterday from a member on this forum. He is sending it directly to Bob at Steggy for a port. When Steggy gets done with it and I get it back.....I'll start the final steps of getting it all buttoned up.

Even though I haven't done anything with it of late. I still go in the garage and just look at it. The most time consuming part was the wiring harness I re-routed. I'm still not happy with the over all look of the JLT pipe and might be looking to do something there....so, I might have an update on that one in a few weeks.

Good luck and take your time. I have had more then once I almost said screw it and just slapped it on. That was one of the big reasons I started a build thread. Kind of forces me to slow done and do it the way I want it to look.
 

DaBigBone

Well-Known Member
Established Member
Joined
Sep 3, 2009
Messages
3,828
Location
Ohio
Incredible write up!

Just curious, but why did you decide to go this route for boost? Not a very common setup on 2Vs simple because people argue the cost of it. Personally, I like it!
 
Last edited:

tobynt

Active Member
Established Member
Joined
Jan 23, 2011
Messages
2,047
Location
Nashville TN
1000% looks. I think the best looking positive displacment blowers on the market is as follows.

Whipple
Saleen Twin Screws
Stock 03-04 Eaton
Kenne Bell
older Saleen and Roush

I'm never going to forge the bottom end so, that ruled out a whipple. People still think a lot of the Saleen twin screws for the 2 valve.

All the above will give me what I need and can handle for HP...so, that's why
 

tobynt

Active Member
Established Member
Joined
Jan 23, 2011
Messages
2,047
Location
Nashville TN
The Polished blower I purchased from a member here is at Stiegemeier for the port. Bob said he should be able to get to it this week.

Depending when he gets to it and shipped out, I might have it for this weekend and finally do a finished install with the blower itself. I bet I have dry fit the blower I currently have about 20 times on the lower manifold. For one reason or another, when I thought I was finished dry fitting everything else around the blower...I would find something else I needed to do that required the blower to be in place. Become fairly redundant. I don't think anyone else doing the instal would have to take it on and off that many times. I would just look at it and get caught up in changing things around.

As a recap with the current blower v/s the replacement blower I just purchased.

I wanted to have a polished blower on my car with a port job. I managed to wait long enough to pick up a polished blower used and send it for port v/s having mine show polished and ported. It's going to save me about $200-$250 doing it this way.

Now, I need to sale the blower I currently have. Wounder how many people might be interested in an eaton with fresh paint and 3 slotted mounting holes for a Tork Tech instal....along with a new factory throttle body and plenum. Might be a tough sale.
 

mullet99

New Member
Established Member
Joined
Feb 12, 2012
Messages
10
Location
miami
tork tech

well i have also a tork tech blower for sale shuldnt be hard mine had 4000 miles originally i put 1700 using stock pulley saw 8lbs boost 450 ,00 for anyone intrested thanks mullet
 

2000GTSTANG

Well-Known Member
Established Member
Joined
Nov 26, 2006
Messages
1,791
Location
Plymouth, MI
For the intercooler overflow, did you use the rod to support it from the bottom? Im going to be using the same tank and I dont have the rod for it.
 

Users who are viewing this thread


Top