'69 Mach 1 - Paint Correction + Protection (Questions ITT)

CV355

_
Established Member
Joined
Aug 24, 2016
Messages
3,272
Location
_
I took next week off from work so I can do full paint correction on my '69 Mach 1. I feel like I'm marginally competent enough to do a decent job with the traditional approach, ending with a glaze, sealant, and paste wax.

However, the more I read about ceramic coatings the better the idea is sounding. What scares me away from jumping in with both feet is that the paint job on my Mach 1 was somewhere around $15k (last owner put a small fortune into the car) and it is wet-sanded jet-black. It has always been my approach in life to jump into the deep end with concrete shoes, but I don't feel like this would be wise in this case.

1) What would you do if this was your car?
2) Can you screw up a ceramic coat, and if so, what is the correction method?
3) Can a glaze be utilized before a ceramic coat, or must it be a bare surface? (I would assume that oils would affect adhesion)
4) I read that some LSPs are ok on ceramic, and others state that it's a waste- what's the verdict on this?

My idea at the moment is to test the waters with ceramic on my other vehicles first, get the hang of it, and then attempt it on the Mach 1. If I go ahead and just do glaze/sealant/wax, would a simple stripper wash and IPA wipedown be enough prep to change to ceramic?

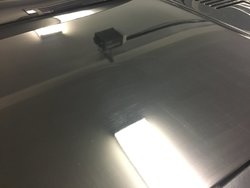
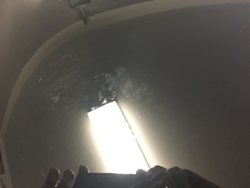
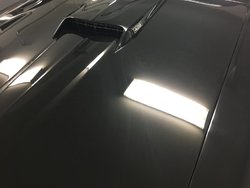
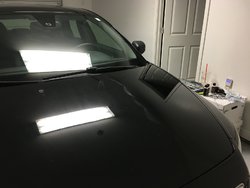
I'll post pics in this thread as I get going- any critique is appreciated.
 

NastyGT500

Naples Premier Detailer!
Established Member
Joined
Aug 9, 2008
Messages
3,270
Location
Naples, Florida
Yes, you can screw up a coating. You can get high spots, hazing, streaking. You need to polish it off.

NO. No glaze, nothing prior to a coating. The surface needs to be clean. Oil and residue free or else you will have issues.

You don't need anything on top of a coating. No waxes, sealants, etc. The only thing you can/should do is a maintenance topper.

I think that if you are going to delve into the world of coatings, I would use them on your other vehicles first in order to get the learning curve down prior to touching your baby.

NO, you would need to polish the vehicle in order to make sure that the surface was 100% free of your prior LSP product.

If it were mine I would polish her to perfection and then use a nice 'nuba wax on it. I'm sure it does not get that much use and a high quality wax will give you the protection you need and the looks you want. It won't last as long as a synthetic sealant or a coating, but I would re-apply it every so often to maintain the wax.

IDEALLY IF IT WERE MINE, I WOULD SHIP IT TO FLORIDA AND HAVE ME WORK ON IT!!! LOL!

Keep us posted!

Scott
 

black92

Hot rod Lincoln
Established Member
Joined
Dec 22, 2005
Messages
6,705
Location
Olathe, KS
I have Mckee's 37 Paint Coating (V2) and I have yet to apply it. I've heard it's stupid easy to apply and for the cost, it's pretty hard to beat. Hoping to get it on in the next few weeks on both mine and the wife's car. Will post follow-ups once done.
 

Imatk

Well-Known Member
Established Member
Joined
Aug 21, 2008
Messages
2,306
Location
Texas
Yeah I agree... I just applied CQuartzUK to my daily driver. BUT the only reason I applied a coating at all was because it's a daily driver and I'm looking for something that will last a little longer than a month which is what I'm getting out of DG105.

You can DEFINITELY screw up a coating. I did :)

I had to polish it off and do it all over again. The CQuartz I used is/was very very finicky and I had to do several test spots to see how long I should wait before it "flashes" which really is nothing like wax.

It actually reminded me of Rain-X when you apply it to a windshield except A LOT more picky.

For your car I'd just use a really nice wax and admire the beauty :)
 

KEVINS

Well-Known Member
Established Member
Joined
Jan 11, 2014
Messages
521
Location
EARTH
I'd ceramic coat it. You can learn a LOT from this detailing forum:

https://www.autopia.org/

As was stated above you correct the paint through polishing and once it's as perfect as you want it then you wipe all the polishing oils/chemicals off so you're left with pure paint then you apply the coating.

ks
 

CV355

_
Established Member
Joined
Aug 24, 2016
Messages
3,272
Location
_
Ok, so it has been an eventful two weeks. I had the flu last week, which developed into a wonderful throat/lung infection of some sort. Because of that, a lot of the prepping I was planning on didn't happen. The car wasn't finished in the shop until yesterday. Around 4PM, I hopped in to drive it home. I guess this thing has a tiny little high-stall torque converter in it because a throttle blip on the highway rose the rpms to 5000 instantly. It also threw the v-belt, which in turn caused the fire-breather to overheat the coolant and blow antifreeze all over the place. It went from a steady 170 to 210 in the blink of an eye. Thankfully some of the guys from the shop were tailing to make sure I got back safely and helped me out of that jam.

This car definitely needs some driveability restored. It's set up too much as a drag car and the street manners are non-existent. I am absolutely convinced that it could lift the front end off the ground with a good launch in 1st (~4500 stall, high compression, angry ass cam, 4.10s...). I think a larger torque converter is in order at minimum.

Here's a pic of the coolant mess that I've been contending with.
 

Attachments

  • 32818.jpg
    32818.jpg
    440.5 KB · Views: 96

NastyGT500

Naples Premier Detailer!
Established Member
Joined
Aug 9, 2008
Messages
3,270
Location
Naples, Florida
Geez, sorry to hear this. Hope you are feeling better/recovering quickly. That sucks. Coolant is a mess! Get that sucker into 'street' trim and enjoy it!
 

CV355

_
Established Member
Joined
Aug 24, 2016
Messages
3,272
Location
_
Engine bay cleanup started yesterday. Tried to get into every nook and cranny to get the antifreeze spots and pooling out. Then, went to town with Simple Green to get any caked on grunge. All chrome / bare metal details were scrubbed and lightly polished. I took the valve covers off, worked out some bends, polished them on the buffing wheel, and put high-temp chrome polish/sealant on them. They definitely look better than before but show signs of beating over the years. Might replace them at some point but for now they are fine (before & after pics attached). While rerouting and looming the spark plug wires, I found a few with kinks/tears, so those are going to need to be replaced.

After cleaning the engine bay, putting the valve covers back on, and checking for leaks, I rolled the car outside and did a full 2-bucket wash with the foam cannon. Dried the car with a squeegee (glass only) and a plush microfiber drying towel lightly misted with CG After Wash. Within seconds I could see pollen starting to collect so I rolled her back in the garage for now.

The paint looks decent but has swirls everywhere, a few minor scratches, and a moderate 6" scuff on the passenger quarter. The paint has a gritty feel to it- evident when drying. There's that telltale "abrasion" sound and resistance when lightly dragging the MF towel. Clay barring is next, followed by minor paint correction. Since I don't see any major areas, I'll start with light-cut polish, then super-fine, then glaze, sealant, and paste wax. Probably going to take me a week to finish this part- one panel per afternoon for correction is about what I average so there's no rushing involved.
 

Attachments

  • IMG_1794.JPG
    IMG_1794.JPG
    285.8 KB · Views: 107
  • IMG_1791.JPG
    IMG_1791.JPG
    162.6 KB · Views: 85
  • IMG_1792.JPG
    IMG_1792.JPG
    239.1 KB · Views: 85

CV355

_
Established Member
Joined
Aug 24, 2016
Messages
3,272
Location
_
Still in the process of finding time to continue with the detailing/paint correction. Between getting the flu, dealing with the subsequent throat infection, and then a nasty home repair, it has been tough to find time to work on anything else.

I did get a chance to clay the paint, which surprisingly removed some of what I thought were deep defects or scuffs. I'm not a professional detailer by any means, but the first time I used clay in 2007, I was incredibly impressed. I've done a full clay treatment on a decent number of cars. Despite the initial appearance, this was one of the strangest ones. The hood was especially bad- felt like sandpaper. Other areas were as smooth as glass before and after.

Here are some pics of the defects to correct. From 5', the car looks show-quality. Up close (< 1') you can see a lot of light scratches probably from washing. I didn't see any swirls. There is one nasty spot where it looks like a bird turd etched itself in.

With the exception of the one area, most defects look light in nature. I'm going to start with a medium-light cut polish and see if I can work out the scratches without having to go deeper.
 

Attachments

  • IMG_1826.JPG
    IMG_1826.JPG
    161.1 KB · Views: 80
  • IMG_1827.JPG
    IMG_1827.JPG
    146.6 KB · Views: 82
  • IMG_1824.JPG
    IMG_1824.JPG
    169.7 KB · Views: 102

NastyGT500

Naples Premier Detailer!
Established Member
Joined
Aug 9, 2008
Messages
3,270
Location
Naples, Florida
Doesn't look too bad to me. Just remember: start with the least aggressive pads/polish/compound you have, check your results and work up from there if necessary.

Keep us posted!
 

CobraBob

Authorized Vendor
Established Member
Premium Member
Single Barrel Sirs
Joined
Nov 17, 2002
Messages
105,532
Location
Cheshire, CT
I give you a lot of credit for doing a paint correction at that level. Way beyond my abilities. LOL. Always nice to have folks, experienced folks, like Scott to provide help and encouragement.

I'm looking forward to seeing your Mach when it's finished.
 

CV355

_
Established Member
Joined
Aug 24, 2016
Messages
3,272
Location
_
Thanks guys! I practiced on my jet-black Volvo last year and it turned out pretty amazing. Of course, I don't have the experience other guys do (especially NastyGT500- that guy's work is impeccable)

Volvo Pic:
Before = Left
After = Right (bare, no glaze/sealant/wax)
Biggest mistake I made on the Volvo was not masking everything off- dust throw got into everything. Not making that mistake again

I'm hoping to get even better results on the Mach 1
 

Attachments

  • IMG_0409.JPG
    IMG_0409.JPG
    149.2 KB · Views: 81

Users who are viewing this thread


Top