You are using an out of date browser. It may not display this or other websites correctly.
You should upgrade or use an alternative browser.
You should upgrade or use an alternative browser.
How to assemble a shortblock
- Thread starter MalcolmV8
- Start date
What about the bolts that go into the side of the block into the main bearing caps? The manuals says to discard them and replace. My machine shop says that's wrong and I can reuse them as they are only torqued to 15 ft/lbs and that's not enough to stretch them.
No point in blowing money I don't have to.
Thanks
Malcolm
No point in blowing money I don't have to.
Thanks
Malcolm
I didnt replace them, I reused them.
So far looks good. I bought the bore of rings I needed so I wouldnt have to file them myself. I installed them on the pistons with my hands and didnt use the ring pliers. I used that cheap ring compressor shown on the ebay link, just oil it alot. Worked fine for me.
So far looks good. I bought the bore of rings I needed so I wouldnt have to file them myself. I installed them on the pistons with my hands and didnt use the ring pliers. I used that cheap ring compressor shown on the ebay link, just oil it alot. Worked fine for me.
Thaks for all the info so far.
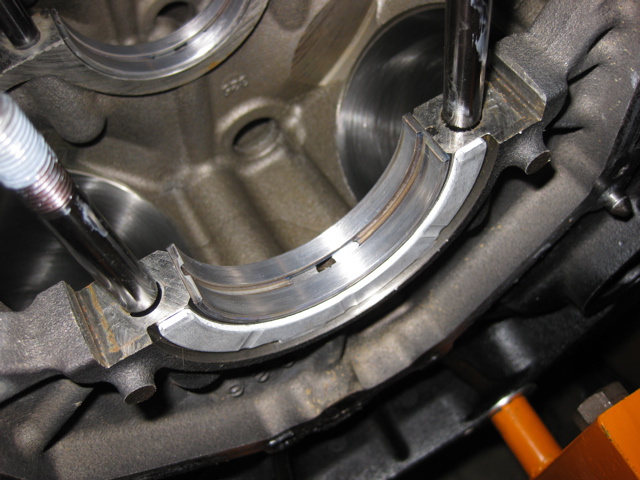
Here's the thrust washer I grinded down to get the end play I needed on crank.
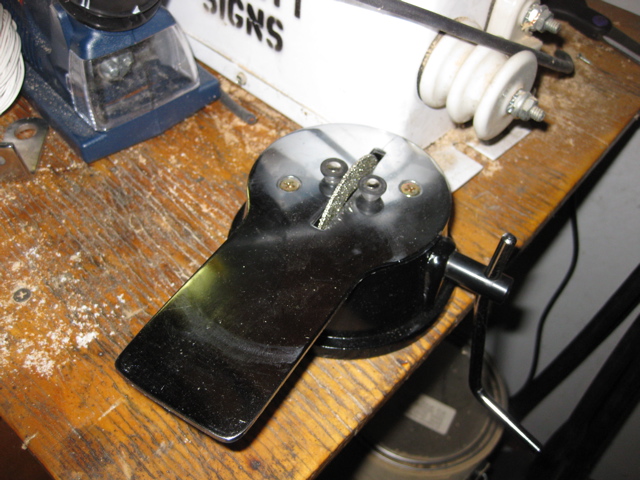
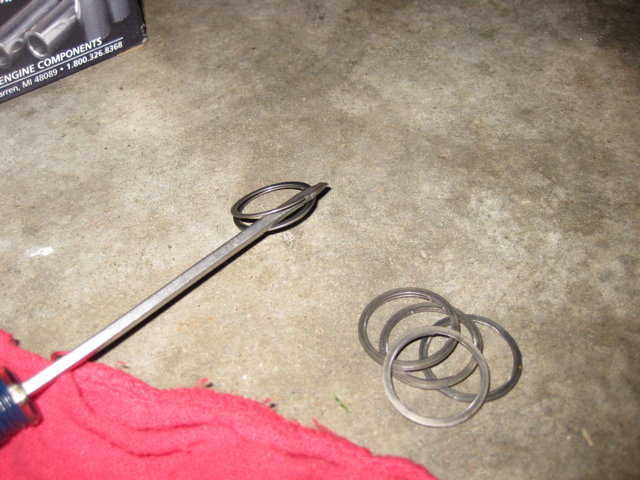
Been gaping rings. Here's the ring gap filer I used.
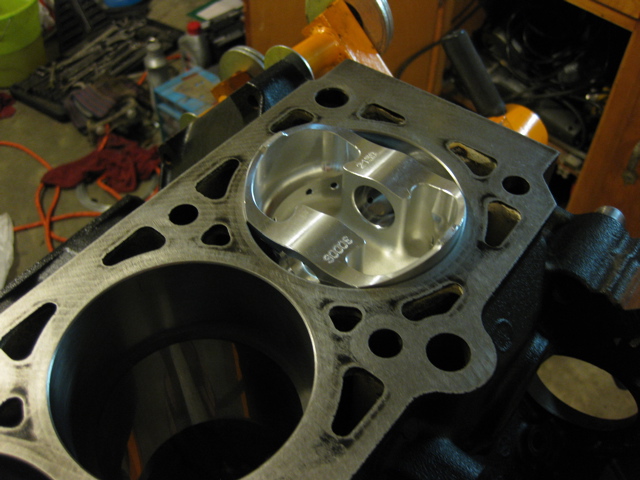
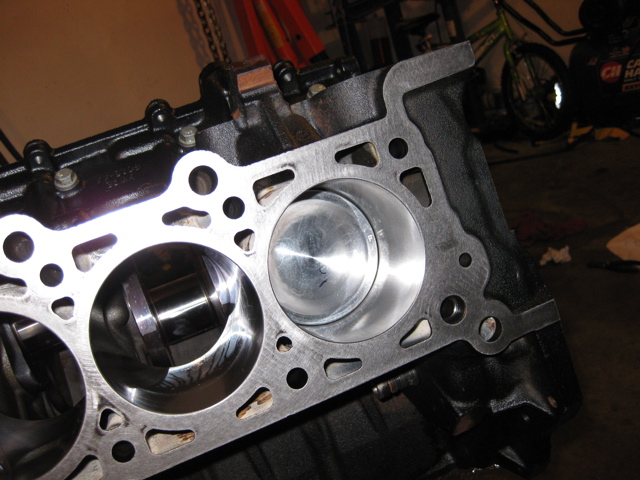
Here's one of the new pistons I used to push the rings down square in the bore.

Here's the piston upside down. That's as far down as I pushed the rings. Top rings are gaped at 0.020 and second groove rings are at 0.013 ~ 0.014.
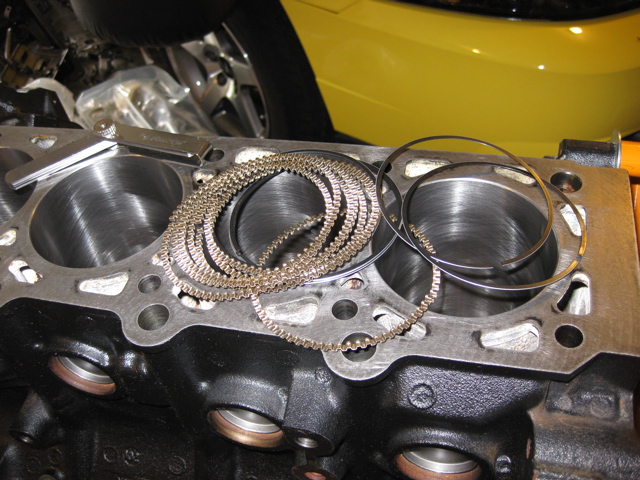
OK here's the part that confuses me. The oil rings. It's like a puzzle and put them together. The spec sheet says the oil ring rail needs 0.015 end gap min. I assume that's the center wafer looking part? I checked one in a cylinder and it butts up snug with no end play. Do I grind it down just like a compression ring? They are very hard to check end gap because they don't hold tight in the cylinder like a compression ring. They just try and fall.
Thanks
Malcolm
Here's the thrust washer I grinded down to get the end play I needed on crank.
Been gaping rings. Here's the ring gap filer I used.
Here's one of the new pistons I used to push the rings down square in the bore.
Here's the piston upside down. That's as far down as I pushed the rings. Top rings are gaped at 0.020 and second groove rings are at 0.013 ~ 0.014.
OK here's the part that confuses me. The oil rings. It's like a puzzle and put them together. The spec sheet says the oil ring rail needs 0.015 end gap min. I assume that's the center wafer looking part? I checked one in a cylinder and it butts up snug with no end play. Do I grind it down just like a compression ring? They are very hard to check end gap because they don't hold tight in the cylinder like a compression ring. They just try and fall.
Thanks
Malcolm
OK after a little head scratching and refresher on oil rings I got it figured out. The oil ring rails (upper and lower parts) have a large gap on mine. Around 0.035 ~ 0.040 so nothing needs to be filed. The wafer part in the center is supposed to butt up and is ok.
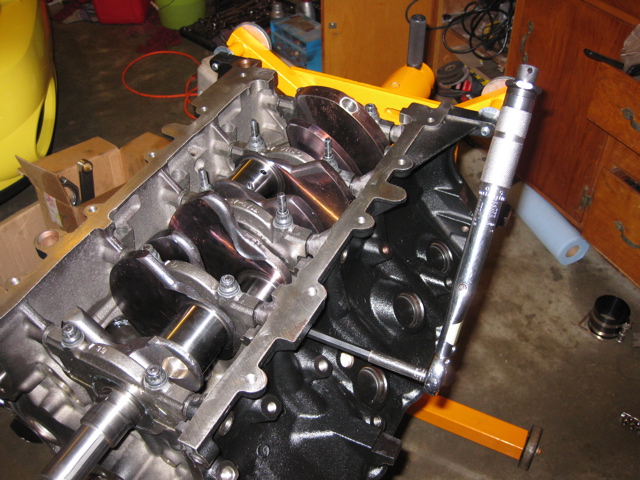
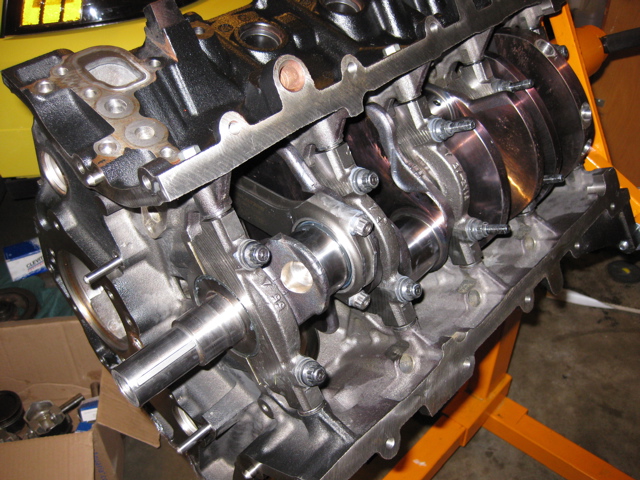
Finally it feels like progress. After all the test fits checking clearances etc. I got the crank installed for the final time. Got some assembly lube on there and put it all together.
For those side spacers you have to turn out of the main caps I went to the local tool store and they had a long allen wrench on a socket for $15. So I purchased just a plain extra long 8 mm allen wrench and cut off the end and put it in a socket. Total cost $1.97. That way I could get a torque wrench on and torque them in stages 44 in/lb and then 89 in/lb before installing the side bolts which went to 15 ft/lbs.
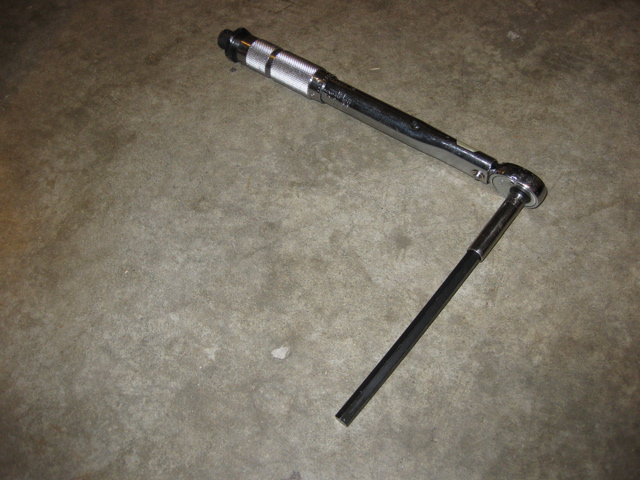
Worked out great.
My rings are all filed and ready to go so hopefully tonight if I get some time I can get the rings on the pistons and get them on the rods and into the block.
For those side spacers you have to turn out of the main caps I went to the local tool store and they had a long allen wrench on a socket for $15. So I purchased just a plain extra long 8 mm allen wrench and cut off the end and put it in a socket. Total cost $1.97. That way I could get a torque wrench on and torque them in stages 44 in/lb and then 89 in/lb before installing the side bolts which went to 15 ft/lbs.
Worked out great.
My rings are all filed and ready to go so hopefully tonight if I get some time I can get the rings on the pistons and get them on the rods and into the block.
Looking good man. I had an allen on a socket in my tool box thankfully. You should have seen me fighting the caps off for the first time. I had no idea what the hell was holding them in, then a buddy came by and point that out to me after they were all out, I felt like a retard.
You are definitely going very in dept and the end result will pay off. Good work!
You are definitely going very in dept and the end result will pay off. Good work!
LOL you're not alone. The first time I took my main caps off I struggled horribly and eventually got them off only to realize I was suppose to turn in those little side cap screw things first ")
This is a great learning experience and I'm really enjoying it.
This is a great learning experience and I'm really enjoying it.
LOL you're not alone. The first time I took my main caps off I struggled horribly and eventually got them off only to realize I was suppose to turn in those little side cap screw things first
This is a great learning experience and I'm really enjoying it.
good job :beer: i love building engines, im in the middle of 2 future engine builds :dancenana:
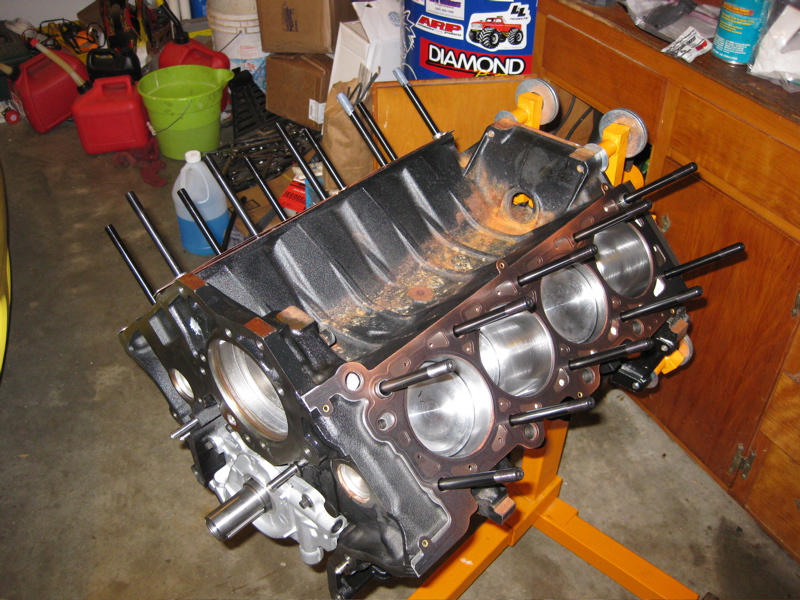
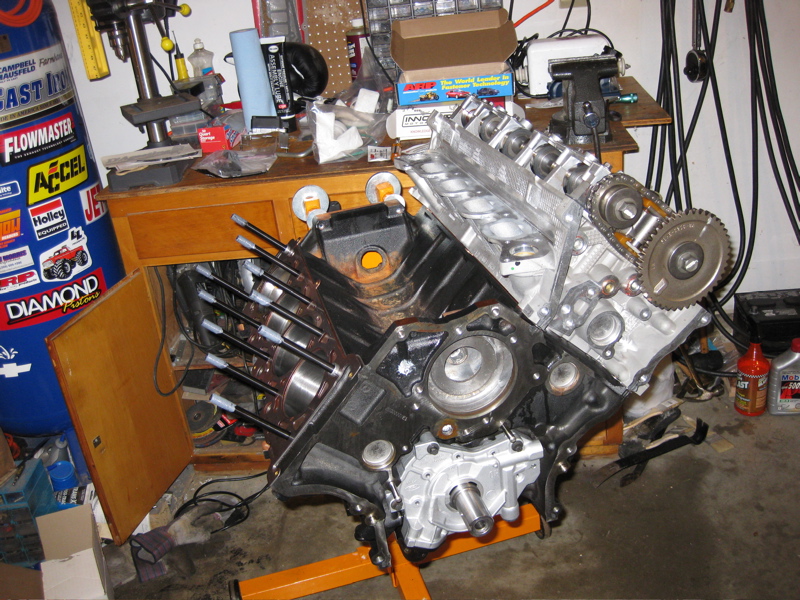
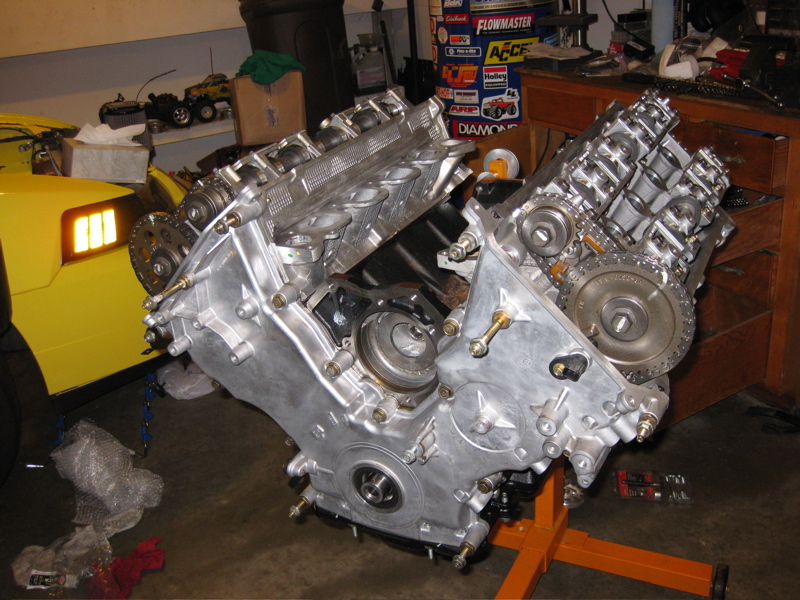
Been slacking on updates here. Short block portion is done. All pistons are in the block. A few pics
Notice the black rod bearings. They have some sort of coating on them. I forget exactly what it does, resist wear or something? dunno now. Machine shop talked me into them.
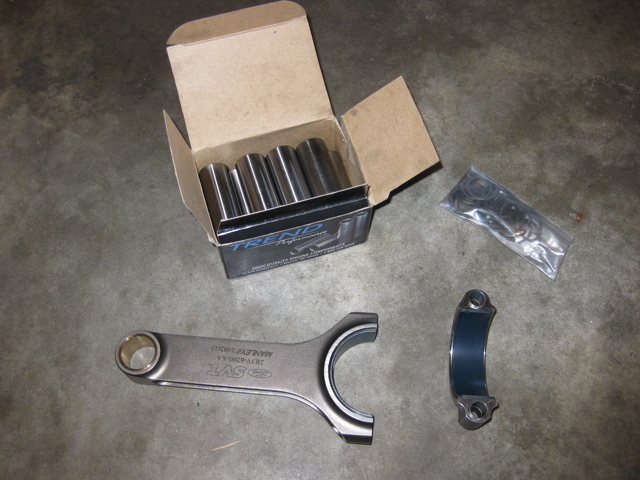
First rod in place.
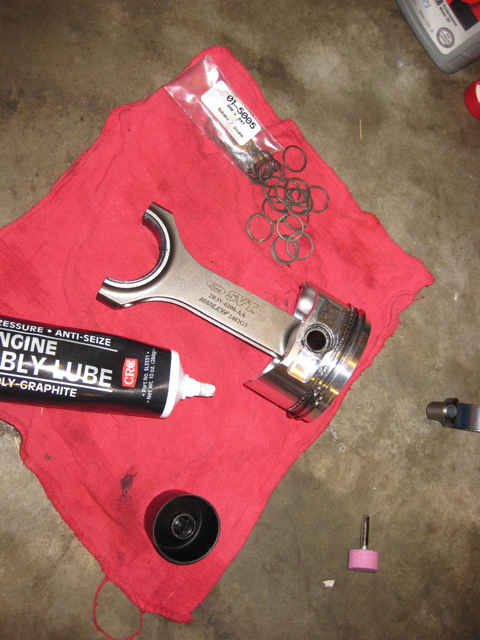
Now this I thought was interesting. Diamond pistons take this circular key ring looking things on the side of the pistons to hold the gudgeon pin in place. Two of them on each side of the piston. All motors I've rebuilt in the past always just used a regular cir clip. Must be an aftermarket thing.
Notice the black rod bearings. They have some sort of coating on them. I forget exactly what it does, resist wear or something? dunno now. Machine shop talked me into them.
First rod in place.
Now this I thought was interesting. Diamond pistons take this circular key ring looking things on the side of the pistons to hold the gudgeon pin in place. Two of them on each side of the piston. All motors I've rebuilt in the past always just used a regular cir clip. Must be an aftermarket thing.
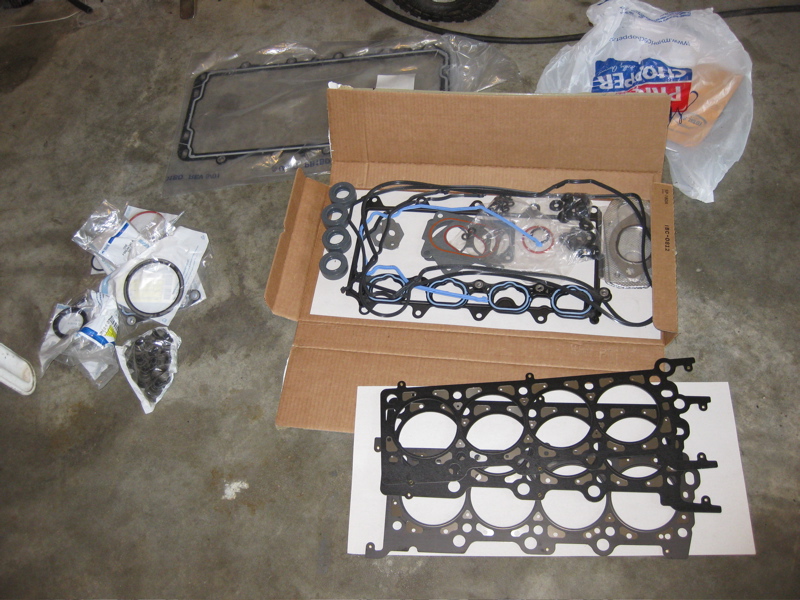
Well head studs came in today along with many other goodies. I have gaskets, orings and all sorts of things. Assembly should move along pretty quick now.
Machine shop told me to get this spray and to spray it inbetween the different layers of the multi layer metal head gasket. Anyone else ever do that? or have some comments, feedback etc. on that?
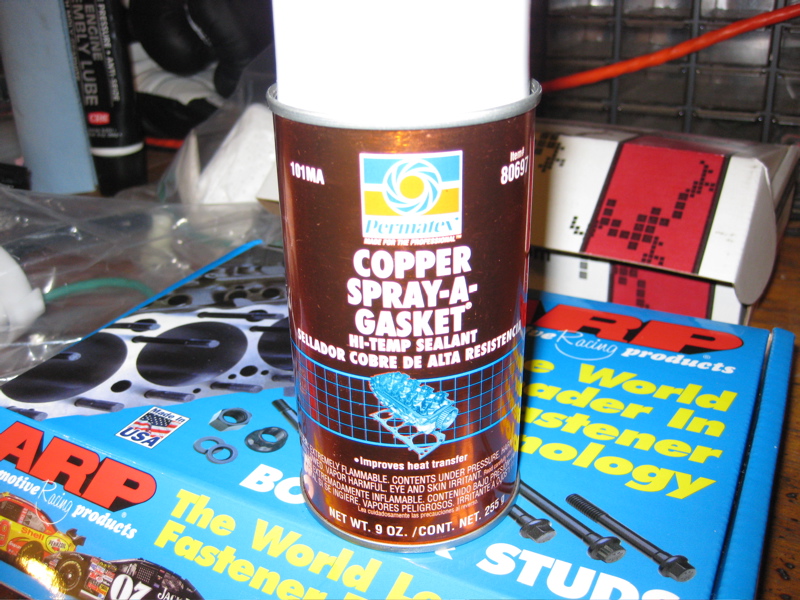
Machine shop told me to get this spray and to spray it inbetween the different layers of the multi layer metal head gasket. Anyone else ever do that? or have some comments, feedback etc. on that?
My gasket set had an extra head gasket inside. Notice three head gaskets.
Got oil pump and pickup as well as windage tray installed.
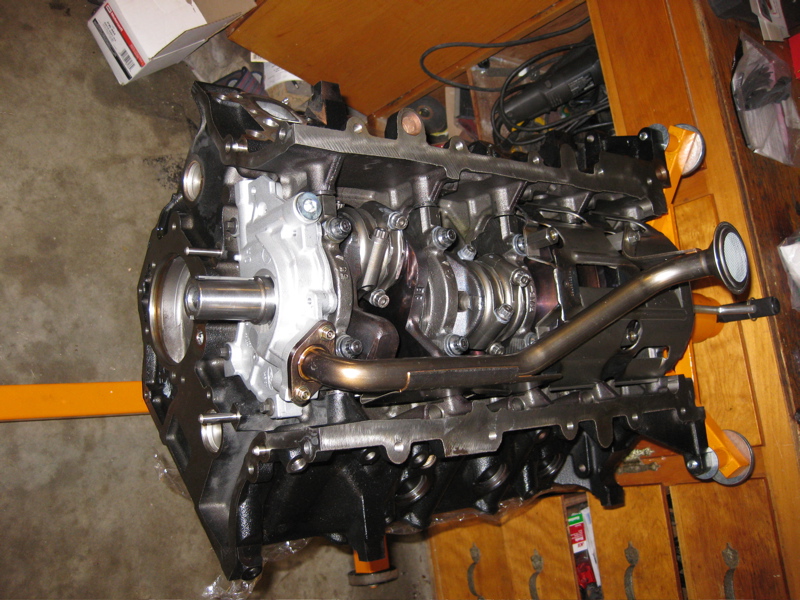
Head studs in place
A shot of the heads
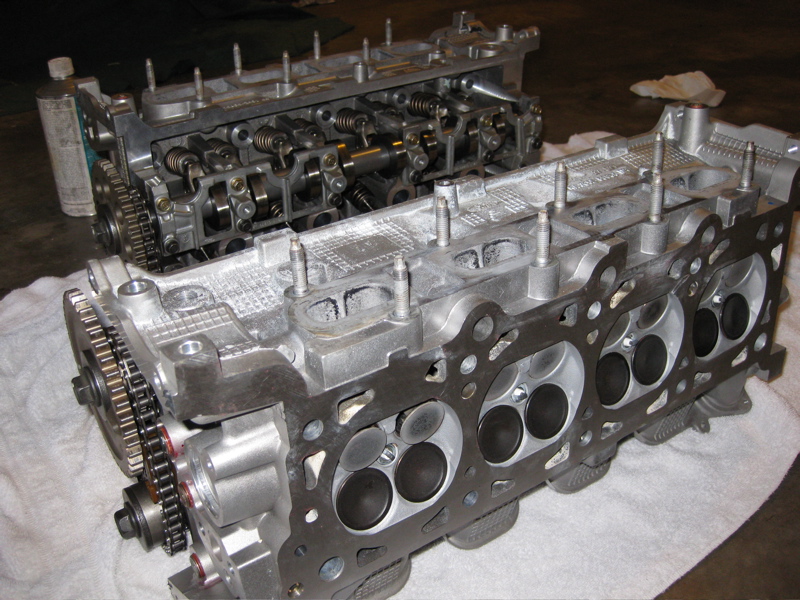
It still amazes me how big these darn heads are
Both heads on finally.
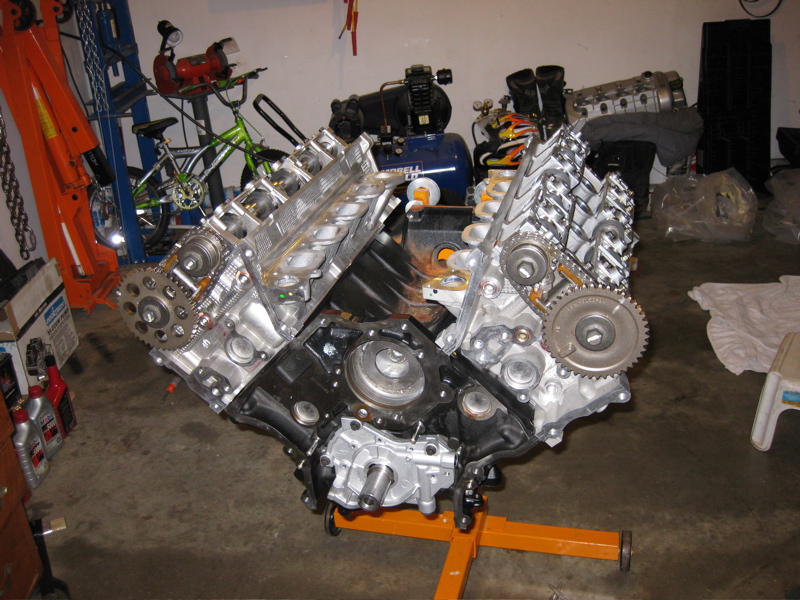
It's starting to look like an engine again. Getting exciting
Got oil pump and pickup as well as windage tray installed.
Head studs in place
A shot of the heads
It still amazes me how big these darn heads are
Both heads on finally.
It's starting to look like an engine again. Getting exciting
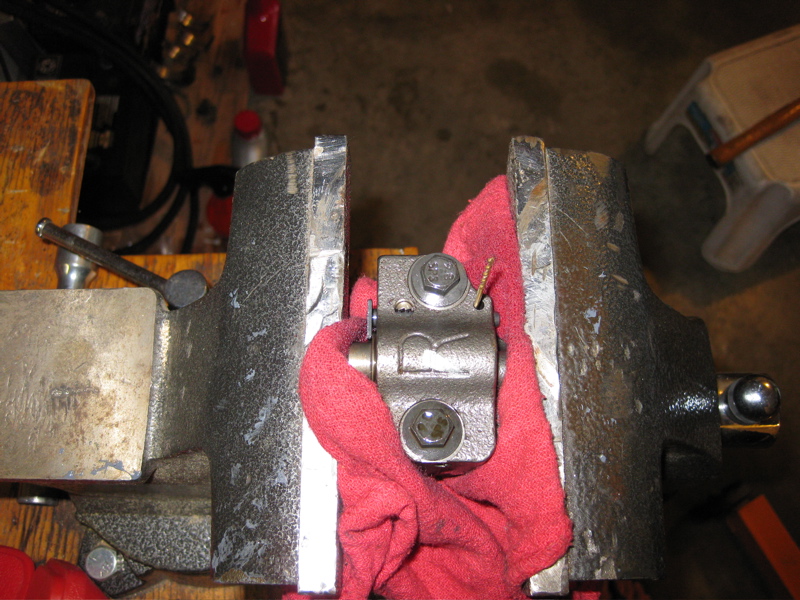
Next up timing chains. You have to compress the tensioners and release the ratchet piece with a screw driver so that outer piece will go down.

Once fully compressed you insert something small, like this 1/16 drill bit, into that hole at the bottom which keeps it compressed.
Timing chains installed.
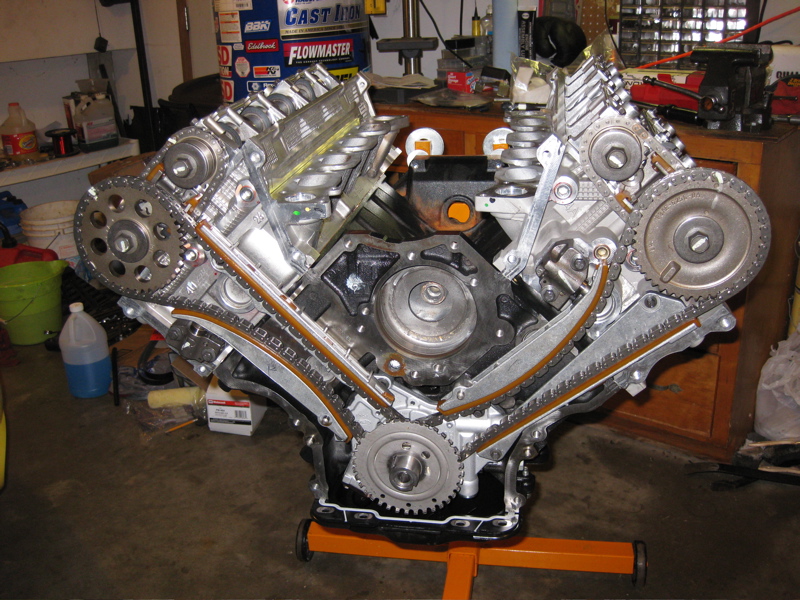
Timing chain cover installed
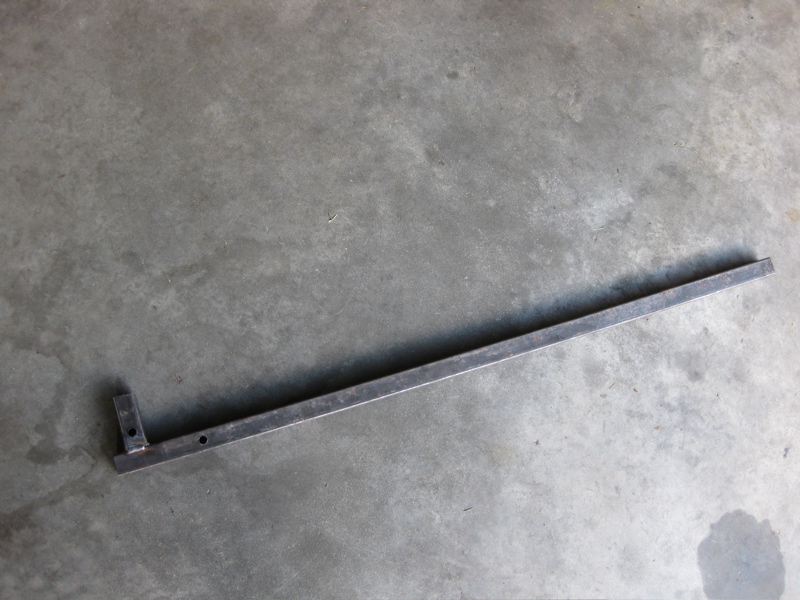
OK next was balancer install. What a PITA. I struggled and could not keep that crank from turning for anything. I put two of the flywheel bolts in the back of the crank and put wrenches on them and turned the crank till they jammed up on the engine stand. That was not nearly enough. Finally after much frustration I grabbed some square tubing and made this.
A close up of the end.
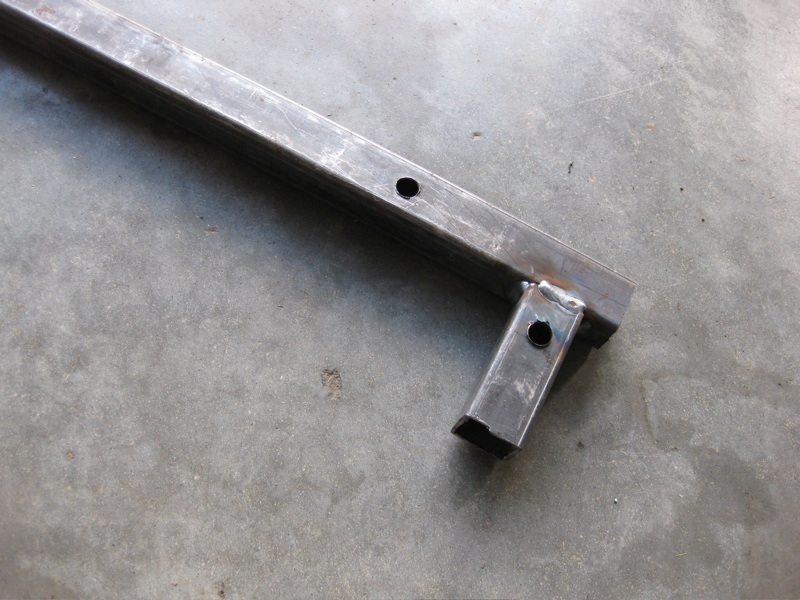
Bolted up to the flywheel.
I made the bar long enough to lock up against the floor. Worked like a charm You'd be surprised at how much force it took to turn that bolt an extra 90 degrees beyond torque value.

A lot more stuff on the motor
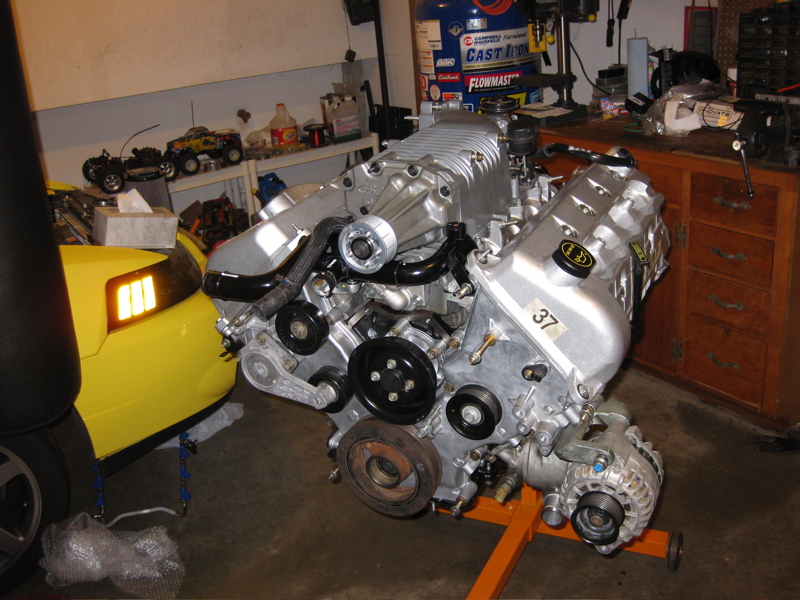
And the blower even
Once fully compressed you insert something small, like this 1/16 drill bit, into that hole at the bottom which keeps it compressed.
Timing chains installed.
Timing chain cover installed
OK next was balancer install. What a PITA. I struggled and could not keep that crank from turning for anything. I put two of the flywheel bolts in the back of the crank and put wrenches on them and turned the crank till they jammed up on the engine stand. That was not nearly enough. Finally after much frustration I grabbed some square tubing and made this.
A close up of the end.
Bolted up to the flywheel.
I made the bar long enough to lock up against the floor. Worked like a charm
You'd be surprised at how much force it took to turn that bolt an extra 90 degrees beyond torque value.A lot more stuff on the motor
And the blower even
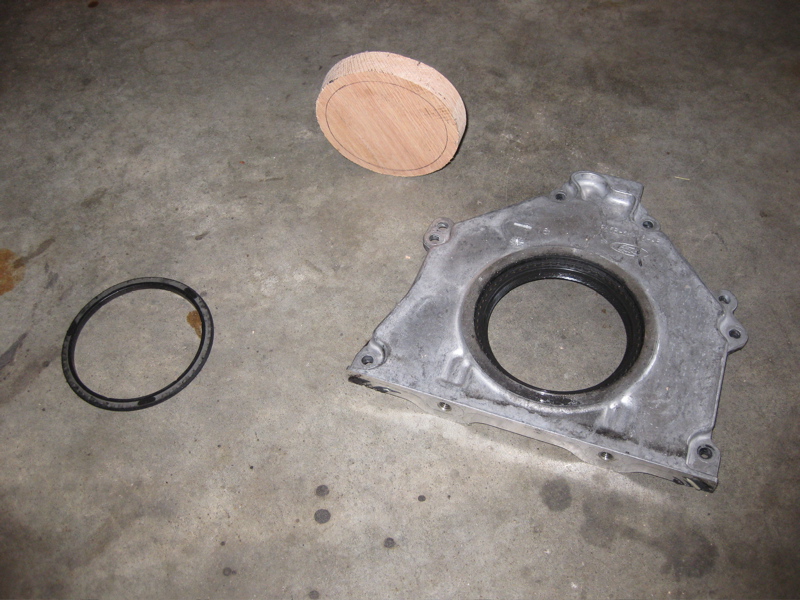
Oh yeah, how'd you guys get the rear main seal in? that thing is HUGE diameter wise. I guess I need to find a special tool for that. My local Oreillys said they might be able to order one but don't even know the price. They are checking on that and should know in a day.
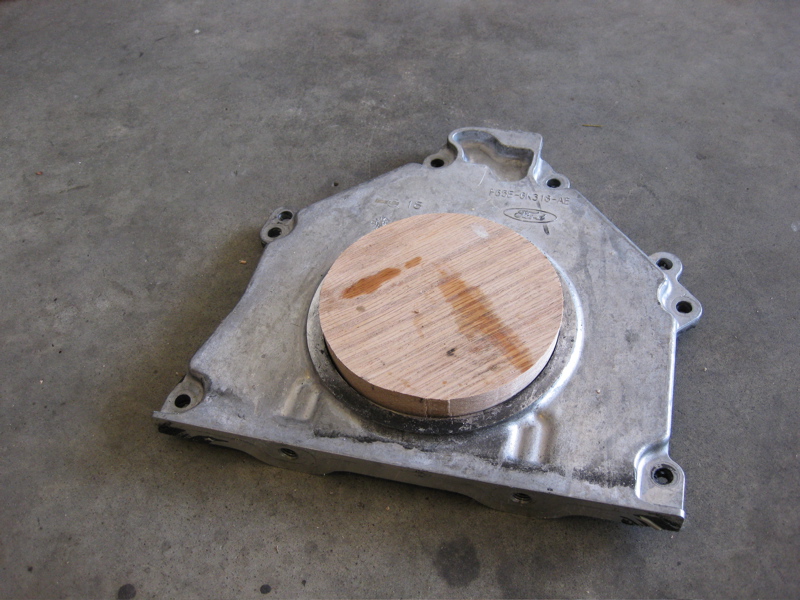
My answer to installing the rear main seal. A board of wood and froze the seal in the freezer for about 4 hours. Tapped it in with some oil after cleaning the plate up.
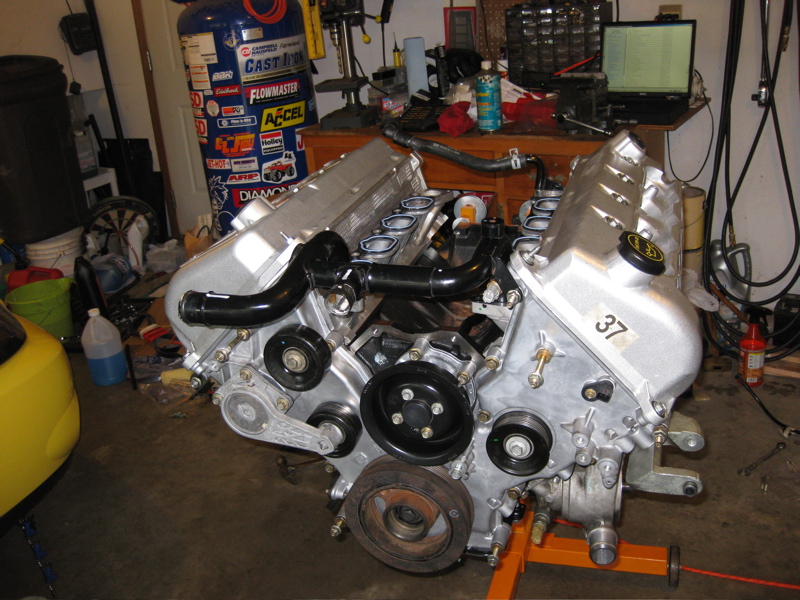
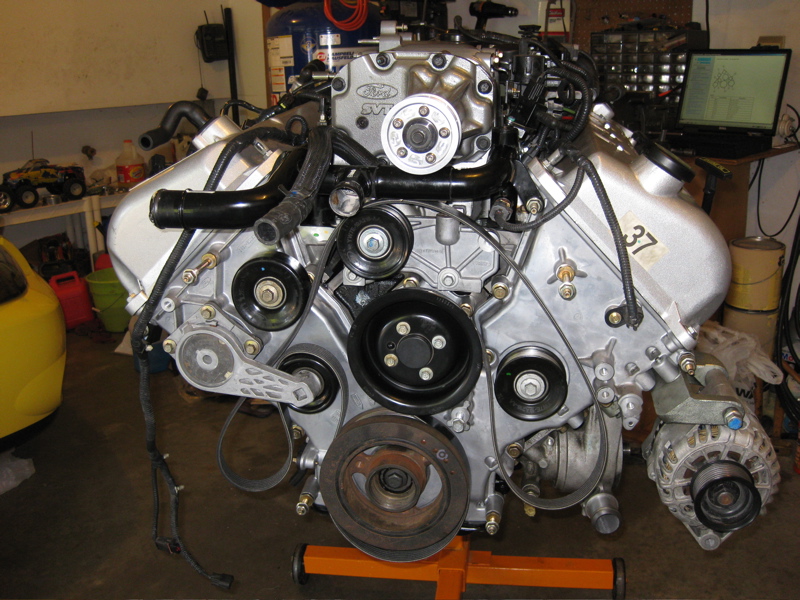
Hopefully most guys on here already know we have two serpentine belts up front on the motor but if you're new to these cars/motors yes they do. Here's how the inner belt runs. I don't have the a/c compressor or power steering pump in place as they are still in the car attached.
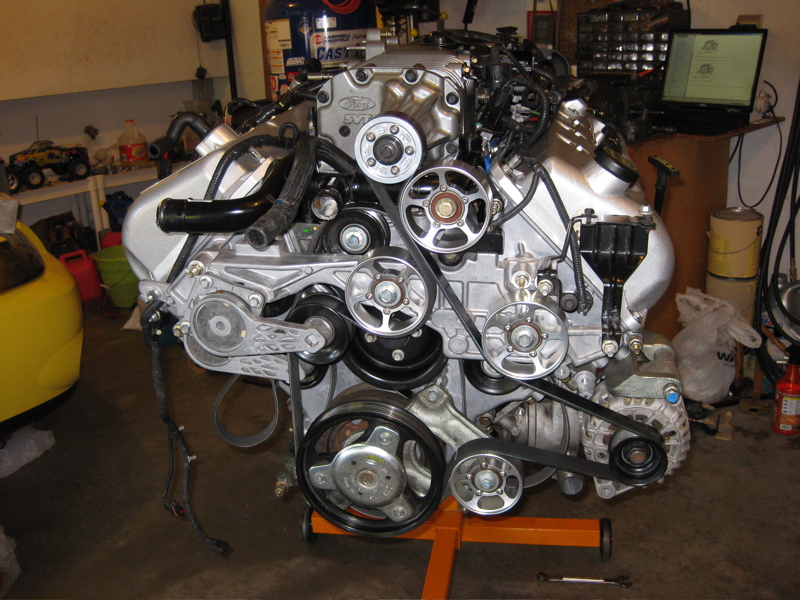
Here's how it looks when you have all the outer brackets installed and second serpentine belt.
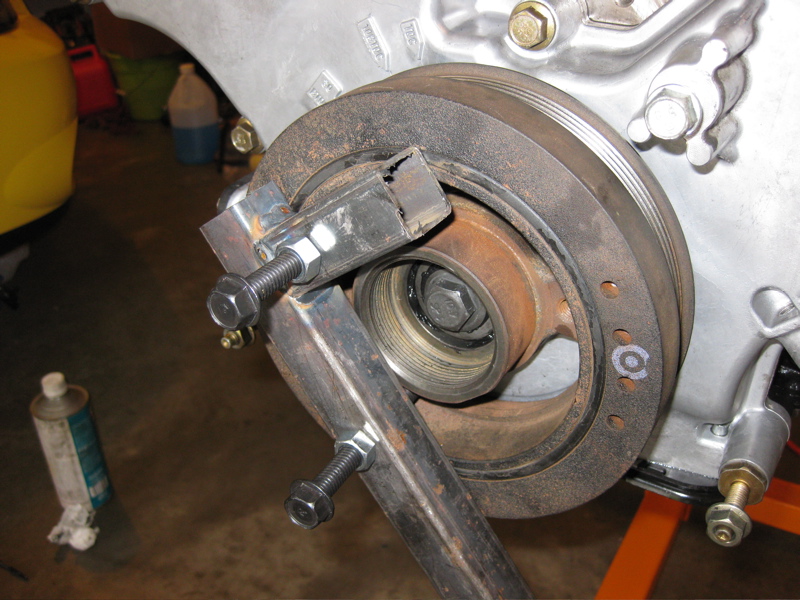
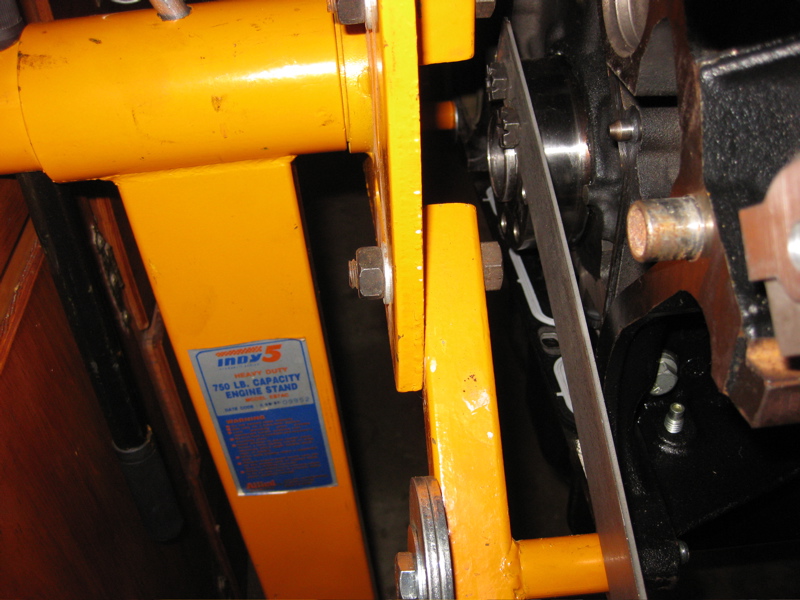
Getting that second lower crank pulley on required torquing it down to 74 ft/lb (left hand thread) so I got some flat bar and drilled two holes in it and bolt it up to the rear of the crank. I then let it lock up against the engine stand to prevent the crank from turning. Worked great.
Getting close. Motor is almost ready to go back in the car
Hopefully most guys on here already know we have two serpentine belts up front on the motor but if you're new to these cars/motors yes they do. Here's how the inner belt runs. I don't have the a/c compressor or power steering pump in place as they are still in the car attached.
Here's how it looks when you have all the outer brackets installed and second serpentine belt.
Getting that second lower crank pulley on required torquing it down to 74 ft/lb (left hand thread) so I got some flat bar and drilled two holes in it and bolt it up to the rear of the crank. I then let it lock up against the engine stand to prevent the crank from turning. Worked great.
Getting close. Motor is almost ready to go back in the car
Wow, great progress!!! update??
pretty good thread.
What was the tq sequence and lbs for the head studs?
Sorry I've been out of town. I assume you've found this info by now.
Wow, great progress!!! update??
Yeah car is up and running. Very nice too I might add
See this thread. I think there's been a few others too but this one comes to mind.http://www.svtperformance.com/forums/terminator-talk-229/631168-my-car-lives-again-fired-up.html
Users who are viewing this thread
Total: 6 (members: 0, guests: 6)

