pad/polish for a scratch?

DSG2003Mach1

Well-Known Member
Established Member
Premium Member
Joined
Apr 15, 2004
Messages
16,069
Location
Central Fl
going down a trail had a branch scrape down the side of the truck from one end to the other. I used some Meguiar's Mirror Glaze Fine Cut Cleaner #2 by hand and it cleaned it up a bit but not completely (not that I spent a ton of time on it in this heat). I have a Porter Cable but my pads are old and crap so looking for recommendations on a pad and polish.

You can just baaaaarely feel it with a finger nail in places so I know it wont completely go away but want it to clean it up as much as possible.
 

Bdubbs

u even lift bro?
Established Member
Premium Member
Joined
Jan 8, 2010
Messages
16,094
Location
MN
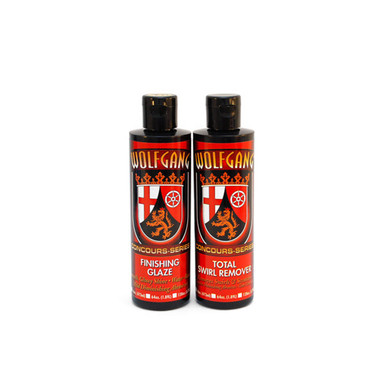
I like lake country 5.5" pads with the Porter Cable. I also like Griot's Boss fast acting cream and correcting cream. I've also had pretty good luck with Wolfgang Uber polish and finishing glaze.

Sent from my moto g power (2021) using Tapatalk
 

Lambeau

Superfleck Moonbird
Established Member
Malt Liquor Mafia
Joined
May 13, 2010
Messages
9,931
Location
Rockwood Lodge
Lake Country (LC), based in Oconomowoc, WI, is the brand I have too. Not sure if they make all their products in the USA or not.

As a novice, I've had good luck with LC and a Porter-Cable like BDubbs.

LC's website has some good info.

IMG_8539.jpeg


There's other good brands out there too.
 

Black Gold 380R

Multiple SVT Collector
Established Member
Joined
Feb 28, 2008
Messages
5,663
Location
El Paso, TX
As far as pads I like Griots and another brand called Spta. They are foam pads. For rough stuff I use the orange or yellow foam pad.

I use these on the 6 inch polisher

I use these on the 3 inch polisher

For the polish I have had good luck on my 65 and my 03 Cobra using the 3M perfect it series. The number 1 should buff out the scratch and then use number 2 to finish it off.

You can buy these individually (it's still not cheap stuff though)

If you really want to level it out you could lightly wet sand it with 3000 (2500 if 3000 is to light. Meaning isn't cutting enough for you) and then buff it out. If you go this route go very light. You don't want to bust through the clear. And since you said you can feel the scratch with your fingernail it is a deep scratch.

These are meant for a DA, but you can use them by hand with a sanding block.
 

01yellercobra

Well-Known Member
Established Member
Joined
Oct 5, 2005
Messages
21,322
Location
Cali
A friend recommended this when I needed to remove a couple scratches from my truck. A tree branch got me one of the times I took it off road. I usually use it with an orange pad. Naturally I can't find the before and after pics now.


BlckBox04

I am the liquor
Established Member
Premium Member
Joined
Dec 24, 2007
Messages
8,548
Location
NJ
you need a white foam pad and I use this stuff works really well


gimmie11s

I Race Pontiacs
Established Member
Premium Member
Joined
Jun 1, 2004
Messages
18,629
Location
la la land
Perfect timing on this thread.. I scratched my dually last weekend when I drove a little too close to a lawn chair I had sitting outside SMH.

Good info guys!
 

Black Gold 380R

Multiple SVT Collector
Established Member
Joined
Feb 28, 2008
Messages
5,663
Location
El Paso, TX
If you haven't seen this in my other post, I did some paint correcting on my 03 Cobra hood a few weeks back.

Only had light scratches from washing, but had over spray from my 65 on it (I was dumb and had it parked near the garage when I was painting the 65. Doo LOL), rough surface and orange peel from the initial repaint.

The process I listed above is how I achieved these results.

Just remember everyone's preferred method and products will always be different.

Here you can see how fuzzy the reflection is (orange peel and overspray)
20230507_181431_resized.jpg


This is after wet sanding. Reflection is smooth but hazy. You can see outside area (to the left) still has orange peel and overspray as I had not worked it yet.
20230507_181448_resized.jpg


This is after wet sanding. Again, it looks smooth, but is hazy.
20230507_181528_resized.jpg


And this is after the 3M perfect it kit on an orange pad. This was done on paint that was at least 10 years old.
20230507_184608_resized.jpg


20230507_184727_resized.jpg


Just showing you my results based on my technique and products used. I would go with the least aggresive first and work your way down if need be. So, try with a buffer and pad before wet sanding to see if you're happy with the results.

I didn't take pictures, but I buffed the hood on my wife's F-150 this weekend. It had bad oxidation. I used the orange pad and perfect it number 1. I actually had to do it twice to get all the oxidation out. I still need to finish it with perfect it number 2, but it looks great now. I'll see if I can get you some pictures this evening and post up tomorrow. I think the tops of the fenders still has some oxidation.
 

01yellercobra

Well-Known Member
Established Member
Joined
Oct 5, 2005
Messages
21,322
Location
Cali
you need a white foam pad and I use this stuff works really well

That's the other stuff my buddy recommended. But the VS worked better for me.

My buddy was a professional detailer for a few years. So he's my go to when I have questions.
 

Black Gold 380R

Multiple SVT Collector
Established Member
Joined
Feb 28, 2008
Messages
5,663
Location
El Paso, TX
definitely not gonna play with wet sanding and such, couldnt stomach ****ing that up. I'll try another polish and pad and see what happens, you have to know where it is to see it now

I agree. Least aggressive method is the best place to start.

Here are the pictures of my wife's F-150 I mentioned.

I didn't take pictures of the hood before I started. Here is the roof. The hood looked just like this.
20230828_161411.jpg


20230828_161403.jpg


I did "not" wet sand this. This is using the orange foam pad and 3M perfect it number 1. I had to go over the hood twice to get all the oxidation out. I still need to finish it off, but it's WAY better now.
20230828_161325.jpg


20230828_161334.jpg


20230828_161239.jpg
 

Users who are viewing this thread


Top