Cut a hole in my dash (for gauges)

BBriBro

Active Member
Established Member
Joined
Aug 7, 2002
Messages
1,270
Location
Independence, KY
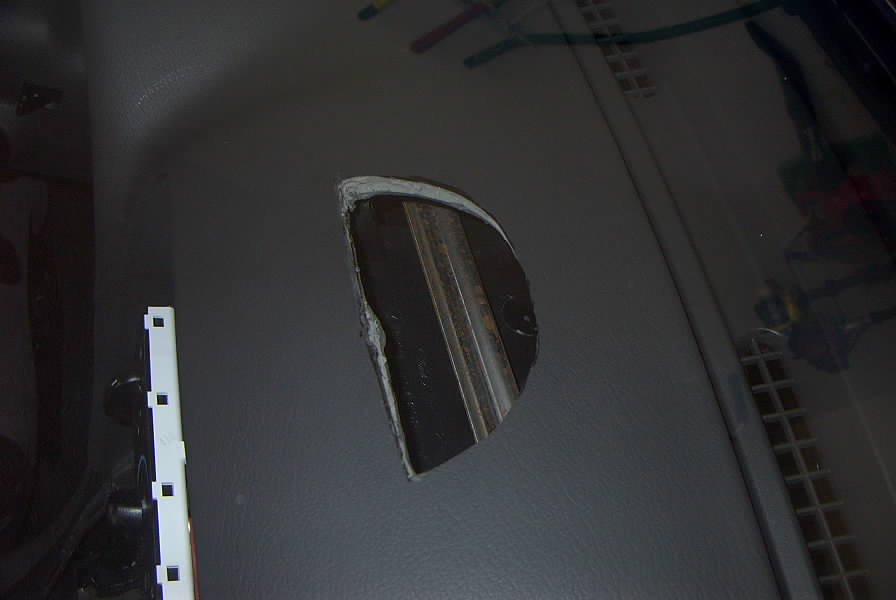
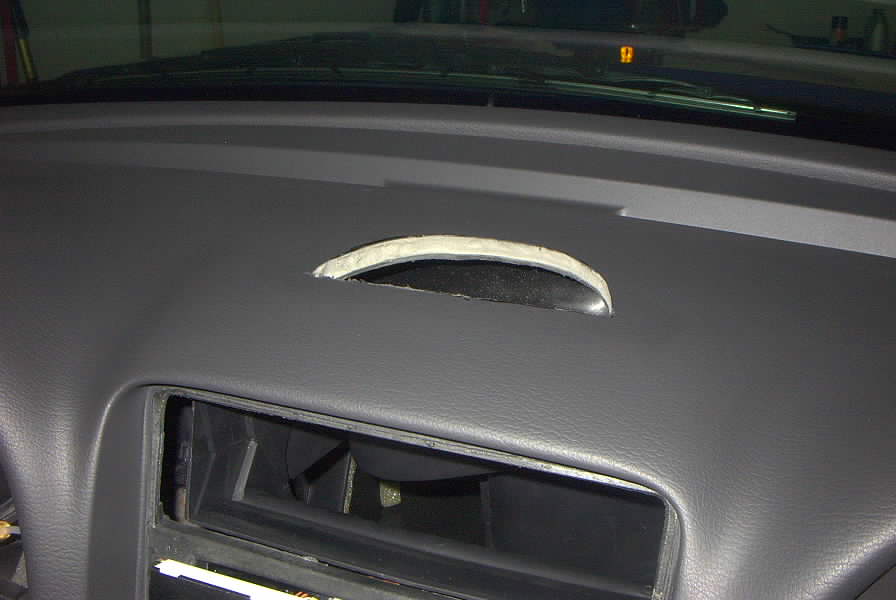
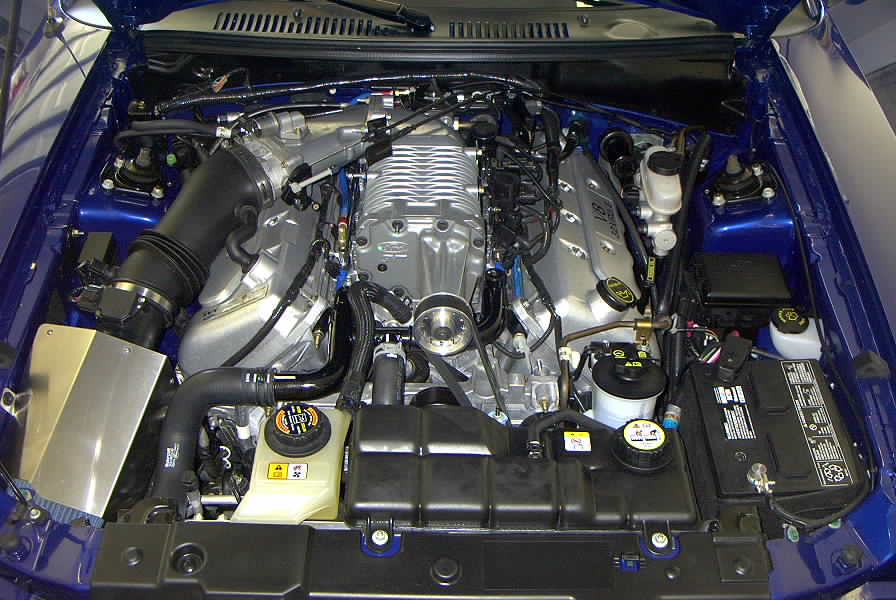
I bit the bullet, and cut the dash, I really like the location up on top of the dash, (my wife's beetle has them up there, and they are very convenient to look at )
interior.JPG
gauges.JPG


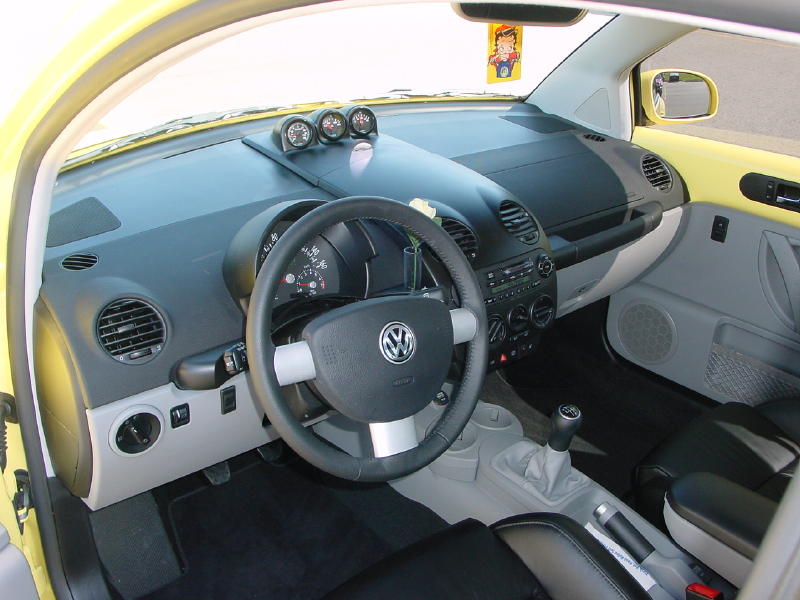
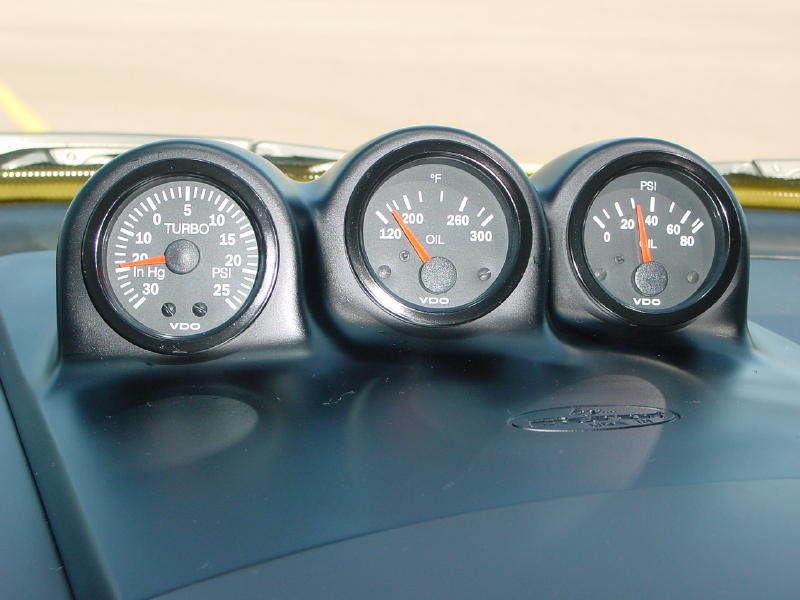
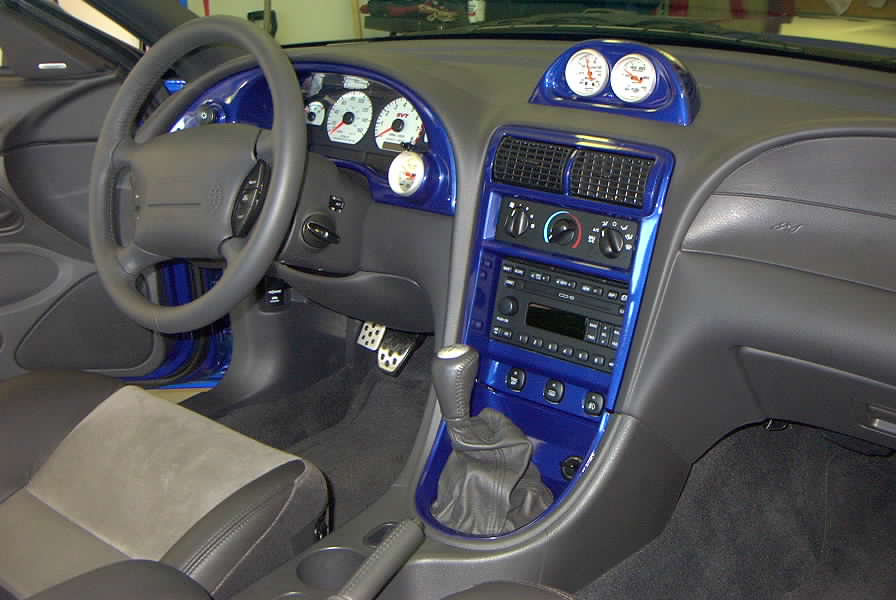
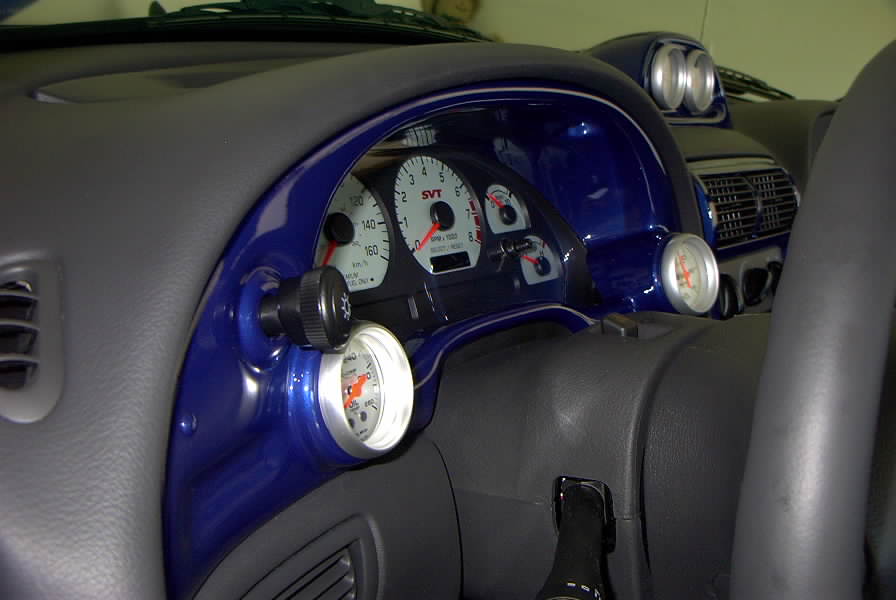
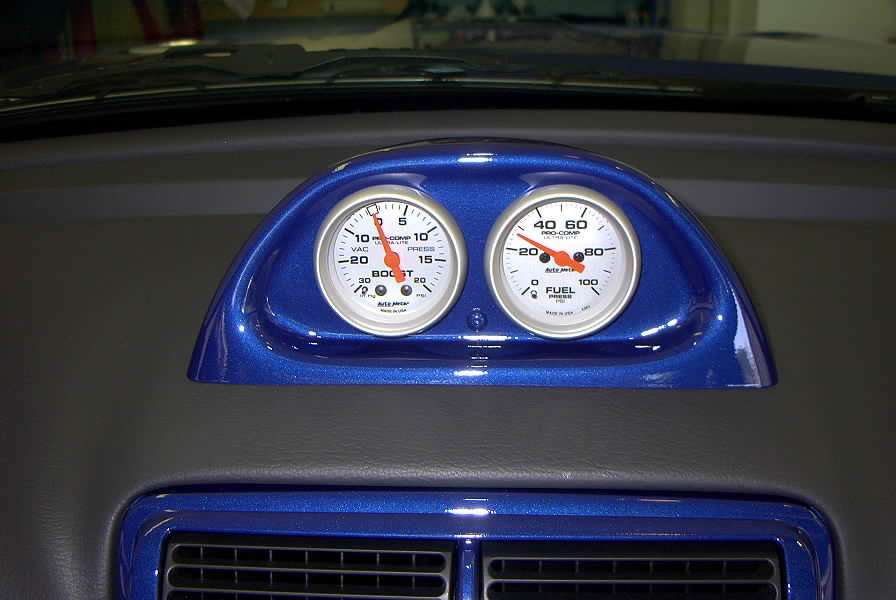
I think overall it turned out well. I drove it for one day with the new bezel and realized that was too low and hidden for the boost gauge, also I wanted a couple more gauges :) So I re-arranged them and went to town !

hole3.JPG

hole1.JPG

hole2.JPG

sender.JPG

newsenders.JPG

fuel_rail.JPG

engine.JPG

interior1.JPG

interior2.JPG

bezel2.JPG

dash_pod.JPG
 
Last edited:

BBriBro

Active Member
Established Member
Joined
Aug 7, 2002
Messages
1,270
Location
Independence, KY
Originally posted by chillfactor
Wow thats a lot of gauges.
Yeah, but the factory ones are pretty much useless, so don't even count those! Once I found out how the factory oil pressure gauge worked ( or didn't ) that was motivation for me to get some real instrumentation.
 

Tabres

Not without incident
Established Member
Joined
Jan 31, 2003
Messages
9,818
Location
Bloomington, Il
I normally HATE painted interiors, but wow, yours looks extreemely nice. It's subtle, unlike most you see these days...

Very nice:thumbsup:
 

unit213

Bone Stock
Established Member
Joined
Mar 29, 2003
Messages
4,360
Location
earth
I like the ones on top of the dashboard. You have some big balls for cutting it up like that.
 

Silverb@ck

New Member
Established Member
Joined
Aug 20, 2003
Messages
24
Location
Austin
That looks bad arse! You have big cajones for cutting up your ride but obviously you know what you are doing. Where did you get that piece for the other 2 gauges that go in front of your instrument panel?
 

jonas

New Member
Established Member
Joined
May 12, 2003
Messages
2,138
Location
Canoga Park, CA
nice, I want to do something simmilar with an aluminum finish.

just personal taste but you think about possibly matching the center guage cluster the same as the dash with only the side with the guages blue? I just think it sticks out way too much but thats just personal taste.
 

Fang

Active Member
Established Member
Joined
Apr 1, 2003
Messages
2,103
Location
Colorado
Damn that caused me to jump back once I saw the painted areas. Different looking. Nice job.
 

BBriBro

Active Member
Established Member
Joined
Aug 7, 2002
Messages
1,270
Location
Independence, KY
Thanks for the compliments guys ! I have always liked the idea of a dash pod too, it just took me a few months to get the courage to cut it, cause there's no turning back !

Originally posted by Tabres
I normally HATE painted interiors, but wow, yours looks extreemely nice. It's subtle, unlike most you see these days...

Very nice:thumbsup:
I don' t know if I'd call it Subtle !! It's a drastic change, but for what I paid to have that paint mixed (from my VIN #:) ), I wanted to use my moneys worth, without going overboard. I figured If I did a good job, it would be fine, and the paint came out great, the clearcoat is shiny and smooth, the metallic reflecting in the sun on the dash pod looks pretty cool driving down the road.

Originally posted by Silverb@ck
That looks bad arse! You have big cajones for cutting up your ride but obviously you know what you are doing. Where did you get that piece for the other 2 gauges that go in front of your instrument panel?
The dash pod and the instrument cluster bezel are both made by Autometer, I purchased them from egauges.com

Originally posted by jonas
....but you think about possibly matching the center guage cluster the same as the dash with only the side with the guages blue?
Yes, actually I wasn't going to paint ANYTHING, but the black plastic bezel didn't look very good against the gray, once I had it in there, I was going to only have the bezel, but decided to go ahead and put some on the dash, so I ordered another black plastic piece that looked out of place. I figured it would be very hard to match the gray plastic since it is a different texture, it isn't even painted, and isn't shiny, I don't think I could have got it to really blend in, so I went for a contrast, and once I had the paint mixed, (and saw how pretty it was :) ) I just kept going.
 

tommygun

New Member
Established Member
Joined
Apr 26, 2003
Messages
3,090
Location
KCMO
did you do the door bezels also? I was thinking about doing the same on my sonic car, now that I see it in pics. WOW and I have some paint left over from painting my hood so I might try this out. Great job
 

Terminator03

banned
Joined
Jun 19, 2002
Messages
419
Location
Michigan
Looks sweet dude. Very, very professional looking. :thumbsup: I love painted interiors when they are done as clean and with as much quality as your setup.
 

OH3Cobra

HP is my vice
Established Member
Joined
Apr 8, 2002
Messages
1,467
Location
Indy
very nice, looks like a 747 with all of those gauges. LOL. Where are the flaps.
 

BBriBro

Active Member
Established Member
Joined
Aug 7, 2002
Messages
1,270
Location
Independence, KY
Originally posted by tommygun
did you do the door bezels also?
Yeah, did the doors too, just where the switches are, not the ones by the door handles, figured they would get scratched up from finger nails. It's really growing on me (only been back together a few hours) I like it. I bet redfire would be pretty ! and Black always looks good too.
 

NetworkingGuru

Active Member
Established Member
Joined
Sep 15, 2002
Messages
1,724
Location
Silicon Valley, CA
Hey man, any chance of getting details on how to do the painting? I am dying to do that, that is the sweetest interior I've seen yet.
 

KOTH

Hang loose - travel light
Established Member
Joined
Mar 11, 2003
Messages
602
Location
Behind the wheel
Bold move to cut the dash but you did a good job and it looks professionally done. Gauges, gauges, and mo' gauges!
 
Last edited:

BBriBro

Active Member
Established Member
Joined
Aug 7, 2002
Messages
1,270
Location
Independence, KY
Originally posted by Tony_Montana87
nice very very nice but where did u buy ur gauges and where did u get the blue interior trim color its nice i like it.
I bought the gauges from egauges.com as well as the pods, and various adapters. The paint was custom mixed by a local auto parts store (Kentucky Motors) Sonic Blue is not available in an aerosol touch up can yet, so I had it mixed. I gave him the paint code "SN", he printed up a label with the formula, then before he mixed it, he asked if I had the VIN # and ran another forumula. It came up a different formula ! So the paint I got should be an exact match to the paint actually used on my car. To an untrained eye, you probably can't tell, but his point was that if you buy any touch up paint in a jar, even with the proper paint code, it may not exactly match your car because they do vary some what, another advantage to the computer generation!
Originally posted by NetworkingGuru
Hey man, any chance of getting details on how to do the painting? I am dying to do that, that is the sweetest interior I've seen yet.
I cleaned all the parts with rubbing alcohol, nothing special, I turned the shifter boot inside out, and filled it with paper towels, and masked around the edge. I popped out the two air vents, and masked inside the duct, so it would stay black. The paint I bought is a base coat, clear coat, it's made by Dupont. There is a jar of "color" it has to be mixed with an activator at 1:1 ratio, once it's mixed you have like 2 hours working time (in the jar) To spray it on, I used a generic cheapie spray gun at 45 psi, applied about 4 coats of the color, it dries so fast, I was shocked, since I am used to aerosol cans, and have never used a gun or an airbrush, this is a fantastic way of painting ! You can do 4 coats in about 10 minutes. The paint itself is very dull with no clear coat, so it doesn't look very good, and it's hard to tell how much paint you've applied, because there is no shine at all, only a little when it's wet, You can touch it within minutes. I let that dry about 30 min to an hour. The clear coat has to be mixed with it's reducer at a 4:1 ratio, then strained as it's poured into the gun. The clear is a little easier to run, cause it doesn't dry as fast, but still much easier than a can. I put about 3 coats of clear, or just enough till it really looked wet, almost like the parts were dipped. It dries dust free in 20 min, but you should let it sit overnight so you don't fingerprint it. All these instructions came on the cans, I am no professional, I was apprehensive and intimidated at first, but just followed the directions. It takes more work because of the mixing and stuff, but it's actually easier than a spray can, and the results make you look good !
 
Last edited:

Users who are viewing this thread


Top