SVTP GT Makes Ludicrous Power Gains : Home Brewed CAI Buildhttp://www.svtperformance.com/forum...icrous-power-gains-home-brewed-cai-build.htmlhttp://www.svtperformance.com/forum...icrous-power-gains-home-brewed-cai-build.htmlhttp://www.svtperformance.com/forum...icrous-power-gains-home-brewed-cai-build.htmlhttp://www.svtperformance.com/forum...icrous-power-gains-home-brewed-cai-build.html
http://www.svtperformance.com/forum...icrous-power-gains-home-brewed-cai-build.html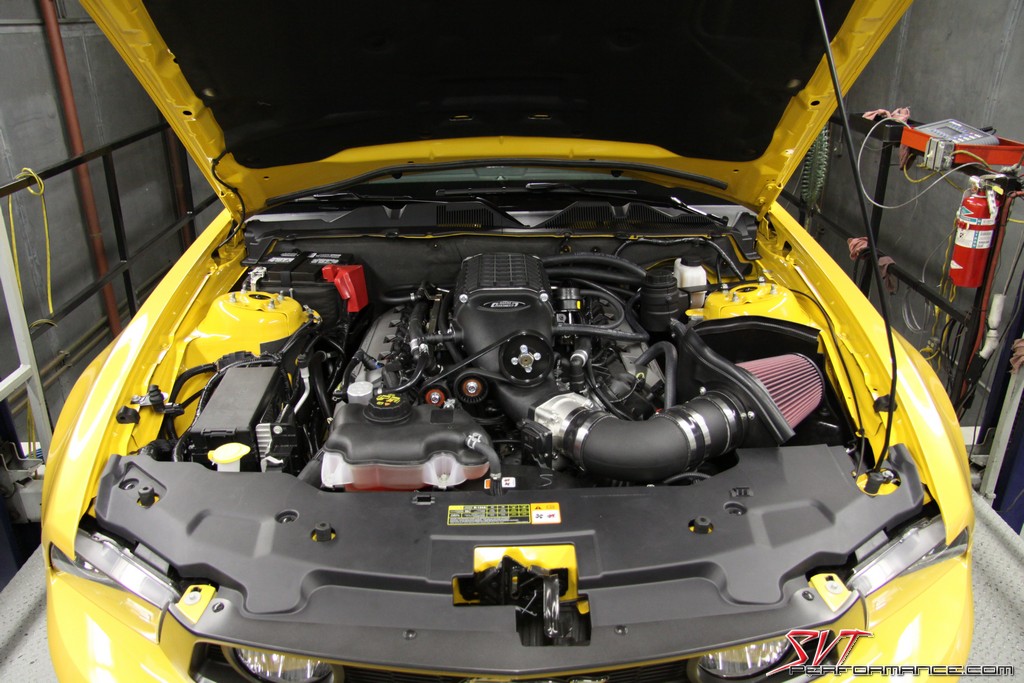
As we mentioned in our previous article, the SVTP GT was suffering from a pegged mass airflow sensor thanks to our recently installed Magnuson TVS supercharger. In this article we are going to discuss how and why this problem occurred, and we’ll take you through the development of our homemade solution
Pegging the MAF is nothing new in the world of Ford performance engines and forced induction. It really became a prevalent issue when people started to substantially crank of the boost on SVT Lightnings. Luckily the aftermarket came up with replacement sensors and plug in solutions to take care of it. With the earlier modulars the problem was usually addressed at the sensor itself, that it no longer the case.
The problem we were finding with the SVTP GT and the Magnuson blower was that the diameter of the sensor housing was too small. Too understand why that’s a problem we need to understand how a MAF works. It’s actually a pretty simple device used to measure the amount of air going into the engine, in quite an ingenious way. Knowing the correct amount of air entering into a cylinder will allow the ECU to inject the proper amount of fuel to reach the desired air : fuel ratio.
Basically, there is a wire with electric current flowing through it contained within the sensor. As the temperature of the wire increases its electrical resistance increases. This in turn limits the amount of voltage that can pass through the wire. Air passing over the wire cools it, decreases the wire’s resistance, which then allows for more voltage to pass through the wire. As the voltage increases the temperature of the wire increases until equilibrium is reached. The ECU then takes the data concerning the amount of voltage required to maintain equilibrium and combines it with data concerning barometric pressure and air temperature to calculate the amount of air entering the engine.
However, everything has design limits. That’s what we often run into when modifying cars, and we quickly found the MAF’s limits on the SVTP GT. Essentially what is occurring is that with the supercharger pulling a greater volume of air through the intake tube the MAF can’t sustain enough voltage through the wire to reach equilibrium. At that point the MAF is pegged, and the car pretty much stops making power. There was only one thing to do; we had to build a custom intake to get rid of the restrictive stock airbox and MAF housing.
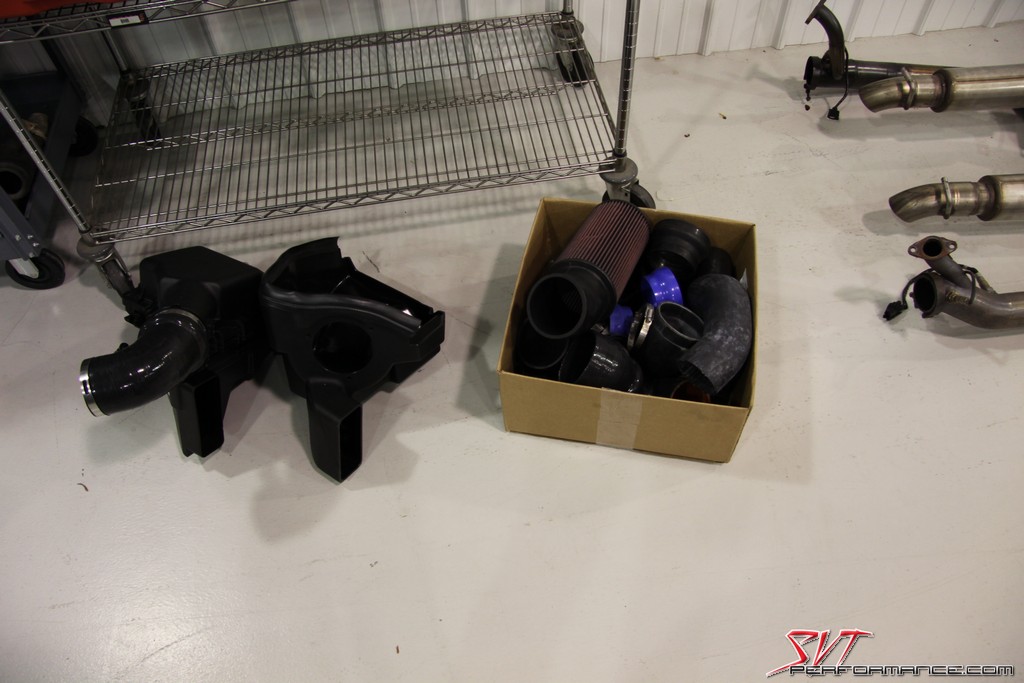
Luckily for us we have great vendors like JLT Performance, Magnuson Superchargers, Blow-By Racing, and Airaid that were all eager to help with our little project. So we packed up the SVTP GT and headed back to Arrington Performance's facilities in Martinsville, VA. We brought with us a plethora of filters, pipes, couplers, MAF housings, and clamps from JLT and Airaid. It was time to get on the dyno and go to work.
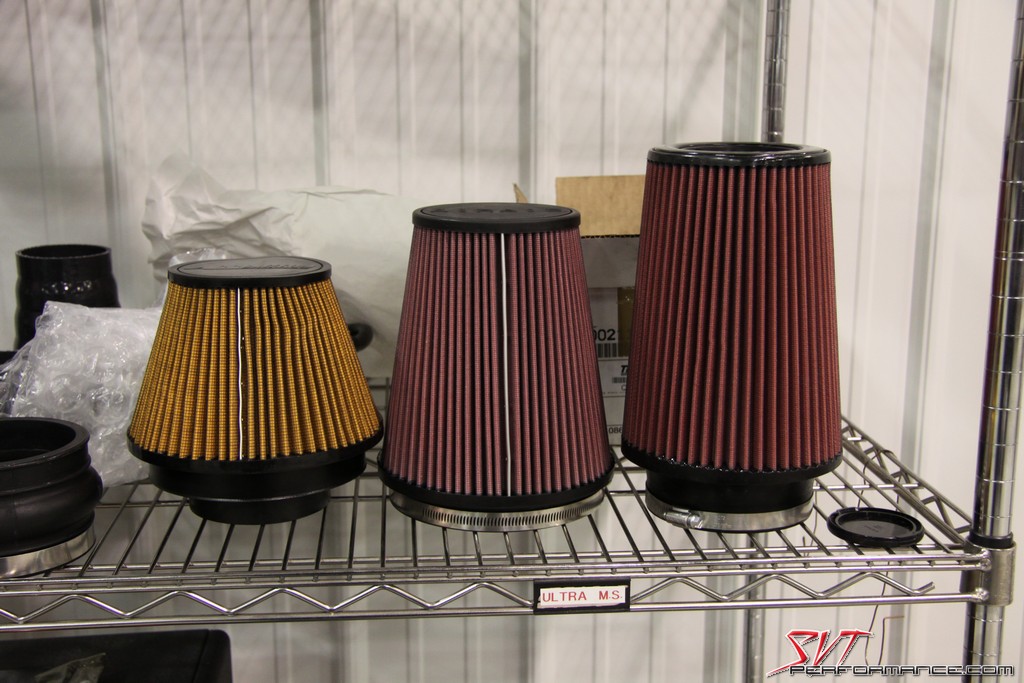
We didn't know which filter would fit, so we brought a few to try.
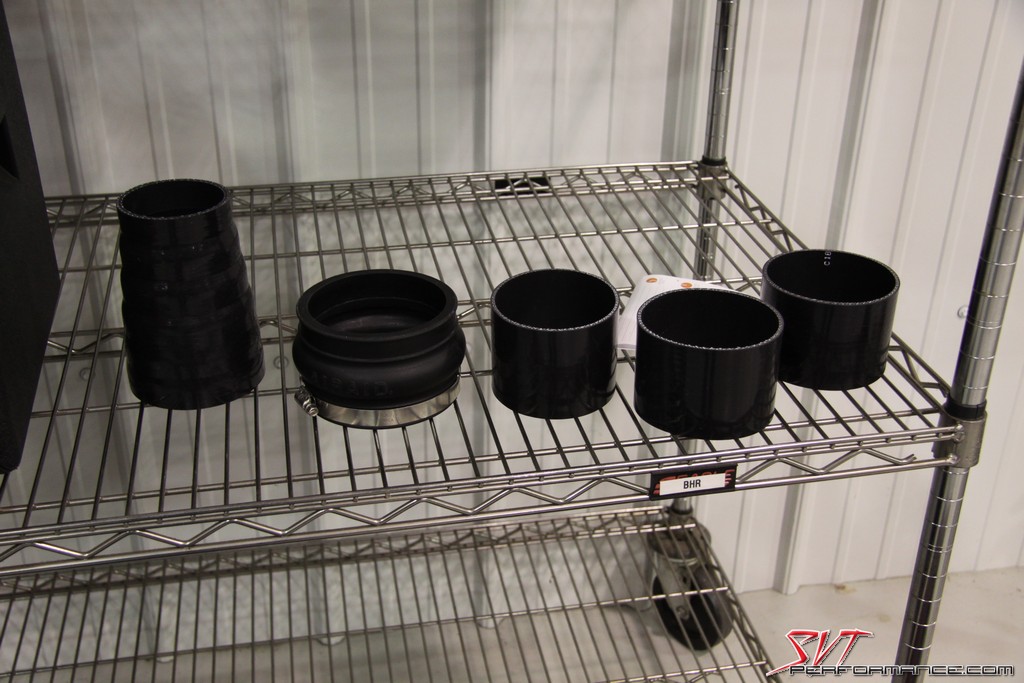
These are just some of the couplers we tried.
We had plenty of parts to work with at our disposal.

Arrington had this box of extra parts we were able to scrounge through.
These are just some of the couplers we tried.
We had plenty of parts to work with at our disposal.
Arrington had this box of extra parts we were able to scrounge through.
The first order of business was to prove that our pegged MAF theory was correct. We believed that the amount of air the MAF was being tasked with measuring wasn’t the issue. Instead, we thought that the problem lied in the velocity of the air that was passing over the heated wire. In theory, if we slowed down the air in the intake tract we could bring the sensor back into its proper operating range. The easiest way to lower the intake velocity is to increase the diameter of the intake tubing.
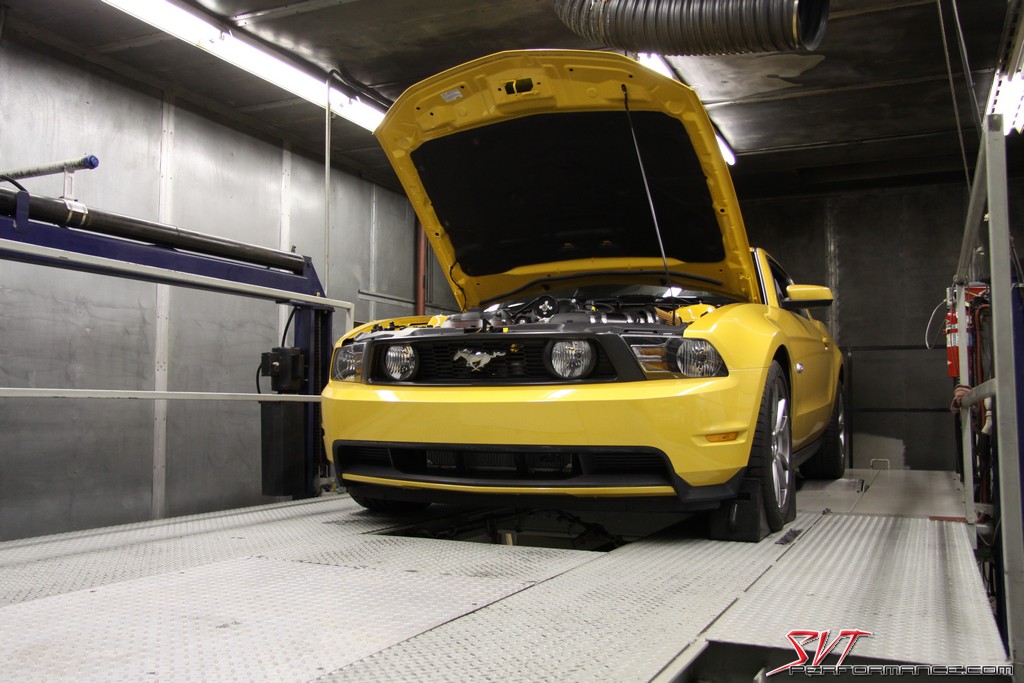
Here she is all ready for surgery.
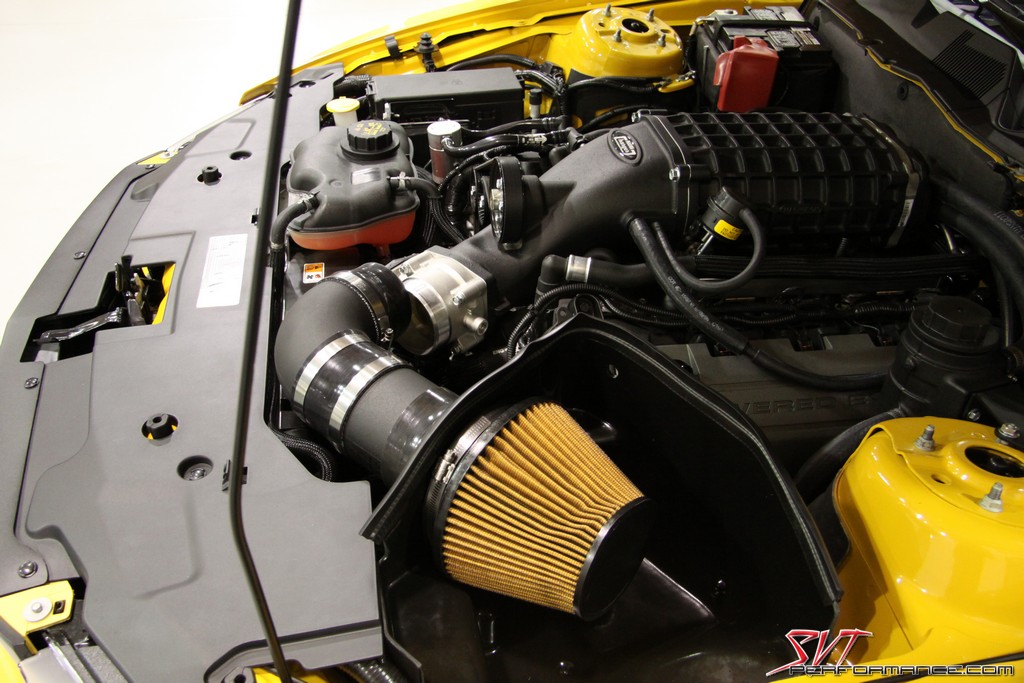
This stock airbox has to go.

Here you see the fairly small (~80mm) stock MAF housing.
This stock airbox has to go.
Here you see the fairly small (~80mm) stock MAF housing.
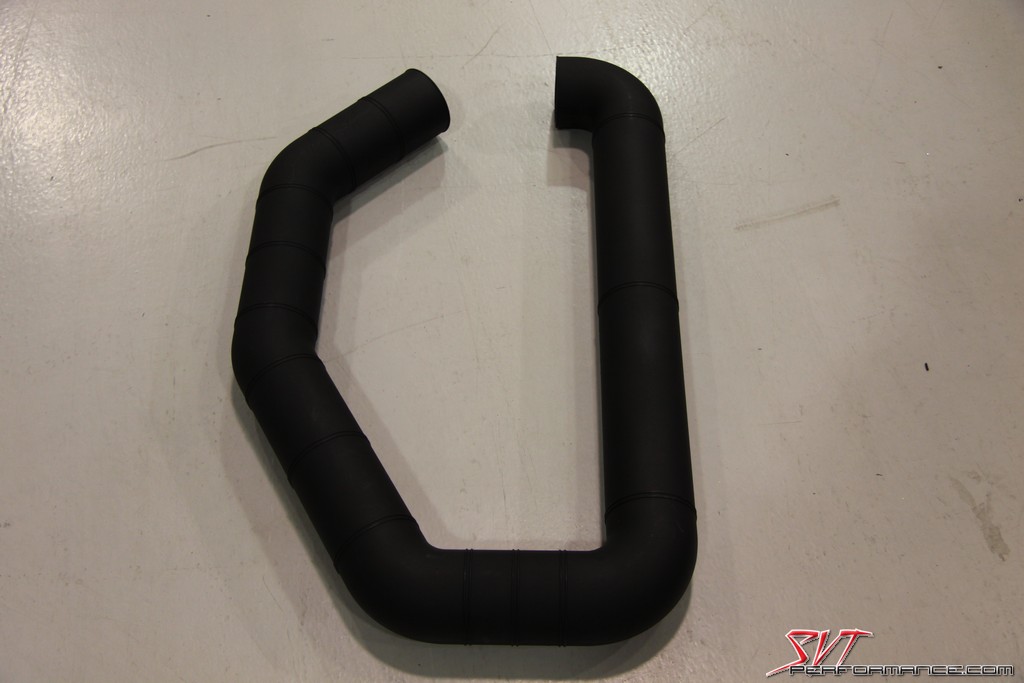
So we started off with one of Airaid’s four inch internal diameter U-Build-It (“UBI”) kits. For those of you who aren’t familiar the Airaid UBI systems you really should check them out. They basically offer a lineup of pipes with differing lengths and angles, along with clamps and silicone couplers, to allow you to piece together a completely custom intake. You can buy the sections of pipe individually or you can be like us an get the full tube section because we didn’t know what we were going to end up needing. Better to have is and not need it than to need it and have to sit around and wait for it to be delivered. The later is damn annoying. The quality of this product is instantly apparent when you open the box. The tube wall is very thick and smooth. It’s easy to cut out the sections you need using a ban saw or sawzall, and following the prescribed cut lines.
The Airaid UBI kit is a great product for anyone who needs to build a custom intake.
Airaid molds in these guide lines to help you make straight cuts.

Airaid molds in these guide lines to help you make straight cuts.
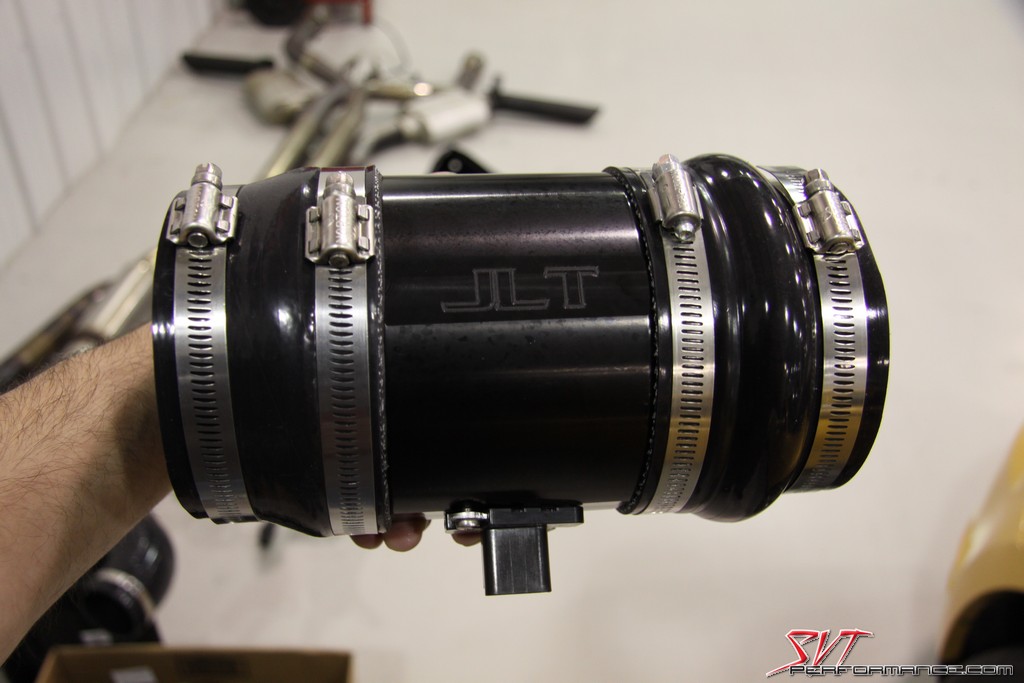
To start our build we began with a 90 degree piece from the Airaid UBI kit and a little something from JLT Performance. The big problem we were having with the stock box was the 80mm MAF diameter. JLT was able to help us out by sending one of their 110mm billet aluminum MAF housings. All we had to do was remove the sensor from the puny stock setup and placed it in the JLT part. From there we attached the Airaid 90 degree elbow to the JLT MAF housing with a silicone coupler. Then it was time to find a filter. We had the Airaid and JLT filters from the CAI kits that we had tested a few months back, but they were a bit too long to fit with the setup we had so far.
The 110mm billet JLT MAF housing is an impressive piece of work and ludicrously large.
It fit well with out Airaid filter adapter and Arrington filter though.
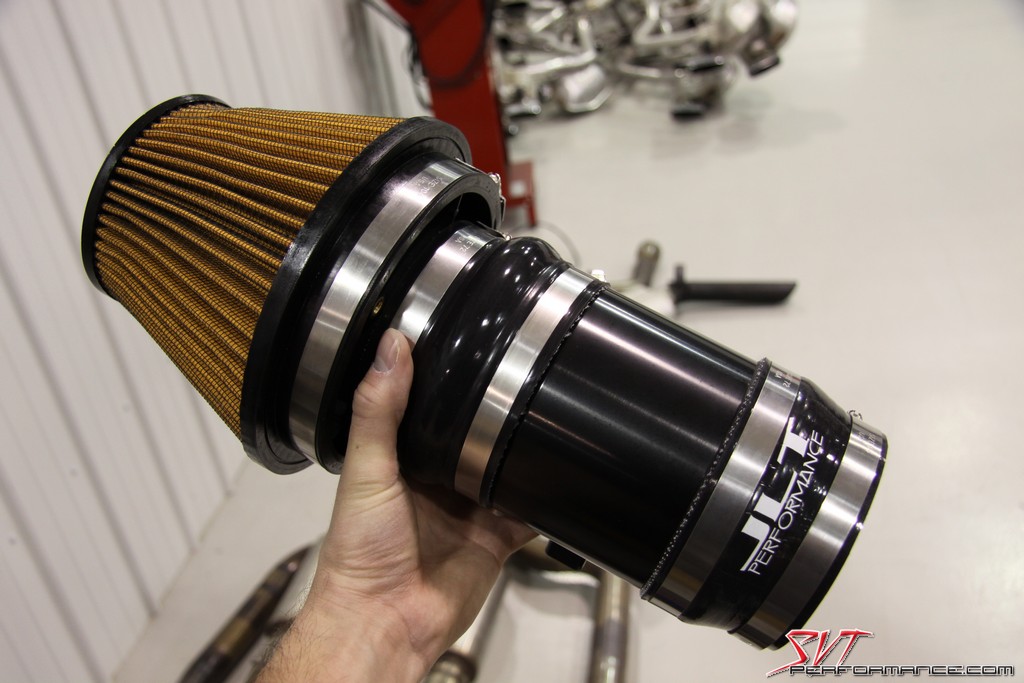
And with a bit of fitting it mated up to the Airaid 90 degree elbow.
It fit well with out Airaid filter adapter and Arrington filter though.
And with a bit of fitting it mated up to the Airaid 90 degree elbow.
Luckily for us Arrington had a spare filter sitting around that fit just right in the available space and worked with Airaid filter adapter we were using. It was one they have custom made to include with their CAIs for various Mopars. It’s a quality item and the orange filter media looked pretty good with the Yellow Blaze paint on the SVTP GT, which says a lot considering the overall design of the monstrosity that we had cobbled together thus far (codenamed Frankenberry). But aesthetics weren’t really a concern at this juncture; we were out to prove a theory. So with our homebrewed grab bag of intake parts cinched together we were off to the Superflow chassis dyno for a little open filter experimenting.
Frankenberry represents a parts collaboration between JLT, Airaid, and Arrington.
Frankenberry ready to go.

Here's is the monstrosity installed. It had absolutely no support and did a bit of flopping about.

You wouldn't want to drive down the road with this thing holding on for dear life.

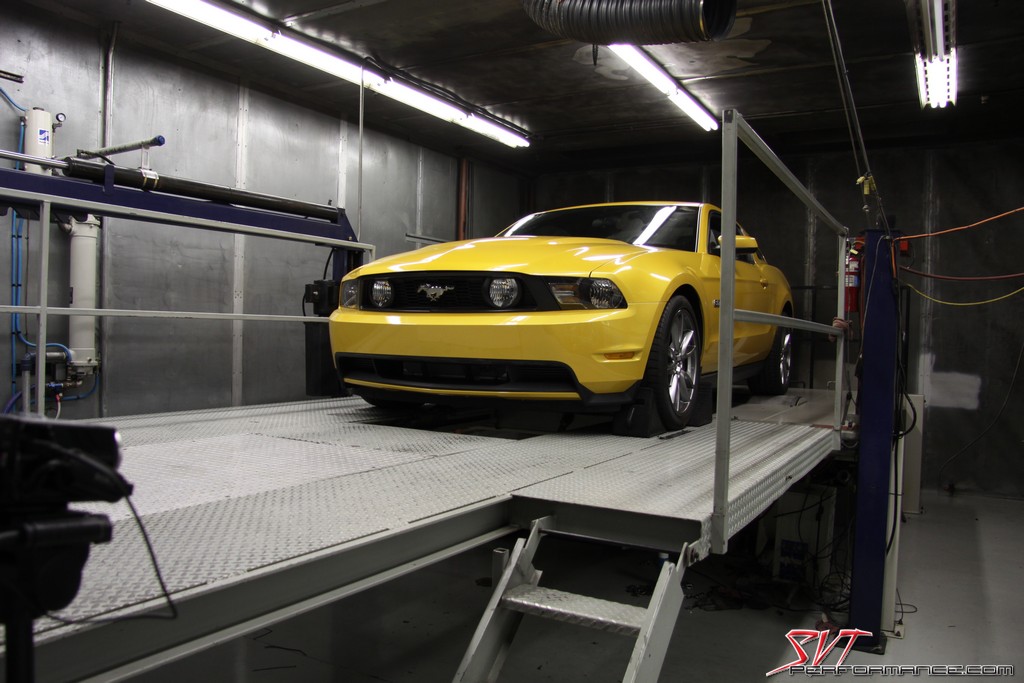
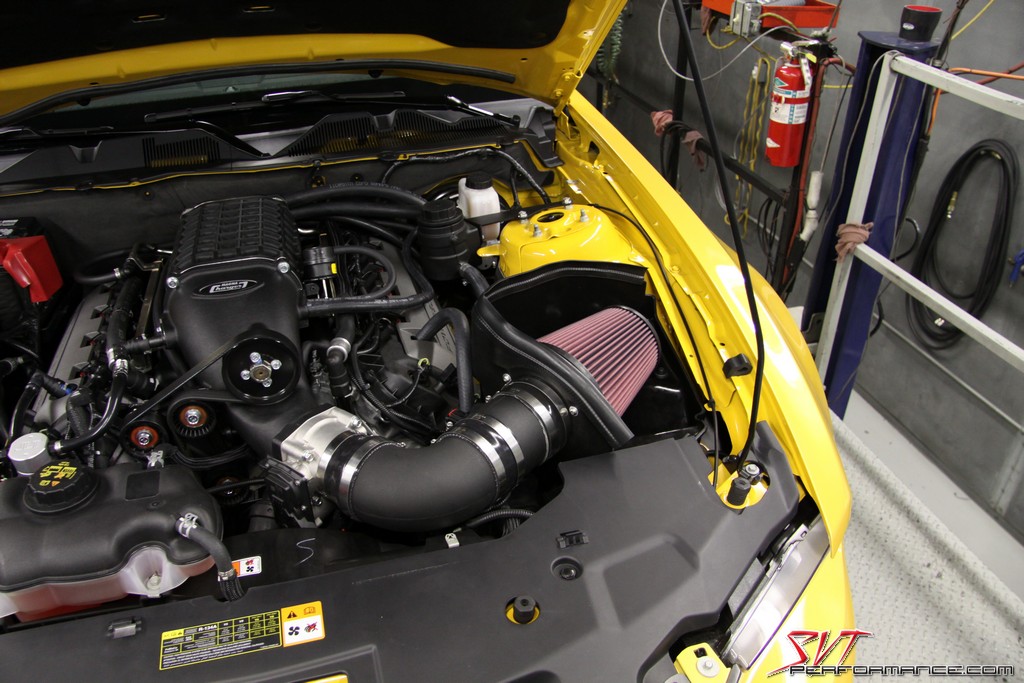
Arrington's Superflow chassis dyno has been an integral tool used in many SVTP articles.
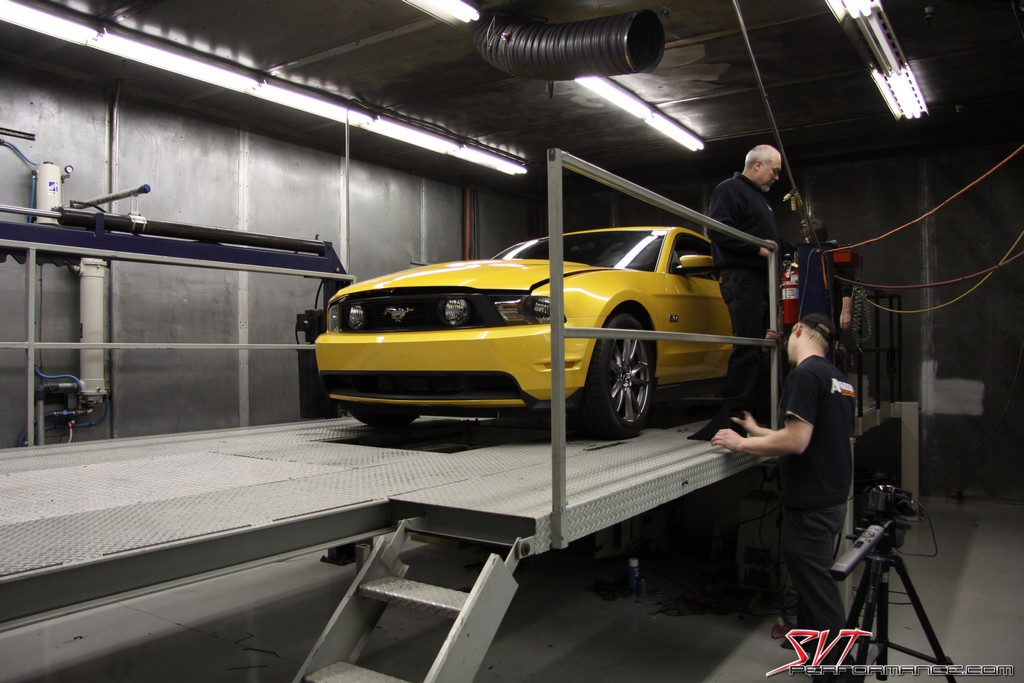
We performed all our dyno tests with the hood closed.
The stock baseline for the SVTP GT 381.8 RWHP and 372.2 RWTQ

With just the addition of the Magnuson TVS Supercharger we made 512.9 RWHP and 428.4 RWTQ.

Time to see if our theory was correct.
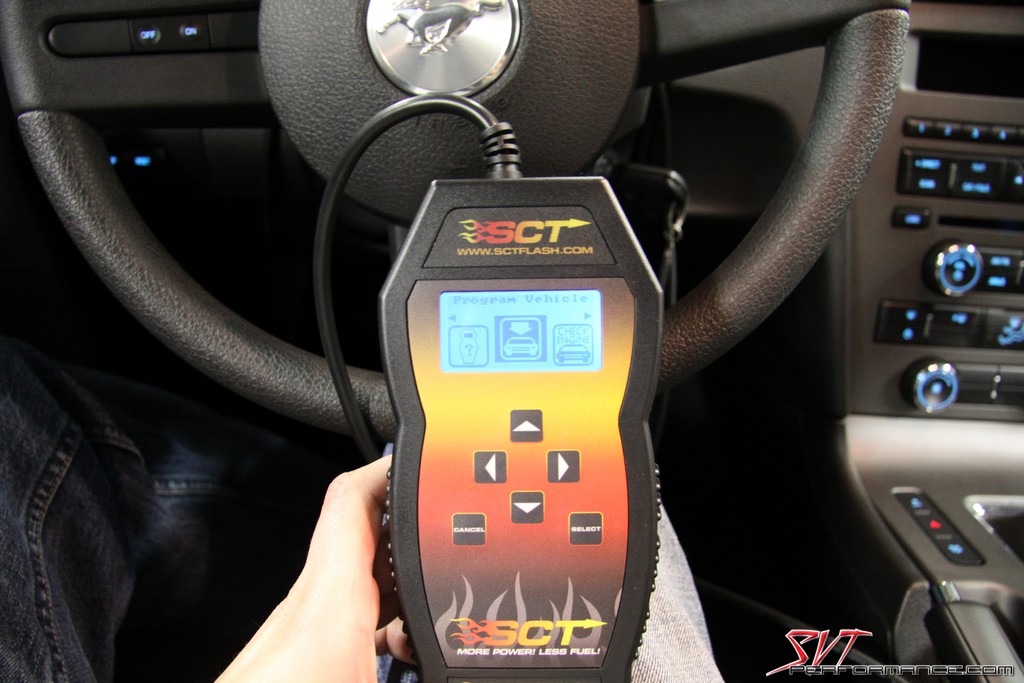
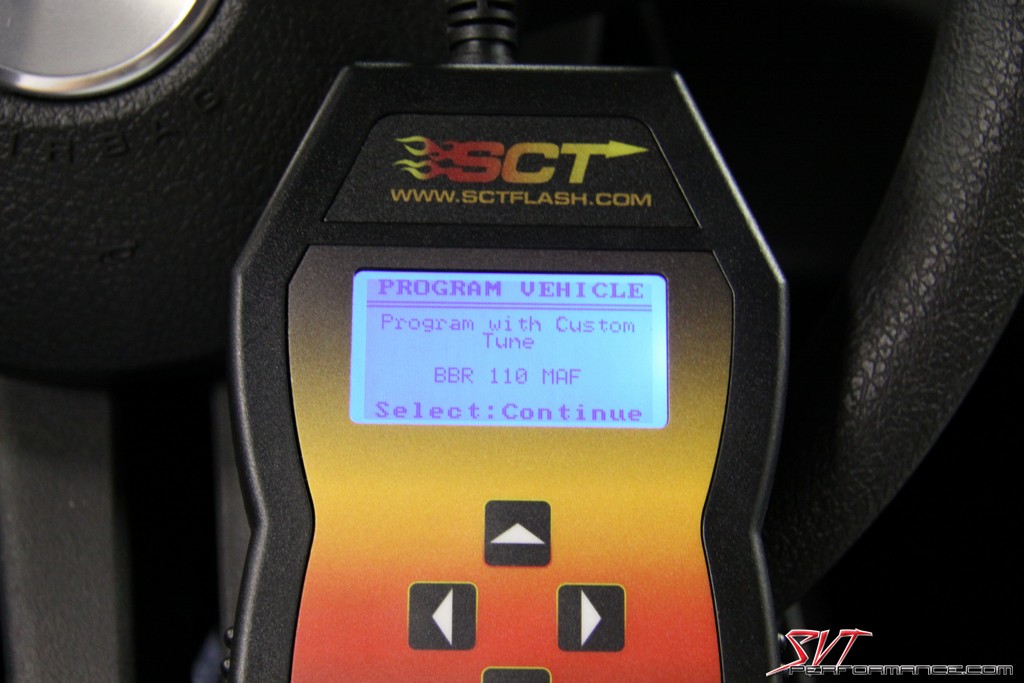
Once again we turned to Chris Jones of Blow-By Racing (“BBR”) and SCT for our custom tuning needs. We coordinated with Chris so he would be able to rapidly make changes to our tunes from his shop in FL while we had the SVTP GT on the dyno in VA. Those changes would soon prove their value as the 5.0 improved from its baseline of 512.9 RWHP and 428.4 RWTQ to an impressive 559.3 RWHP and 470.2 RWTQ, a gain of 46.4 RWHP and 41.8 RWTQ. That massive gain in horsepower let us know we were definitely headed in the right direction, and that our theory that the stock airbox was holding us back was valid. Now it was time to produce Homebrew CAI V2.0.
As cobbled together as it is, it still proved our theory that a larger MAF housing was needed.
Frankenberry ready to go.
Here's is the monstrosity installed. It had absolutely no support and did a bit of flopping about.
You wouldn't want to drive down the road with this thing holding on for dear life.
Arrington's Superflow chassis dyno has been an integral tool used in many SVTP articles.
We performed all our dyno tests with the hood closed.
The stock baseline for the SVTP GT 381.8 RWHP and 372.2 RWTQ
With just the addition of the Magnuson TVS Supercharger we made 512.9 RWHP and 428.4 RWTQ.
Time to see if our theory was correct.
Once again we turned to Chris Jones of Blow-By Racing (“BBR”) and SCT for our custom tuning needs. We coordinated with Chris so he would be able to rapidly make changes to our tunes from his shop in FL while we had the SVTP GT on the dyno in VA. Those changes would soon prove their value as the 5.0 improved from its baseline of 512.9 RWHP and 428.4 RWTQ to an impressive 559.3 RWHP and 470.2 RWTQ, a gain of 46.4 RWHP and 41.8 RWTQ. That massive gain in horsepower let us know we were definitely headed in the right direction, and that our theory that the stock airbox was holding us back was valid. Now it was time to produce Homebrew CAI V2.0.
Our tuning came courtesy of SCT and BBR.
Chris Jones of BBR worked with us to build some custom tunes. Chris even took time to help us with our SCT Pro-Racer Package.
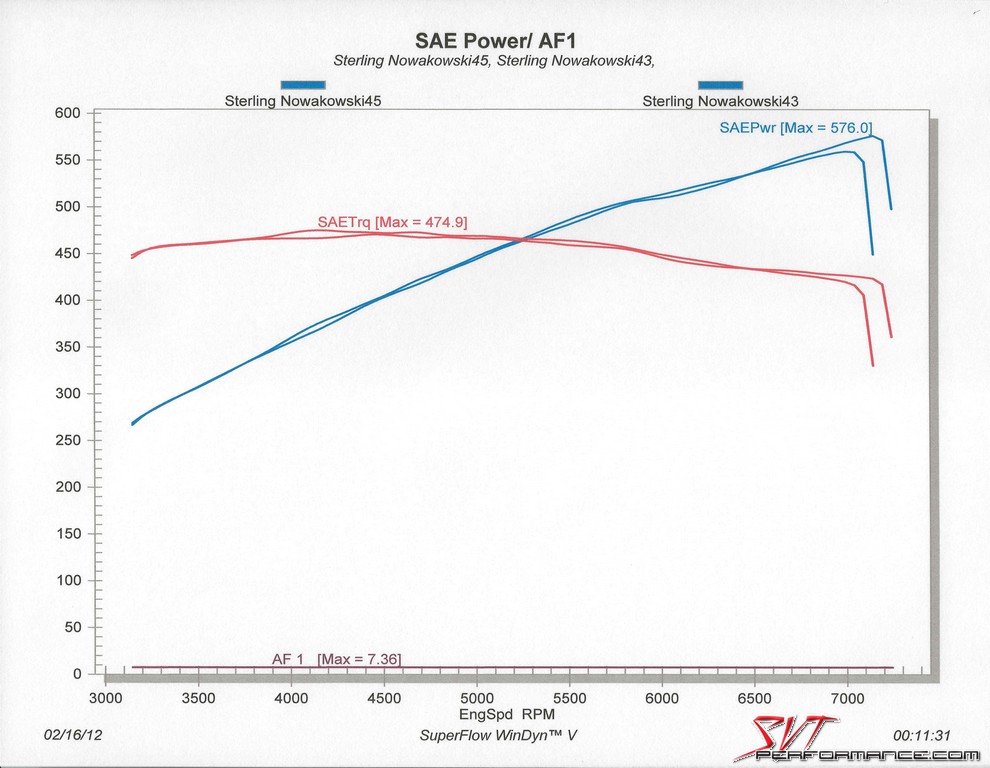
The Frankenberry intake made 559.3 RWHP and 470.2 RWTQ.

Chris Jones of BBR worked with us to build some custom tunes. Chris even took time to help us with our SCT Pro-Racer Package.
The Frankenberry intake made 559.3 RWHP and 470.2 RWTQ.
As cobbled together as it is, it still proved our theory that a larger MAF housing was needed.
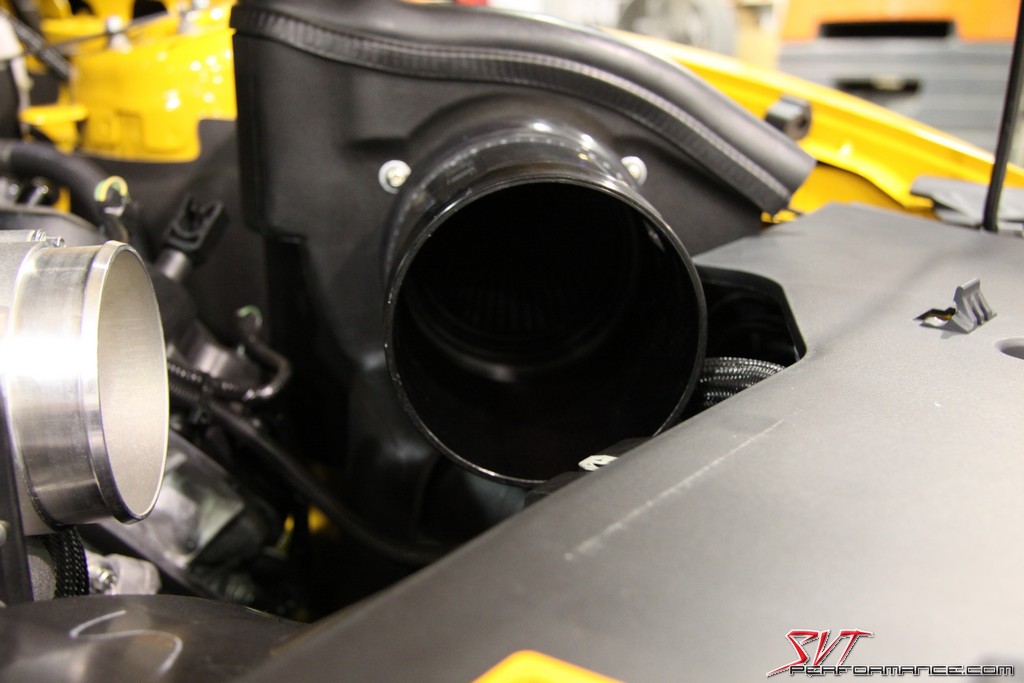
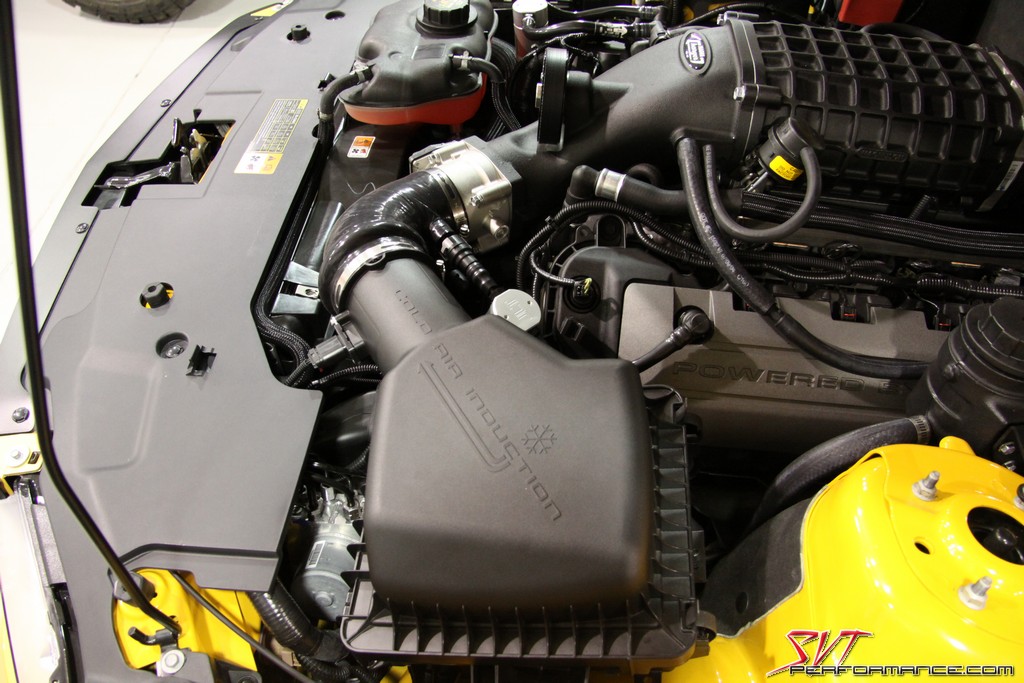
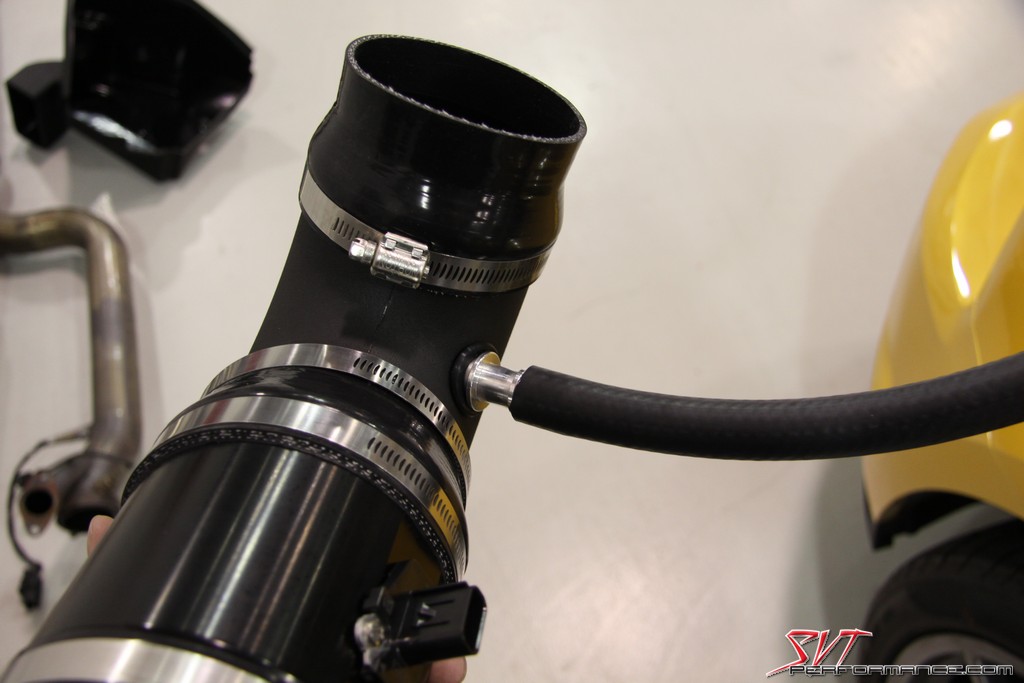
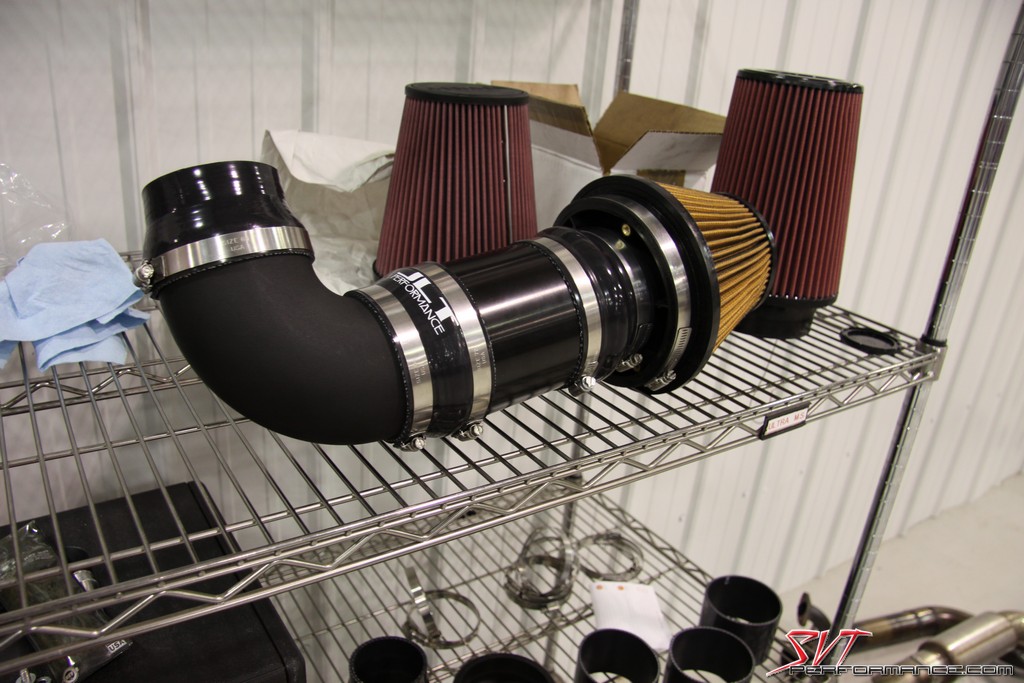
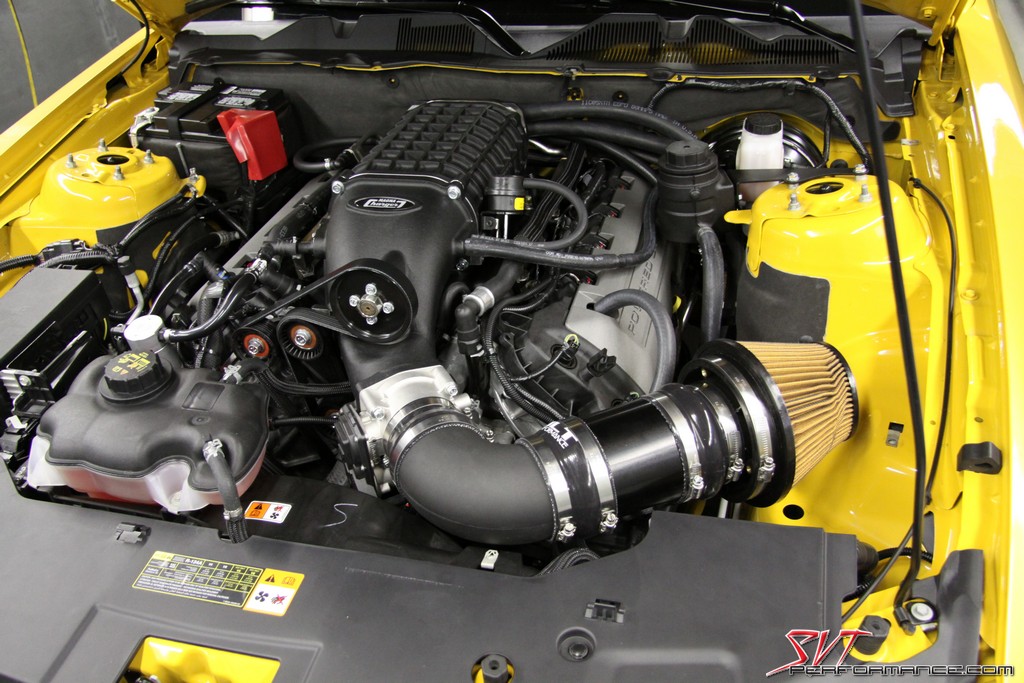
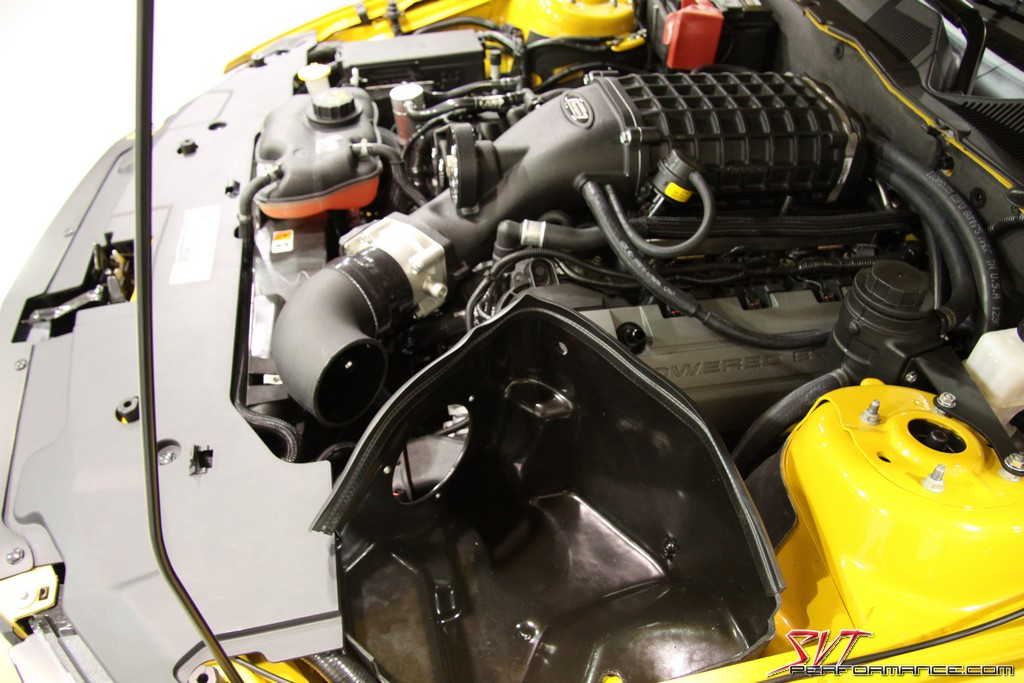
To start with, we knew we wanted something that looked much better and would be safe to drive down the road (we’re about 97% sure that the Frankenberry intake would have fallen off during an average 2:30pm beer run). We knew we wanted to use the filter and heatshield from the Airaid CAI we tested last year. It’s a great piece of design work and gave us a solid place to start building from. When we put the heatshield in place with the Airaid 90 degree elbow from earlier our next step was clear; like so many great projects we were going to need a sawzall. We sawed off the MAF housing from the intake tube that comes in the Airaid CAI kit for the 2011+ Mustang GTs. After a bit of fitting we had something that looked sight more civilized.
We knew we wanted to reuse the Airaid heatshield. It's a very well made hi-quality piece.
Now we just had to find a MAF housing to fit this setup.

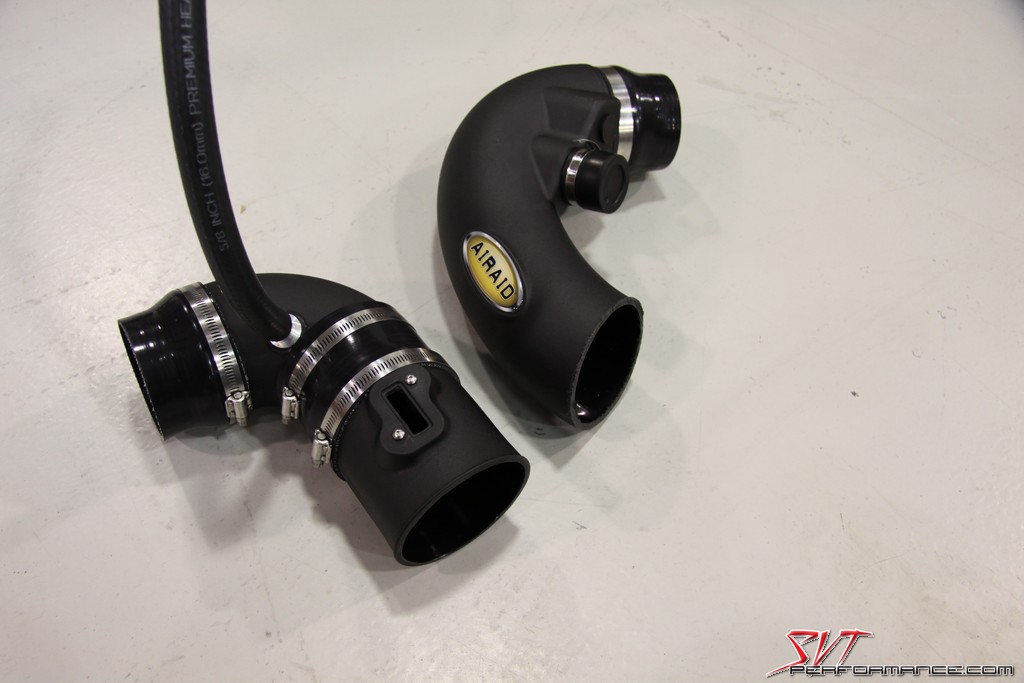
Here was our solution, just crop the end off of the Airaid CAI we tested on the SVTP GT last year.
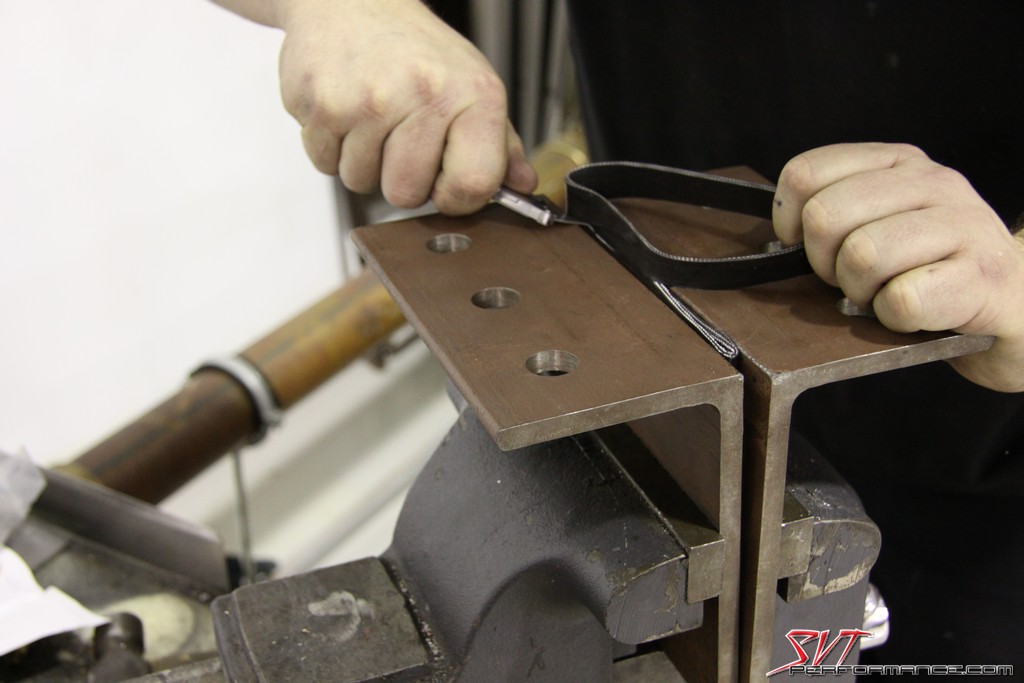
It took a little trimming and resizing to get everything to fit properly.
We had to modify a couple silicone couplers to work with our cropped off Airaid MAF housing.
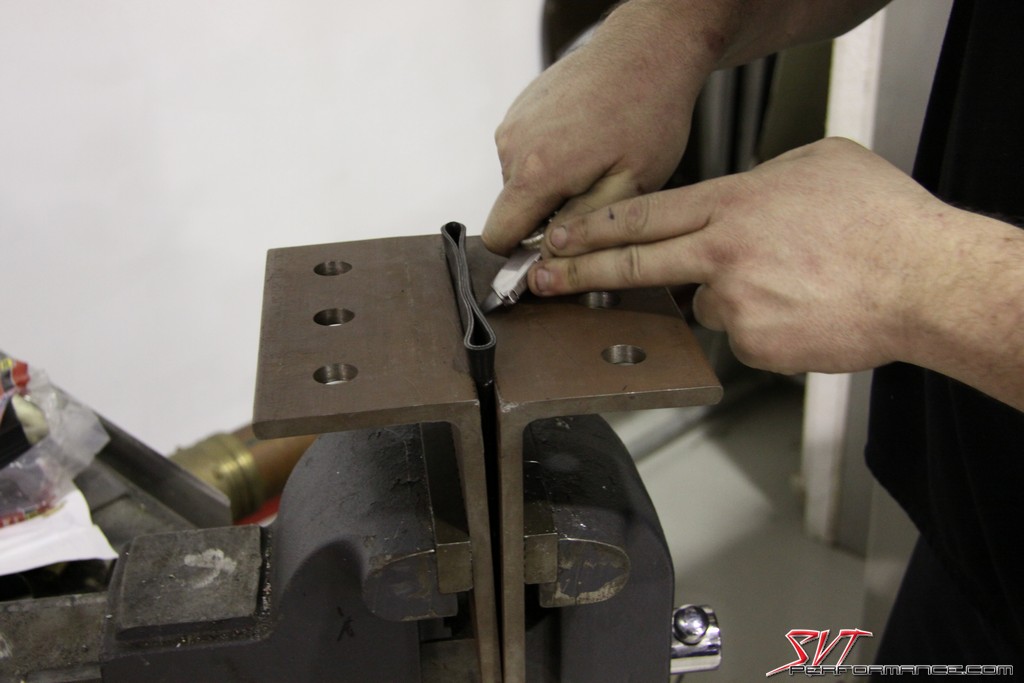
The just had to have a bit of material removed to fit a bit better.
Getting closer to a finished CAI.
It's even starting to look somewhat decent.
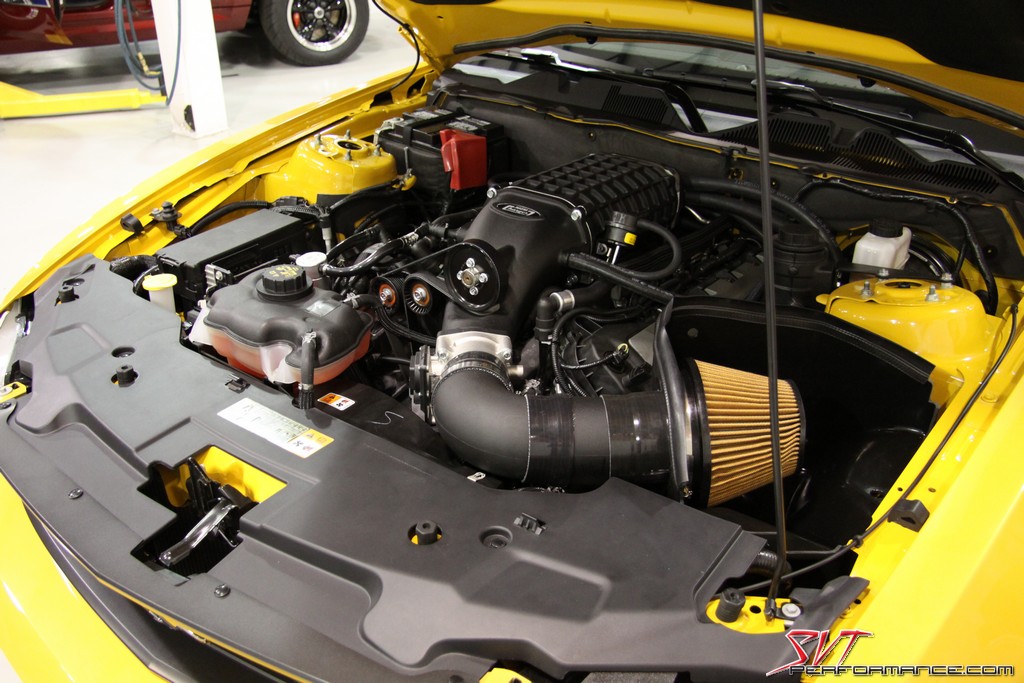
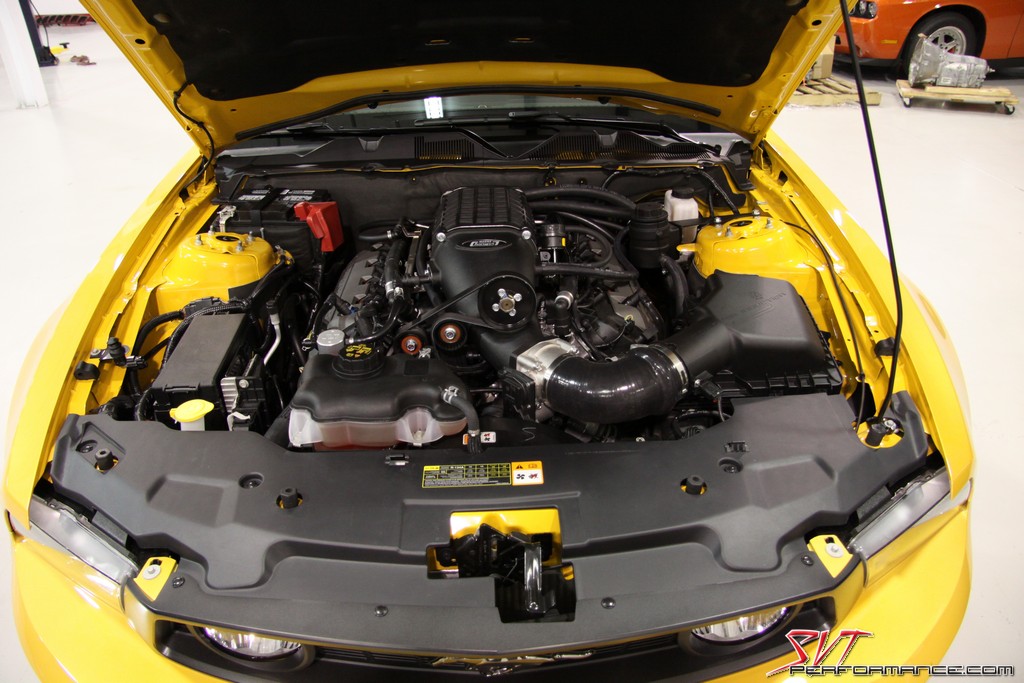
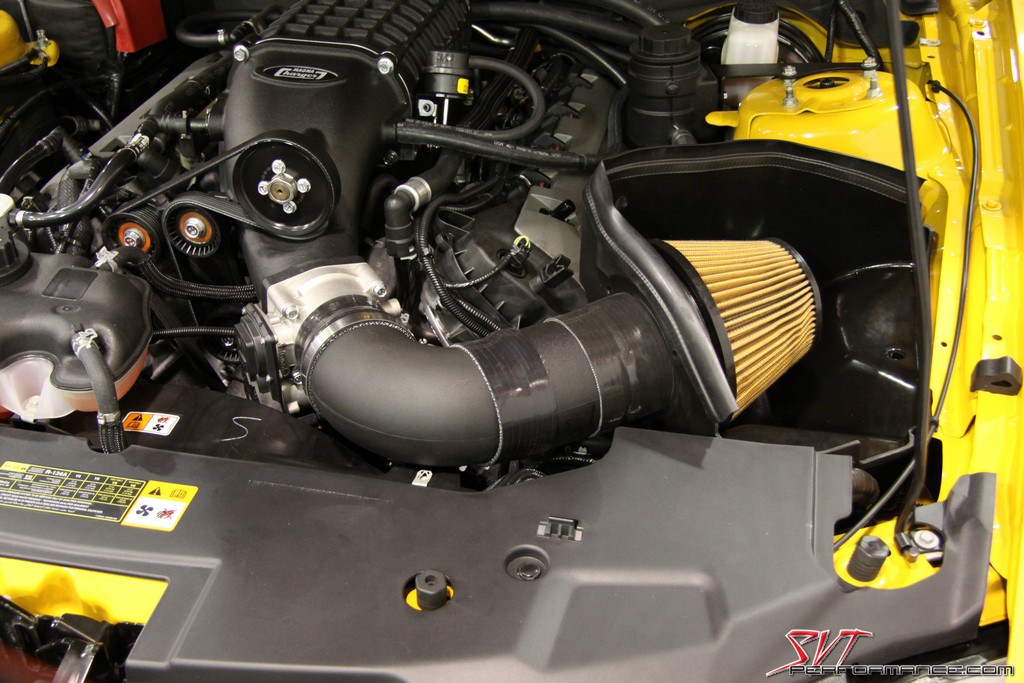
The final version of our intake actually looks pretty good.

It is also 100% streetable. I've put about 3000 miles on the car with this kit and there hasn't been a single hiccup.
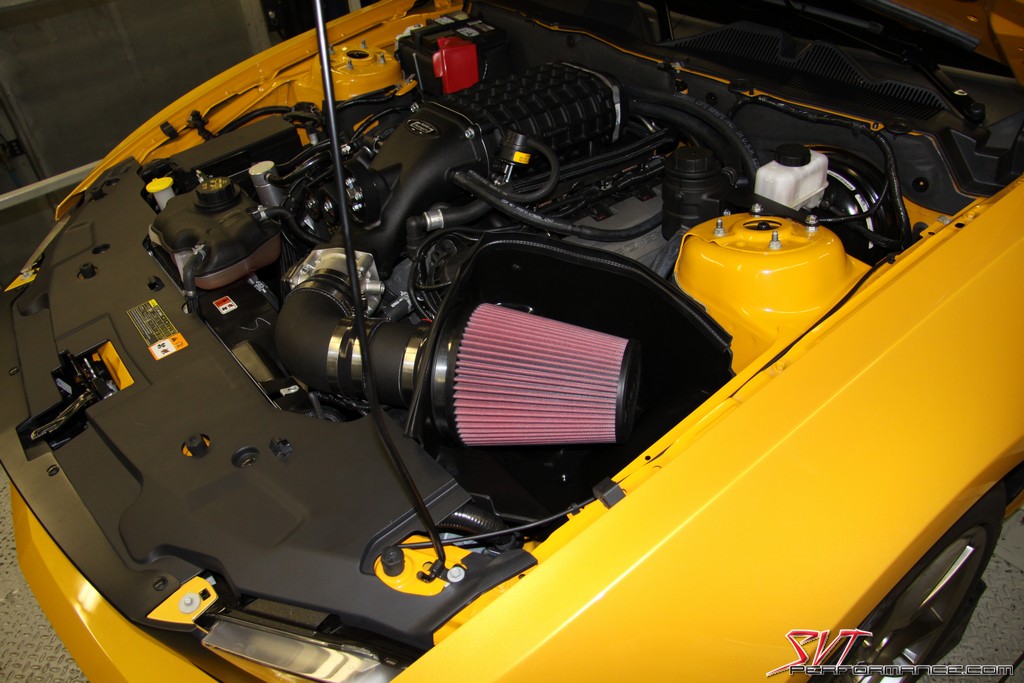
I like that the finish of the Airaid parts match all of the other black pieces under the hood.

From what I've been hearing from the Magnuson folks, their kit will look very much like this one. It will just be a more finished piece.
Now we just had to find a MAF housing to fit this setup.
Here was our solution, just crop the end off of the Airaid CAI we tested on the SVTP GT last year.
It took a little trimming and resizing to get everything to fit properly.
We had to modify a couple silicone couplers to work with our cropped off Airaid MAF housing.
The just had to have a bit of material removed to fit a bit better.
Getting closer to a finished CAI.
It's even starting to look somewhat decent.
The final version of our intake actually looks pretty good.
It is also 100% streetable. I've put about 3000 miles on the car with this kit and there hasn't been a single hiccup.
I like that the finish of the Airaid parts match all of the other black pieces under the hood.
From what I've been hearing from the Magnuson folks, their kit will look very much like this one. It will just be a more finished piece.
That brings us back to the dyno. There’s no easy way to say this, so I’m just going to come out with it. The final version of our homemade intakes gained us a mind blowing 63.1 RWHP and 46.5 RWTQ. An increase like that from an intake was hitherto unknown to science. It produced 576.0 RWHP and 474.9 RWTQ. That much power in a rear wheel drive car is more fun than a can of Aquanet and a cigarette lighter. It begs you to unleash your hell-raising inner-degenerate and just burn the tires off the wheels while terrifying small children and animals. In a word, it’s awesome. In fact, it’s so awesome Magnuson is working on making a production CAI for their supercharger kit that is largely based on our prototype. I’m told that it should be available in a few months. I’m hoping it’s emblazoned with numerous SVTP logos and that we get an early production version to test out and bring the results to you here.
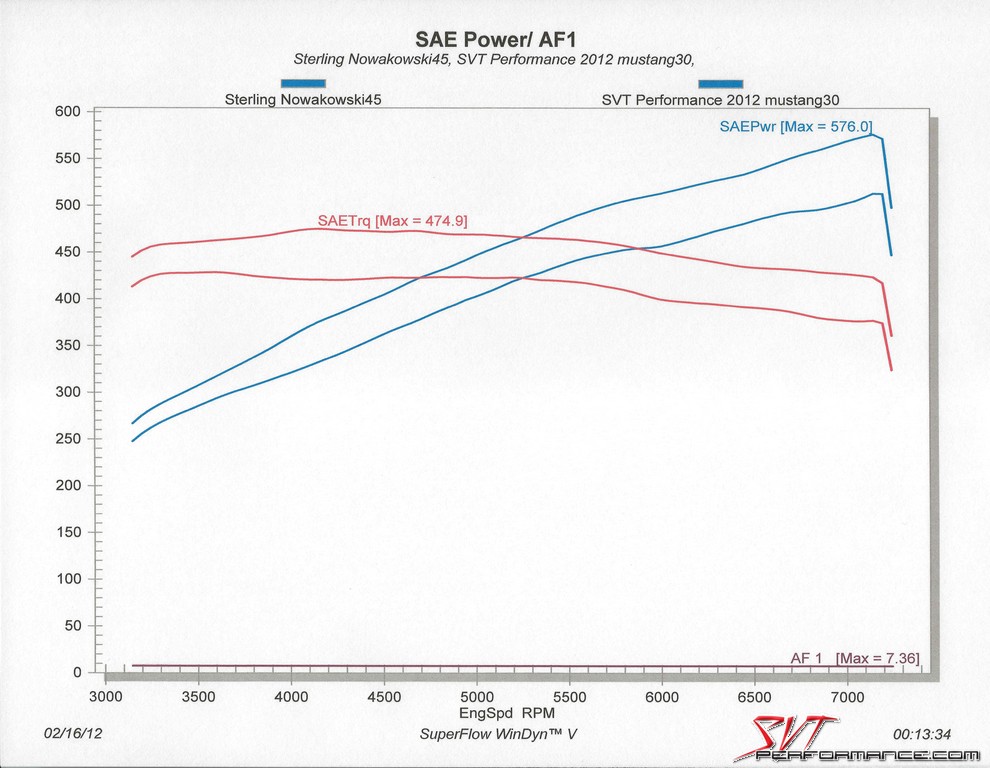
Intake V2.0 screamed its way to 576.0 RWHP and 474.9 RWTQ.
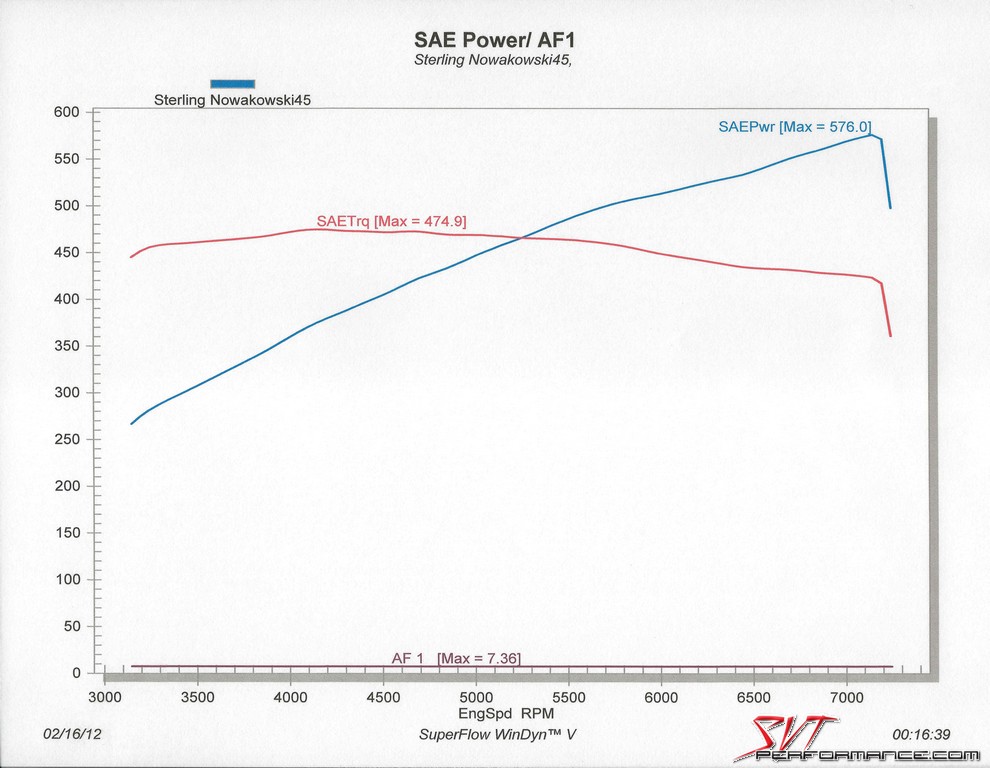
Intake V2.0 gave us an increase of 63.1 RWHP and 46.5 RWTQ over our best run with the Magnuson and the stock airbox.
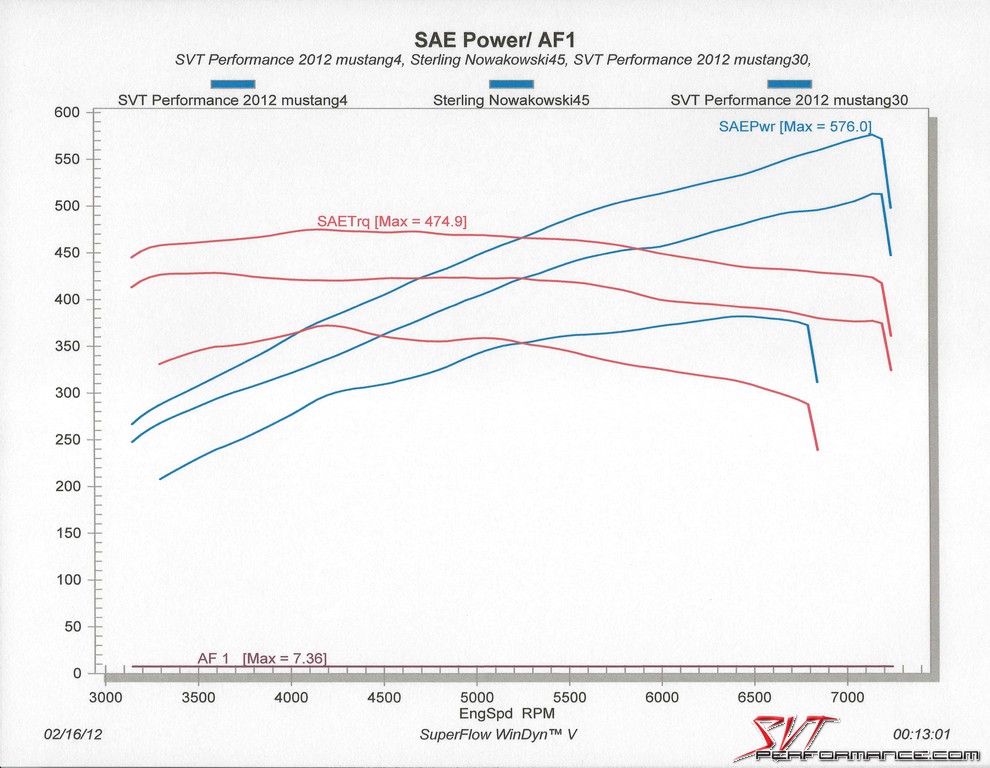
This shows you how much power you can gain (194.2 RWHP and 102.7 RWTQ) with a Magnuson blower, a little time, and a box of intake parts.
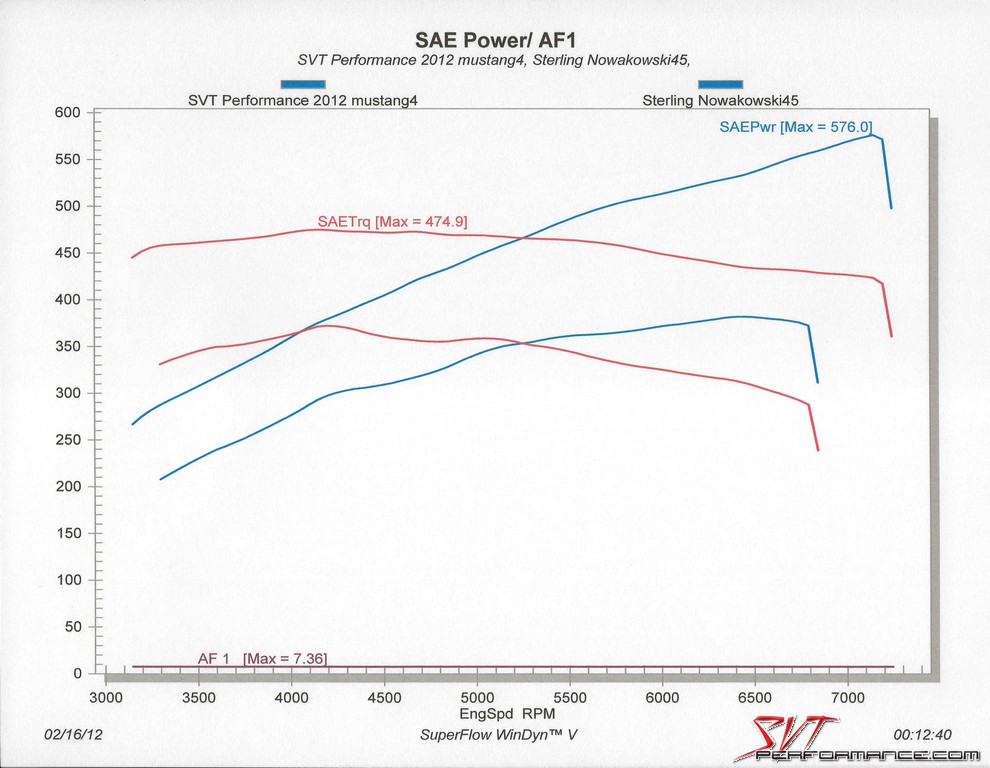
Here you can see how the HP curve of the Frankenberry intake started to nose over, whereas Intake V2.0 just kept pulling.
This graph represents the best stock run, the best Magnuson and stock airbox run, and the best Intake V2.0 run.
Intake V2.0 gave us an increase of 63.1 RWHP and 46.5 RWTQ over our best run with the Magnuson and the stock airbox.
This shows you how much power you can gain (194.2 RWHP and 102.7 RWTQ) with a Magnuson blower, a little time, and a box of intake parts.
Here you can see how the HP curve of the Frankenberry intake started to nose over, whereas Intake V2.0 just kept pulling.
This graph represents the best stock run, the best Magnuson and stock airbox run, and the best Intake V2.0 run.
More mods and articles will be coming in the next few months. You guys have an particular requests you'd like to see?
Special Thanks To:
Magnuson Superchargers
Arrington Performance
Blow-By Racing
JLT Performance
Airaid
-SID297:beer:
 op:
op: