You are using an out of date browser. It may not display this or other websites correctly.
You should upgrade or use an alternative browser.
You should upgrade or use an alternative browser.
Teksid block Vs Stock 03 Cobra block - pics iside
- Thread starter MalcolmV8
- Start date
- Status
- Not open for further replies.
Great thread! What year Teskid is this?
It came from a 93 - 98 Mark VIII.
It came from a 93 - 98 Mark VIII.
Cool. That's the block I'm going with. Excellent thread.
Cool. That's the block I'm going with. Excellent thread.
Very cool. Hopefully this will help out a lot of guys who work on their own stuff.
Will deff help me out! I'm going to do a similar build in a year or 2 for my 03. All your work and write ups will save me alot of time not to mention trial and error lol
Malcolm, have you deburred and radius the block? I ran around and smoothed all kinds of things


Your plugging this thing correct?

Your plugging this thing correct?
Malcolm, have you deburred and radius the block? I ran around and smoothed all kinds of things


That's wild. The aluminum block is already opened up there. I had to go and check my cast iron block to compare and sure enough it looked just like your pic.
I have not deburred as much as you. Much more minor clean up.
Your plugging this thing correct?

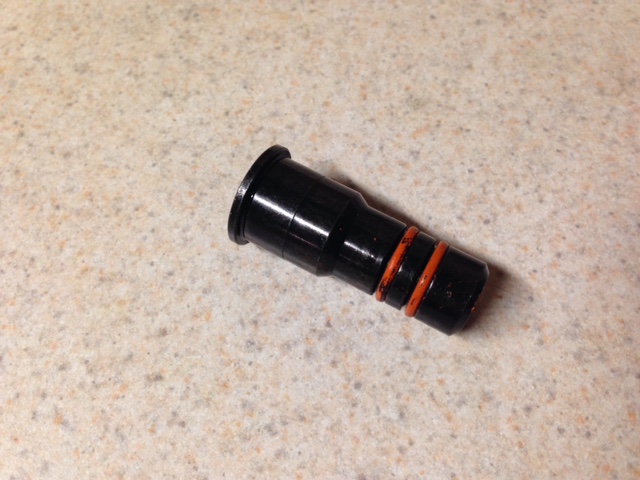
Negative. I like one less hose in the engine bay. I know you don't like it because of possible leaks but in 12 years I've never had a leak. If it ever does leak I'll pull the blower and swap o-rings.
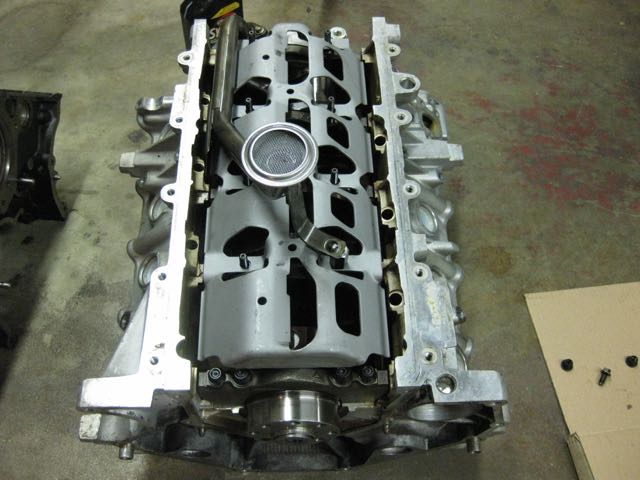
Instead I got this OEM piece to go in the teksid block.
That's wild. The aluminum block is already opened up there. I had to go and check my cast iron block to compare and sure enough it looked just like your pic.
I have not deburred as much as you. Much more minor clean up.
Negative. I like one less hose in the engine bay. I know you don't like it because of possible leaks but in 12 years I've never had a leak. If it ever does leak I'll pull the blower and swap o-rings.
Instead I got this OEM piece to go in the teksid block.
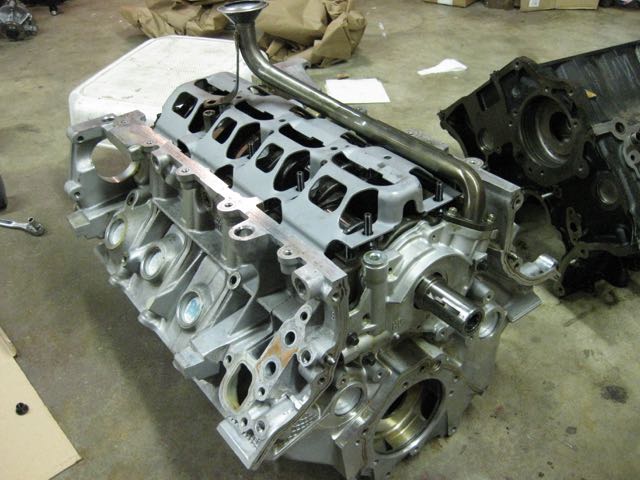
I put a 2" disc sander to get any loose material off the casting inside the block and just kept going
") Should speed oil drainback to the pan and prevent debris from sticking to the walls. There were a few deep crevices right out the base to the bores left over from the casting process which could result in stress cracks which were removed.
Should speed oil drainback to the pan and prevent debris from sticking to the walls. There were a few deep crevices right out the base to the bores left over from the casting process which could result in stress cracks which were removed.If you retain the coolant return line in the lifter valley without lifters that portion of the coolant doesn't get cooled and just re-circulates thru the block. It's on there to get heat to the passenger compartment faster and won't allow the engine to cool as effectively.
If you retain the coolant return line in the lifter valley without lifters that portion of the coolant doesn't get cooled and just re-circulates thru the block. It's on there to get heat to the passenger compartment faster and won't allow the engine to cool as effectively.
True it's a small amount of coolant recirculating around but does that really affect the cooling capacity/ability of the car? I wonder if anyone's done back to back comparisons. I can't imagine it's a measurable difference but I don't know.
True it's a small amount of coolant recirculating around but does that really affect the cooling capacity/ability of the car? I wonder if anyone's done back to back comparisons. I can't imagine it's a measurable difference but I don't know.
Nothing wrong with skipping rerouting the heater core output, it was just a suggestion. The way I look at it making small improvements everywhere you can it starts to add up. The coolant temperature difference before going into radiator and coming out of it won't be more than a few degrees so any improvement will be hard to measure. It's when your really pushing the envelope those mods may make the difference. It's a lot of fun engineering all this stuff I'm sure you and your son are having a blast with the rebuild.
Another difference to be aware here is the oil pickup tube won't line up anymore because of different mains.
In this pic I actually have the wrong nut on here and didn't realize till after this pic. The correct nut is the taller one.
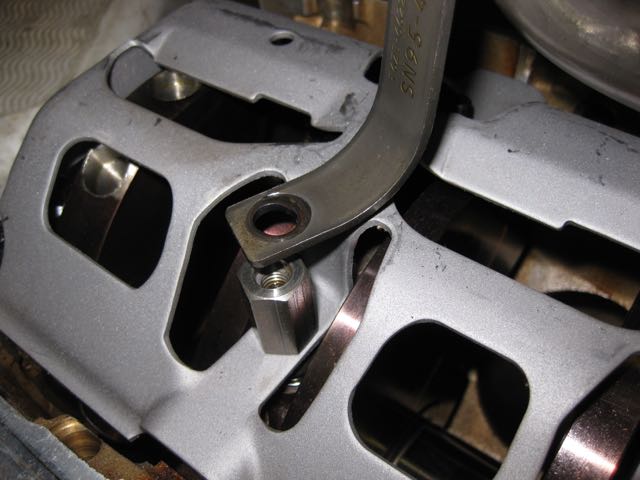
Luckily that metal piece is very pliable and a few twists and bends in the vice and I had it reshaped and fitting. I double checked oil pan to pickup clearance just to be sure nothing had been tweaked and it was just fine.
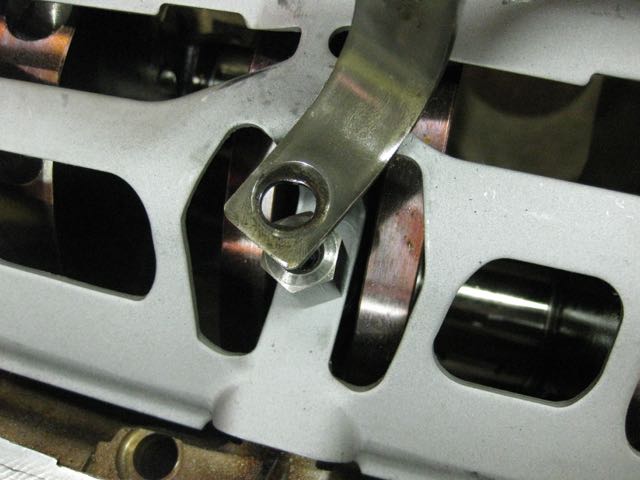
As I recall specs call for 3/8" to 1/2" as been acceptable. I was at .435" or so.
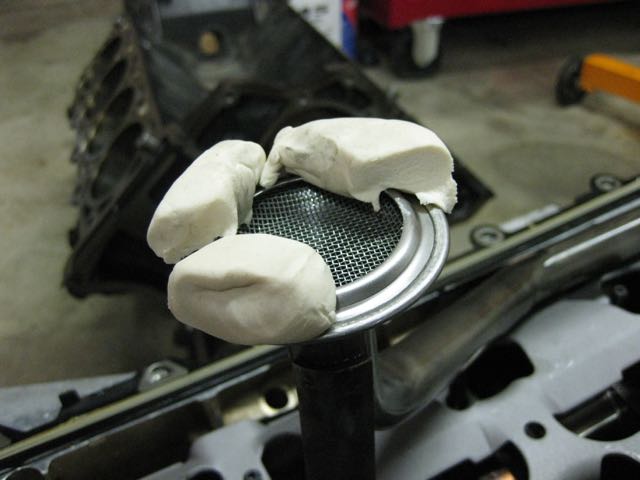
The factory half length windage tray of course no longer works due to the different mains. That was actually a good thing as I got this 05+ GT full length windage tray. Fits wonderfully.
Of course these windage "wings" in the oil pan now have to go. They hit the full length windage tray.
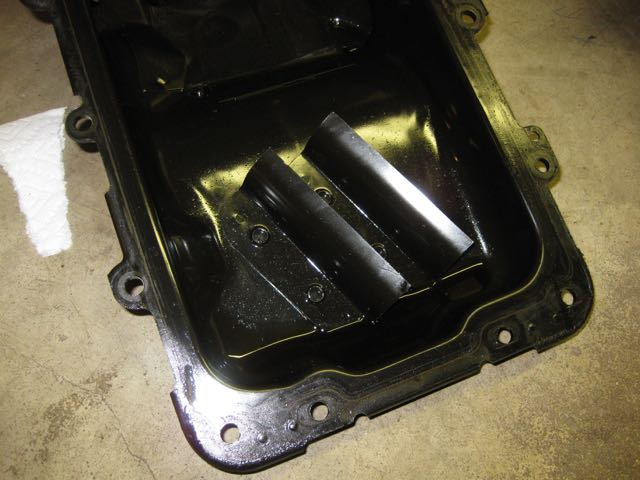
The spot welds are so thin I'm pretty sure I was going to end up with holes in the pan if I tried to grind them out so I just cut the wings off.
The odd color is water vapor drying off, I had just washed it out.
In this pic I actually have the wrong nut on here and didn't realize till after this pic. The correct nut is the taller one.
Luckily that metal piece is very pliable and a few twists and bends in the vice and I had it reshaped and fitting. I double checked oil pan to pickup clearance just to be sure nothing had been tweaked and it was just fine.
As I recall specs call for 3/8" to 1/2" as been acceptable. I was at .435" or so.
The factory half length windage tray of course no longer works due to the different mains. That was actually a good thing as I got this 05+ GT full length windage tray. Fits wonderfully.
Of course these windage "wings" in the oil pan now have to go. They hit the full length windage tray.
The spot welds are so thin I'm pretty sure I was going to end up with holes in the pan if I tried to grind them out so I just cut the wings off.
The odd color is water vapor drying off, I had just washed it out.
Another difference to be aware here is the oil pickup tube won't line up anymore because of different mains.
In this pic I actually have the wrong nut on here and didn't realize till after this pic. The correct nut is the taller one.
Luckily that metal piece is very pliable and a few twists and bends in the vice and I had it reshaped and fitting. I double checked oil pan to pickup clearance just to be sure nothing had been tweaked and it was just fine.
As I recall specs call for 3/8" to 1/2" as been acceptable. I was at .435" or so.
The factory half length windage tray of course no longer works due to the different mains. That was actually a good thing as I got this 05+ GT full length windage tray. Fits wonderfully.
Of course these windage "wings" in the oil pan now have to go. They hit the full length windage tray.
The spot welds are so thin I'm pretty sure I was going to end up with holes in the pan if I tried to grind them out so I just cut the wings off.
The odd color is water vapor drying off, I had just washed it out.
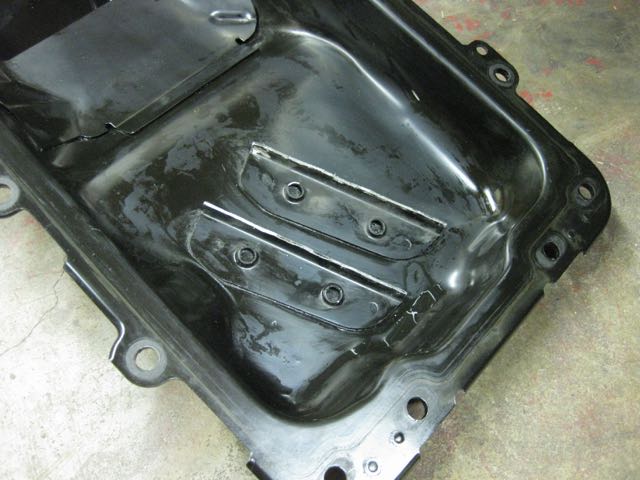
Nice! This is one thing with your build that I've been waiting to see. The only issue I had about using the 3V windage tray was having to cut these scrapers down to the spot welds, while possibly cutting through, then having to weld the holes closed.
Is the windage tray at all close to the scrapers after you cut them? I presume no as you wouldn't leave it that way if there were possible clearance issues, but I figured I'd ask anyway. This wasn't clear in looking at Mofasta's build thread on modular fords since he cut them off entirely and welded over the holes where the spot-welds were.
Last edited:
Nice! This is one thing with your build that I've been waiting to see. The only issue I had about using the 3V windage tray was having to cut these scrapers down to the spot welds, while possibly cutting through, then having to weld the holes closed.
Is the windage tray at all close to the scrapers after you cut them? I presume no as you wouldn't leave it that way if there were possible clearance issues, but I figured I'd ask anyway. This wasn't clear in looking at Mofasta's build thread on modular fords since he cut them off entirely and welded over the holes where the spot-welds were.
The way I cut in the pic had plenty of clearance. I measured about a good 1/4". There's no reason to go down to the spot welds and try and scrape every last piece of it out of the pan.
Maybe i missed it. But did you weight the two blocks to see the difference?
Maybe i missed it. But did you weight the two blocks to see the difference?
I did not. It's documented all over the net. Stock Romeo cast iron is 155 lbs and the Teksid is 85 lbs. So you shave 70 lbs swapping blocks.
Malcolm your progress is looking good so far. Alittle advice.... stay away from Russ aka "SlowSVT!" He'll either make you spend a ton of money or crush your dreams as he improves your ideas!
But as you already know, take your time and do all of these small mods like removing block flashing now while you can. I somewhat skimped out and bought an aluminator short block but I plan on buying another aluminator block and slowly building that up with all the bells and whistles.
I really look forward to seeing your progress
Troy
The way I cut in the pic had plenty of clearance. I measured about a good 1/4". There's no reason to go down to the spot welds and try and scrape every last piece of it out of the pan.
Great, thanks for the info!
Malcolm your progress is looking good so far. Alittle advice.... stay away from Russ aka "SlowSVT!" He'll either make you spend a ton of money or crush your dreams as he improves your ideas!
But as you already know, take your time and do all of these small mods like removing block flashing now while you can. I somewhat skimped out and bought an aluminator short block but I plan on buying another aluminator block and slowly building that up with all the bells and whistles.
I really look forward to seeing your progress
Troy
Sadly I don't need Russ to blow all my money on a car lol. He does come up with a lot of good ideas though. Was supposed to meet up with machine shop yesterday and then today but snow killed it today. Maybe tomorrow otherwise next week.
Malcolm your progress is looking good so far. Alittle advice.... stay away from Russ aka "SlowSVT!" He'll either make you spend a ton of money or crush your dreams as he improves your ideas!
Troy
:nono:
UNTRUE!
I'm only trying to enhance Malcolm's overall engine building experience while providing him "free" advice on mods which is in no way intended to delay, require additional effort and assembly steps, fabrication of parts or cost overruns ............... that would fall on his shoulders should he take my advice so I can hardly be held accountable.
Last edited:
- Status
- Not open for further replies.
Users who are viewing this thread
Total: 2 (members: 0, guests: 2)

