The 69 Mustang - 2018 Edition

Ackbar00

The Peoples Choice
Established Member
Joined
Oct 28, 2004
Messages
425
Location
Dayton, OH
Well, I still have not made up my mind fully on what I am going to do with the car, but in the mean time, I got some more parts for the car while they were on sale this winter. So onward, until, whatever! Lol


So in this first edition of "What the **** did they do this time..." we are doing bumper brackets. So while bumper brackets? Well, If peeps remember from my stuff in the past, the car had zero parking lights, and John Deer tractor lights in place of the High beams

LE4dRxa.jpg

Mega sweet. So I bought a set of parking lights. Low and behold, one side would not fit. And why is that? The Bumper brackets were bent. So rather than replace.... they bent them back into sort of a usable shape and then when they found the nut inserts were stripped, WELDED them to the damn car! Lucky for me, it was just a few areas of Spot weld.

O7S5tcT.jpg


So out came the die grinder. Got them off and gesh….
lMONvro.jpg


Got the weld blasted off and put a little bit of paint in there

Y6YGrpo.jpg


New bumper brackets show up and what do you know, there is an entire bracket that was just missing. I thought the bumper seemed flimsy. Gesh. So I grinded out the threads and ran the bolts from the inside out. Not the best looking, but hey, it works.

WxV5Kj4.jpg

So I get the bumper on and replace the hardware they had in it with Stainless Bolts. Get it all done and step back and look at it. Those bolts dont look right. Go look at my rear bumper, yep they are flush. Damnit, their is a specific Bumper bolt. So those were ordered

Qv5WEYQ.jpg


Last year, since I could get the parking lights in, I go these simple LED lights. Here is what it looked like before:

PUxr6Im.jpg


So I drilled a small hole in the lower valance and moved them there. Got the parking light out and what do you know, bolted right in. Fought with some jank wiring and now.....
I1lEsC8.jpg

AkRgmAq.jpg

Pgax0ia.jpg

l3cvvEU.jpg

lMQxZbl.jpg

er395Mh.jpg

HyQjSi0.jpg


Functional Parking Lights and side markers.
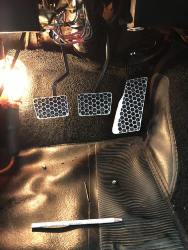
 

Ackbar00

The Peoples Choice
Established Member
Joined
Oct 28, 2004
Messages
425
Location
Dayton, OH
So actually before the headlights, I had done these two things.

One day backing out of the driveway last year, I hear this clunk of something breaking and lost power steering. Pulled it back in the garage and saw this:

H3k4DA3.jpg


The Slave Cylinder bracket broke. Hard to really fault anyone on this. I had noticed that the headers practically just sat on it, but I don’t think that had anything to do, just fatigue. Technaly it just bolted in with one bolt and the bolts that go up into the rail and just nut inserts. Well, those were rusted out, so I bought a long ass drill bit and some threaded rod. That bitch is going Noooooo where ever again. Plus, I bought the one you are supposed to get for Long tubes to provide some clearance. Much better.

TKaPo0f.jpg


A keen eye in the first pics, may have noticed the mirrors. They don’t suck anymore! The mirrors that were on the car, I spent way to much time trying to make them work. They were broke and held in with wood screws. Yeah, rusty wood screws…… I ended up finding them on Ebay as a China $50 set. I couldn’t bring myself to buy them and looked at a lot of other cool options. However, once I removed the mirrors, I noticed how bad it was:

Old Mirrors

LFUwcfL.jpg


Holes….

lVOegJH.jpg


CY4A8Hm.jpg


The problem was, finding a set of mirrors that would cover up all them damn holes. Well, only one set would. I ended up buying the nice racing style mirrors like the Mach 1. Now, I DIDN’T want to buy them, as they are not cheap, but given the holes, I just really didn’t have a choice. I just put a quick black spray paint job on them If I ever get the car painted, Ill color match them. Still, turned out nice (Better, for $300…..).

vYMmNLa.jpg


5MEh4p9.jpg


SAtWybJ.jpg
 

Ackbar00

The Peoples Choice
Established Member
Joined
Oct 28, 2004
Messages
425
Location
Dayton, OH
So, I am becoming the UPS drivers best friend. I have went a bit far, but figured, **** it.

So the new setup is going to be:

Stock 90 302
Edelbrock Heads and intake
FMS B Cam
MSD Dizzy and 6AL Ignition
Holley 650
Carter M60454 Mechanical Fuel Pump
ARP everything
New gasket everything
Current Long Tubes
T5 setup
Hydraulic Clutch activation / 1969-70 Mustang/Cougar, Hydraulic Clutch Master Kit, LF Series Type 3 (More than likly, they say their cable kit wont work with longtubes)

Also got tons of new things. Like an Oil pan and pickup, Fancy motor mounts. etc.

So, yeah. Still have to order some of that, but alot of it is already here. Got the 90 motor tore most of the way down, so going to start on it here in a few weeks.

CXrNoYC.jpg


Was buying a few things I wanted, but didnt really "need". After a bit, I was like, damn, I still got a chunk of money to spend JUST to get the car converted, so I stopped all that. But here is one of the things I did get.

69 Tail Lights

I got their tailights and Front parking lights. They look awesome. I took a short vid of the tails in action, but Imgur is not uploading it, so here is a pic of the fronts.
6SNwgEn.jpg


Things I will "Probably" get, just not until I have it swapped:

New aftermarket gauge cluster
Exhaust
Rear Rebuild kit with Traction lock and 3.90 gear.
 

aoc racer

Ford is hella cool
Established Member
Joined
Dec 14, 2003
Messages
5,552
Location
Tustin, CA
Excellent progress. I love builds and restoration projects so please keep us in the loop of it all.
 

PaxtonShelby

iamdrab
Established Member
Joined
Nov 16, 2010
Messages
5,434
Location
Pittsburgh, PA
Looking good! I understand all about these old girls fighting us every step of the way. You’ll love the T-5 behind a 5.0. That was my setup for 15+ years. I have headers and my clutch cable setup works...you just have to get a little creative with where you route it and consider using heat shield sleeves in tight spots. Keep up the good work!
 

Ackbar00

The Peoples Choice
Established Member
Joined
Oct 28, 2004
Messages
425
Location
Dayton, OH
Well, making some progress. As I started to reassemble things, I found out that the Timing Chain cover that came on the 90 motor did not have a provision for a Fuel Pump. I ended up finding two of them in my moms barn. One need some holes enlarged and a different balancer seal. The other leaked into the water pump area. Since that one fit better, I decided to just JB weld to stop the leak. So far, so good on that.

7Ya2Tkl.jpg


Since I decided to use a mechanical fuel pump, i needed to add a cam eccentric to the roller motor. Comp Cams 235 kit. What a cool little kit. Came with a two piece eccentric, the TC dowels, head dowels and some bolts. Really made figuring out that process pretty easy. With my new timing chain and cam installed.

5GxKgT0.jpg


And here we are. Got a lot of things painted. I ordered an ARP oil pump shaft, so when it gets here I can get the oil pan on. Buddy of mine is coming over are we are going to get the pushrod length figured out so i can order those. Then I can pull it off the stand and replace the rear main seal, get the pilot bearing and trans stuff on. Once at that point, I think Ill be ready to start taking the car apart.

Bh8TFzU.jpg
 

Ackbar00

The Peoples Choice
Established Member
Joined
Oct 28, 2004
Messages
425
Location
Dayton, OH
Got the 302 and T5 ready to go

87WIDOt.jpg


So, finally got some time and decided to get this motor pulled. Got my buddy Chad to help me and for the most part, everything went smooth.

Here it is. Last time you see this combo:
cbnNmMt.jpg


SW767n8.jpg


Carb Plate on, ready to be pulled:
tG6BoCW.jpg


Out of here!
EGFsl5r.jpg


AdMQktR.jpg


So one fun note, found something else that previous owners thought was a good idea.....
ernONhH.jpg


Can anyone guess what that is?


If you answered a cut up floor matt for the lower radiator insulator, then you win!
Os7XCdh.jpg


Lol. Something else to address.

So now that I have access to the headers, I am thinking I am going to replace them. I used to have access to a sandblaster, and now I dont. I figure for what its going to cost to have done and painted, I could get these:

FOR 64-70 MUSTANG 260/289/302 TRI-Y STAINLESS RACING MANIFOLD HEADER/EXHAUST | eBay

I mean, for $77..... they actually have a pretty good reviews on the vintage boards. Most of the interference issues are around the clutch Z bar. I wont have that so bonus. Plus for 300-350 HP, I think it should be plenty of header. Will also replace the radiator. they are $125 new on Ebay.

I power washed the engine bay and pulled the front seat. Next up, look into the clutch pedal stuff.
 

72MachOne99GT

Well-Known Member
Established Member
Premium Member
Joined
Jul 15, 2011
Messages
6,105
Location
Indiana
Someone needs to find the previous owner/mechanic and put him on some kind of survival wilderness show.
 

Ackbar00

The Peoples Choice
Established Member
Joined
Oct 28, 2004
Messages
425
Location
Dayton, OH
Well, I have not been idle, just feels like I don’t have anything done and I keep ordering parts. Sometimes I wish I could do things more half ass like others, it’s not like the car is pristine. Keep finding myself buying more things. A battery relocation to the trunk. A new Overflow. Paint for the engine bay. A 3G Alternator conversion. Sigh…..


So to start, I was able to pull the brake pedal without pulling the entire assembly. I am honestly not sure if I will be able to get it and the brake pedal installed that way, but we going to give it a try ;) So here are the pedals side by side.

zXe0yQR.jpg


Next I cut the stock pedal

6w2FNRo.jpg


And awhile ago, I decided to splurge and get some fancy pedals. I got these from SRP Racing - Custom Aluminum Racing Pedals. Oh my they look cool

gFmjAT2.jpg


Moving on, I had bought the Hydraulic setup for the clutch activation. Rest assured, after a few hours of trying to find a way to make this fit, it just won’t. In short, it looks like a previous owner (Here we go again….) decided to cut their own hole in the firewall and ran the speedo cable through there. Well, they didn’t cut it where I needed it. That aside, there is just no room. Assuming I could slot it to work, Id have to run new lines for the master cylinder and maybe move the brake tree. And even then, I was going to have to “squish” the spacer down and I was afraid it would strip the threads. I called MDL’s tech line and they were helpful. Even said they are developing a new system for 69 and 70 cars, but this does not help me right now.

NOT a factory cut hole. Plus a very small amount of flat area that I need for the hydros

VHMY4U0.jpg


soBcncP.jpg


And here you see the mismatch

eZ5tes9.jpg


SO…. I decided to order MDL’s cable setup. Now they were very clear that it would not work with long tubes. But given what I am dealing with here, I decided to order it anyway and work around it. More on that when it shows up.


China 77$ headers!

7t2vCZr.jpg


vqNkZ20.jpg


Actually seem to fit really well. Plenty of starter clearance. The #5 tube I can get my bolt in. Don’t have to worry about Z Bar clutch linkage. Welds seem pretty good. Guess time will tell.


One of the headers looks like it could interfere with the trans, but I think an exhaust shop can build something to clear.

Kec0XdV.jpg


2tjrb7e.jpg


So I had a stock fox cable from when I got my trans stuff. Put it in and I see now why they said it would not work with long tube headers. I have about 2 inches of clearance.

Ep9OmjQ.jpg


Even then, this is the only issue compared to the multiple issues with the hydro setup. So I have ordered a heat blanket. Going to wrap the header
 

Ackbar00

The Peoples Choice
Established Member
Joined
Oct 28, 2004
Messages
425
Location
Dayton, OH
Got my new radiator. Got it on a scratch and dent sale for 89$ shipped. Cant beat that. Had to trim up the core support to fit and it turned out pretty good.

Northern 209671 Ford Mopar Style Welded Aluminum 2-Row Radiator 26 x 19 Race Pro


kn174sT.jpg


Also built a new Low insulator. A lot nicer than a cutup floor mat.

K9Zip9K.jpg


Built my trans plug for the reverse lights and neutral safety switch.

GpZXyuX.jpg


Working on figuring out my old alternator wiring. With the 3G conversion, I can remove a lot, not totally sure what can go. So I have a thread on vintage forums figuring that out.

zoQlzMn.jpg


And finally, every new thing I have been doing electrical, I have not been using the factory fuse system. I had some really cheap fuse panels shoved behind the dash that I didn’t like. So I got this 7 circuit system from Jegs and started to replace the other stuff. Mounted it on the right of the dash upside down, so that I could have easier access to the fuses. Looks like it should work out well.

4rCfLSM.jpg


L8Sue7Q.jpg


Looking up from the floor:

U4pkPG2.jpg


Well, that’s it for now. Waiting on parts to show up.
 
Last edited:

Ackbar00

The Peoples Choice
Established Member
Joined
Oct 28, 2004
Messages
425
Location
Dayton, OH
Been a few months, but made some good progress.


Wiring, wiring, wiring…..

So in addition to the previously mentioned fuse panel, I also had to deal with the battery relocation and the MSD 6AL install. Trying to run these things in a way I liked and functionally worked was a challenge for myself. Overall, I think it works.

xgvf6kX.jpg


Getting started.

QvjALt2.jpg


So I mounted the 6AL where the battery was. I ran its harness back forward to route down to where the factory harness was. I also decided to mount my coil on this side of the engine. Made for a lot shorter routes to the 6AL

kwh99tQ.jpg


Finished up at the firewall. The positive and negative battery cables came through here as well. I grounded the battery at the factory post for the engine ground.


P6LAy5Q.jpg


And done. So now only connections that have to route over to the motor are the alternator and the connection for the distributor.


fbEKUZa.jpg


Header “wrap”


So I went overkill on protecting the clutch cable. I found the blanket on EBay, I think it was for a generator. It is basically a large turbo blanket. I removed it ends so that it would lay flat.


XedgC6Q.jpg


Fitting on the header

wQNAJ9g.jpg


And using a stock fox cable as a guide, this should prevent the cable from getting damaged since it has to sit on the header. I also have some heat sleaving I am going to put on the cable. Looks a little ugly, but it will be down and should not be that visible.


qKcxwyc.jpg
 
Last edited:

Ackbar00

The Peoples Choice
Established Member
Joined
Oct 28, 2004
Messages
425
Location
Dayton, OH
Battery Relocation


Decided to build my own, EBay is a wonderful place BTW. Cost me about $100 for all of it.

sDDD53a.jpg


Tq8Mchf.jpg


PRFDH1f.jpg


My new coolant overflow.


idgFidQ.jpg


Installed. Cleaned up the wiring, added split loom. Can also see part of the new motor mounts

2x1PWOk.jpg


Clutch cable and pedal install.


Since I couldn’t get the clutch hydraulics installed, I went with their cable setup. Install went about as expected. Probably should have replaced the master cylinder since I had it off, but I didn’t.


Pedals installed with the new covers.


8Z7pGxe.jpg


Cable Bracket

x9xOHES.jpg


Done deal!


SWiByM1.jpg


And finally, the new motor and transmission is in place!! So now I can start the fun stuff. Install the intake, headers, Power steering, etc.


Q4QQTrP.jpg


Shot of the motor mounts

Bngntqz.jpg


Started test fitting the PS pump and my new hydro line.


l4LPmeO.jpg


And we all caught up now. Had to order a new trans mount, once that is in, I can lock down the motor mounts and start to look at the driveshaft length.
 

Attachments

  • 8Z7pGxe.jpg
    8Z7pGxe.jpg
    55.5 KB · Views: 282

Ackbar00

The Peoples Choice
Established Member
Joined
Oct 28, 2004
Messages
425
Location
Dayton, OH
Got a few things done.

Trans mount and new crossmember is in.
mKUoy4w.jpg


Got the carb intake on with the ARP hardware. Test fit the Alternator and got all that wiring sorted out.

CIMwaoq.jpg


Got the carb out, test fitted that and got the fuel lines all sorted out.

EH9K9ON.jpg


So my big issue is still this damn PS line. I am now back to trying to get the Powerflex hose to working. My Hydro line might have worked..... if it wasn't short. Like **** my life.... i didn't take into account that the PS pump sits higher with the fox body AC delete bracket than where the 69 pump sits. I had the line modified with a different fitting to see if that would help and no dice. Have close to $100 in that line and I was at a point of having to get a new one made at $65. I "think" I found a way to make the Powerflex hose work (Which is what I wanted to do in the first place.....), just see when the other fitting arrives.
 

Users who are viewing this thread


Top